Chastity, thy name is Spider plant

I love my plants like my own children, well, if I had any. My houseplants and my outdoor garden, all my plantlings are precious to me. But it's extra special when my baby plants have babies of their own. My tomatoes are blooming and fruiting outside and, inside, my spider plant has been working on some new additions as well. 

Spider plants are strange in the way they propagate. They have two very different ways of doing it. The first way is standard plant procedure: make flowers, plant sex, make seeds and hope for the best (statistically favourable hope, of course). The second way they do it is quite a bit more interesting.

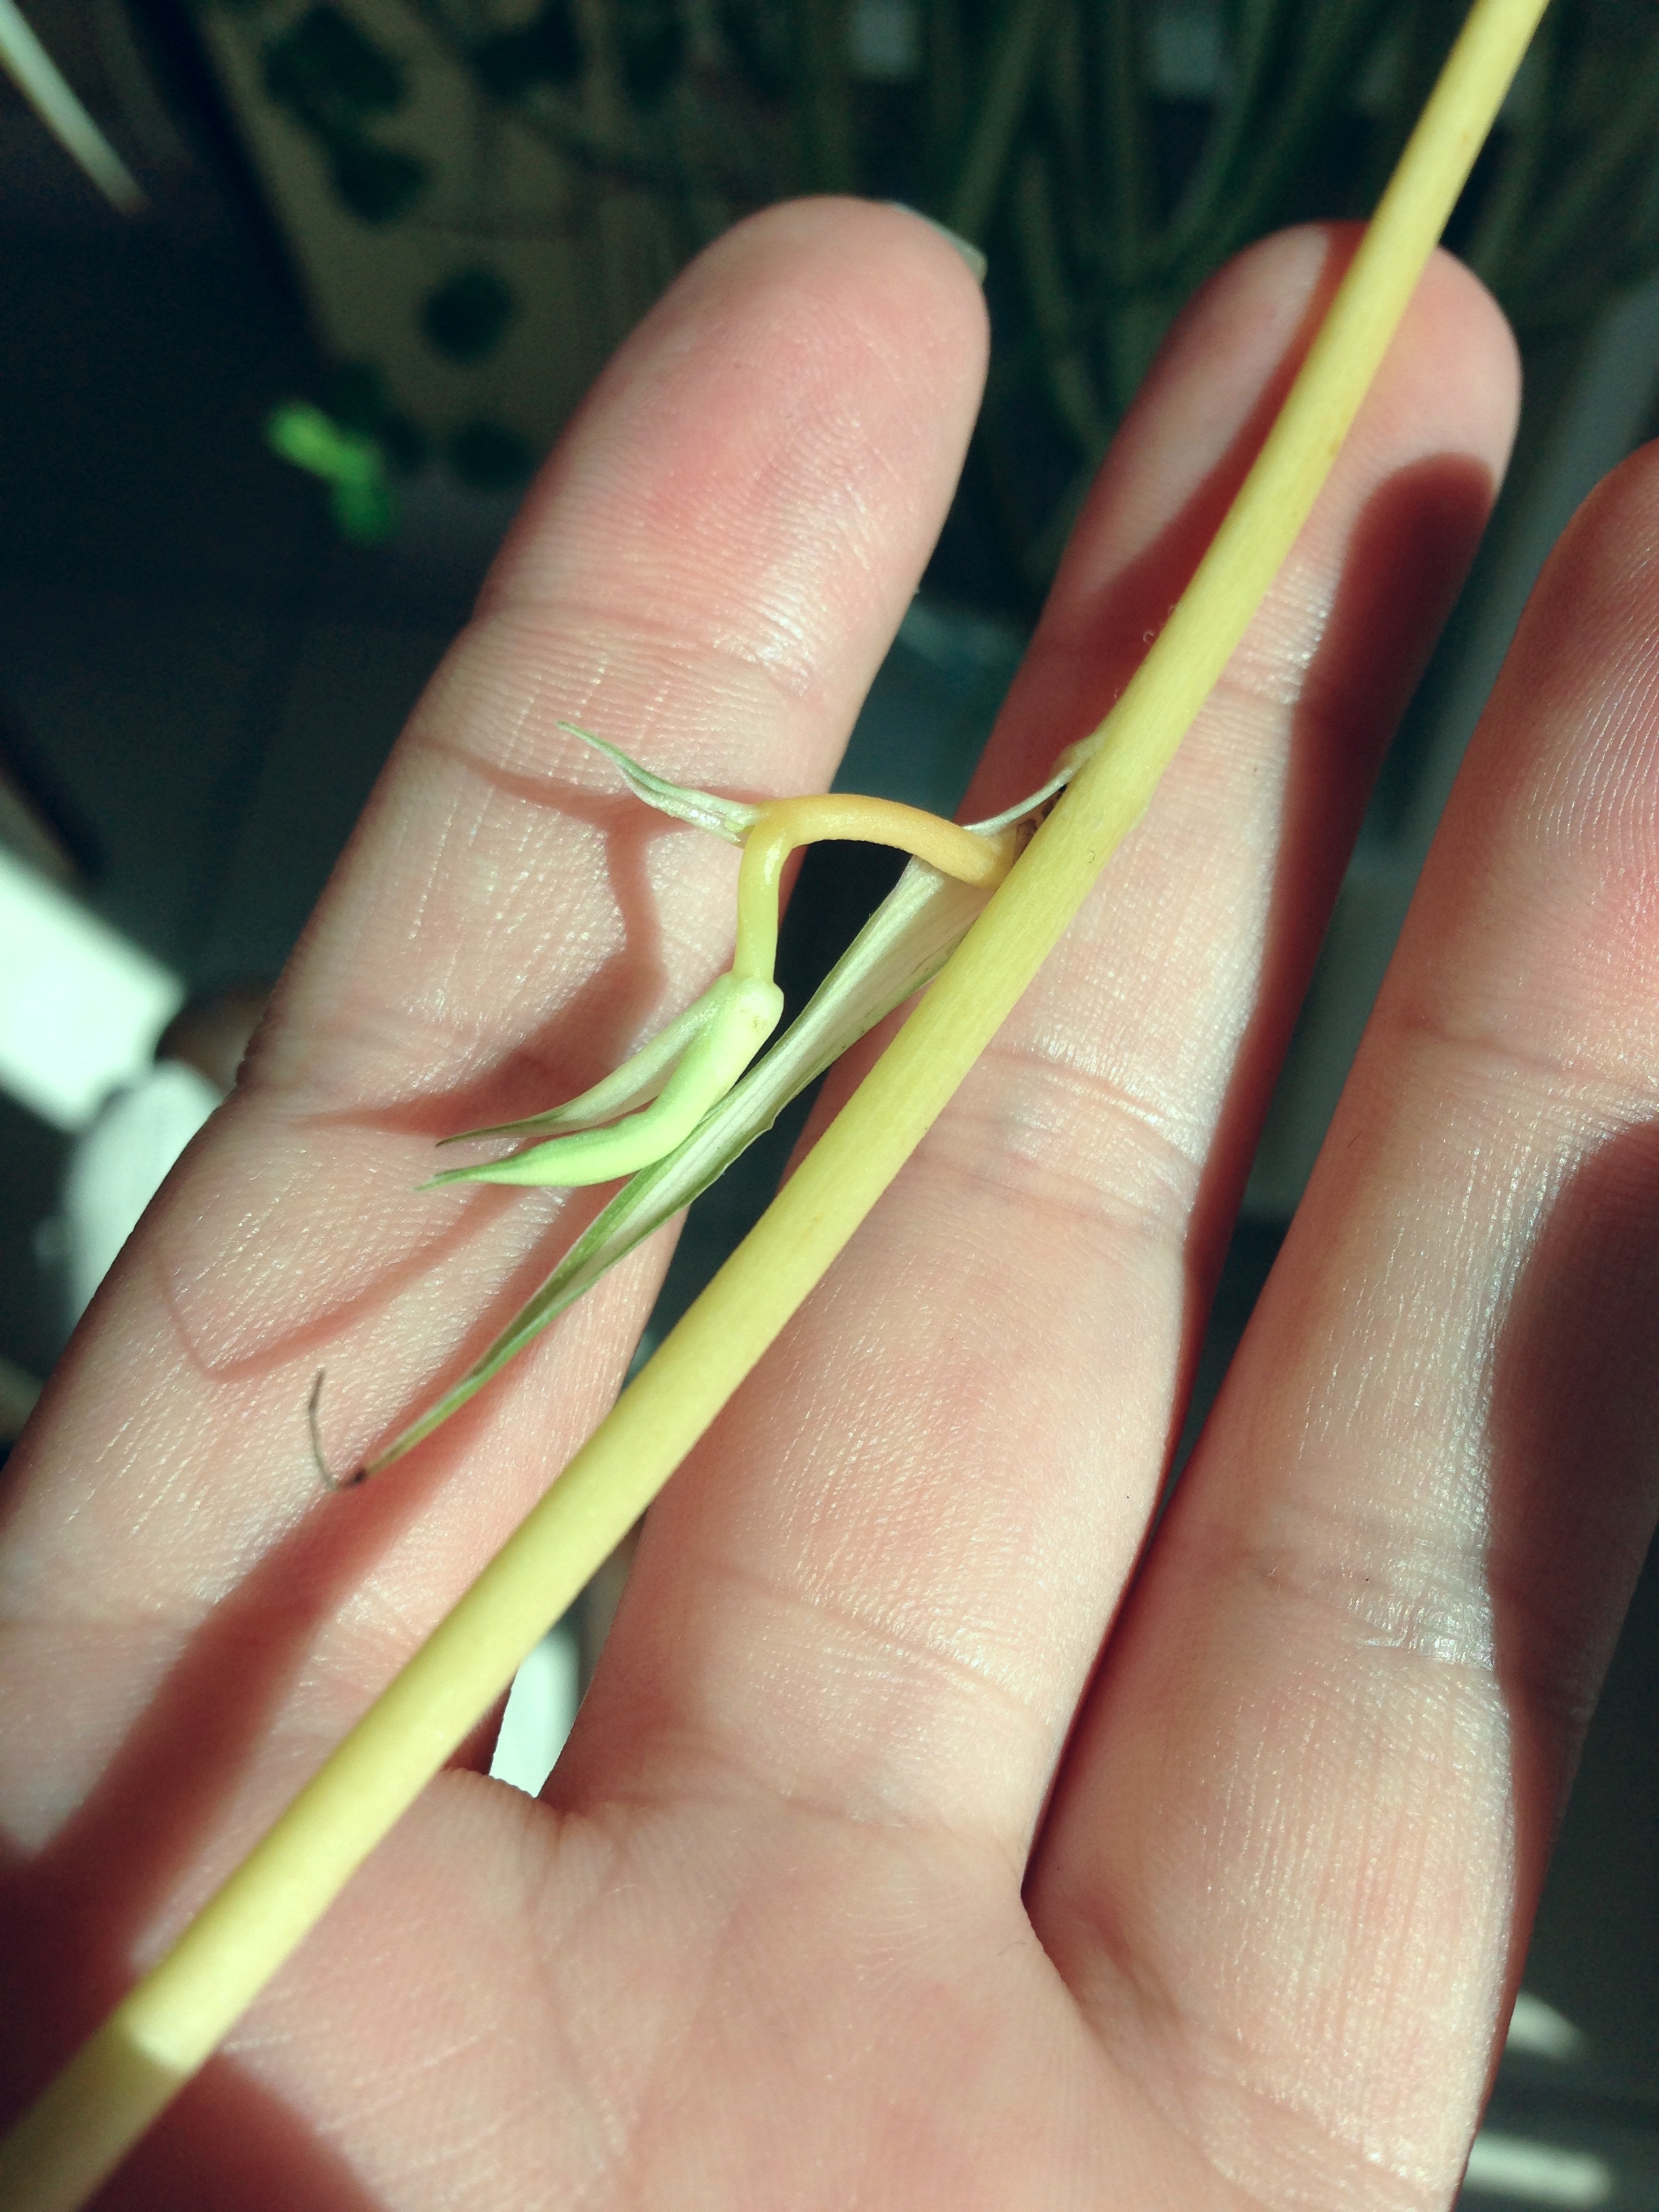
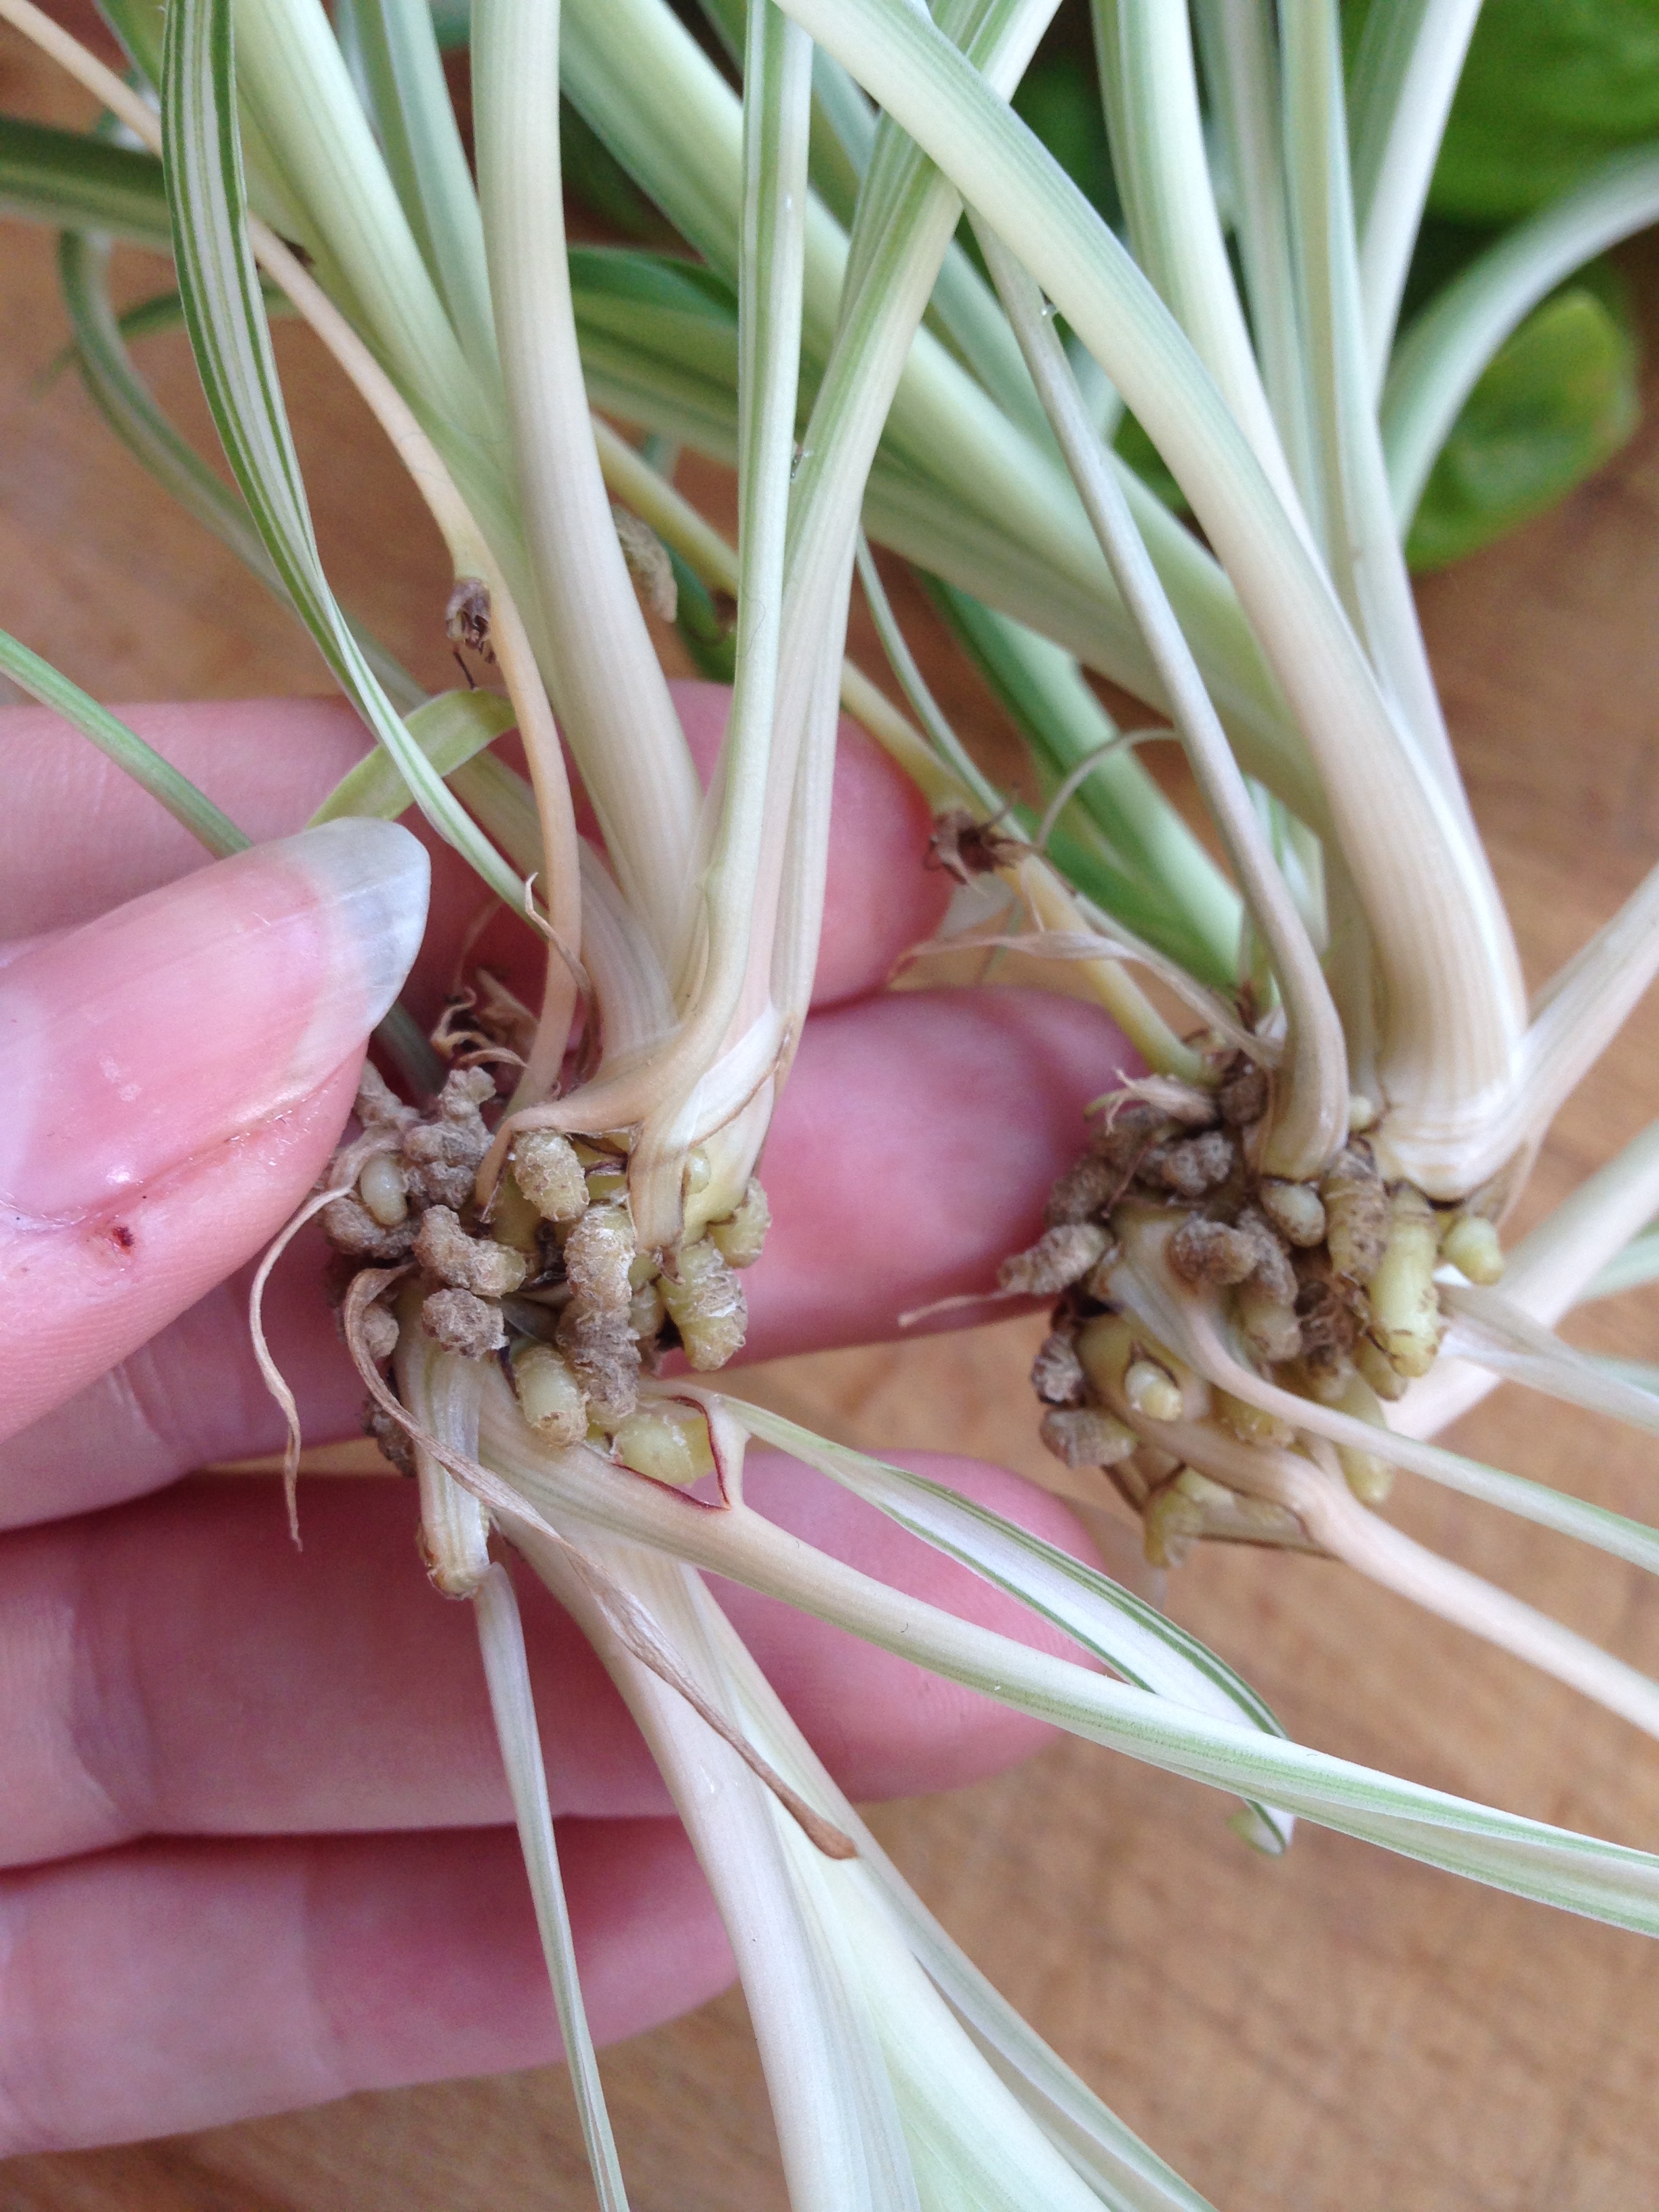
Spider plants grow little plant tendrils that extend out from the base of the original plant, and, on these tendrils are soon to be new little copies of the main plant. Essentially the plant is sending out little copies of itself beyond it's root system in order to find more soil and grow. Smart. Plant smart! Well, smart if it were, in this day and age, kept in a garden surrounded by soil. Now-a-days those tendrils will be lucky to find moist air they can start to 'grow' in. Enter houseplant owner!

I had two of these tendrils growing off my spider plant earlier this year. They grew two sets of babies each before I finally gave in and decided to deal with them. (Normally I cut off these tendrils so that my plant will focus on growing itself, instead of babies. But I got preoccupied so I had let them be.) 

See this Instagram video by @thehalfassedhobbyist * 10 likes

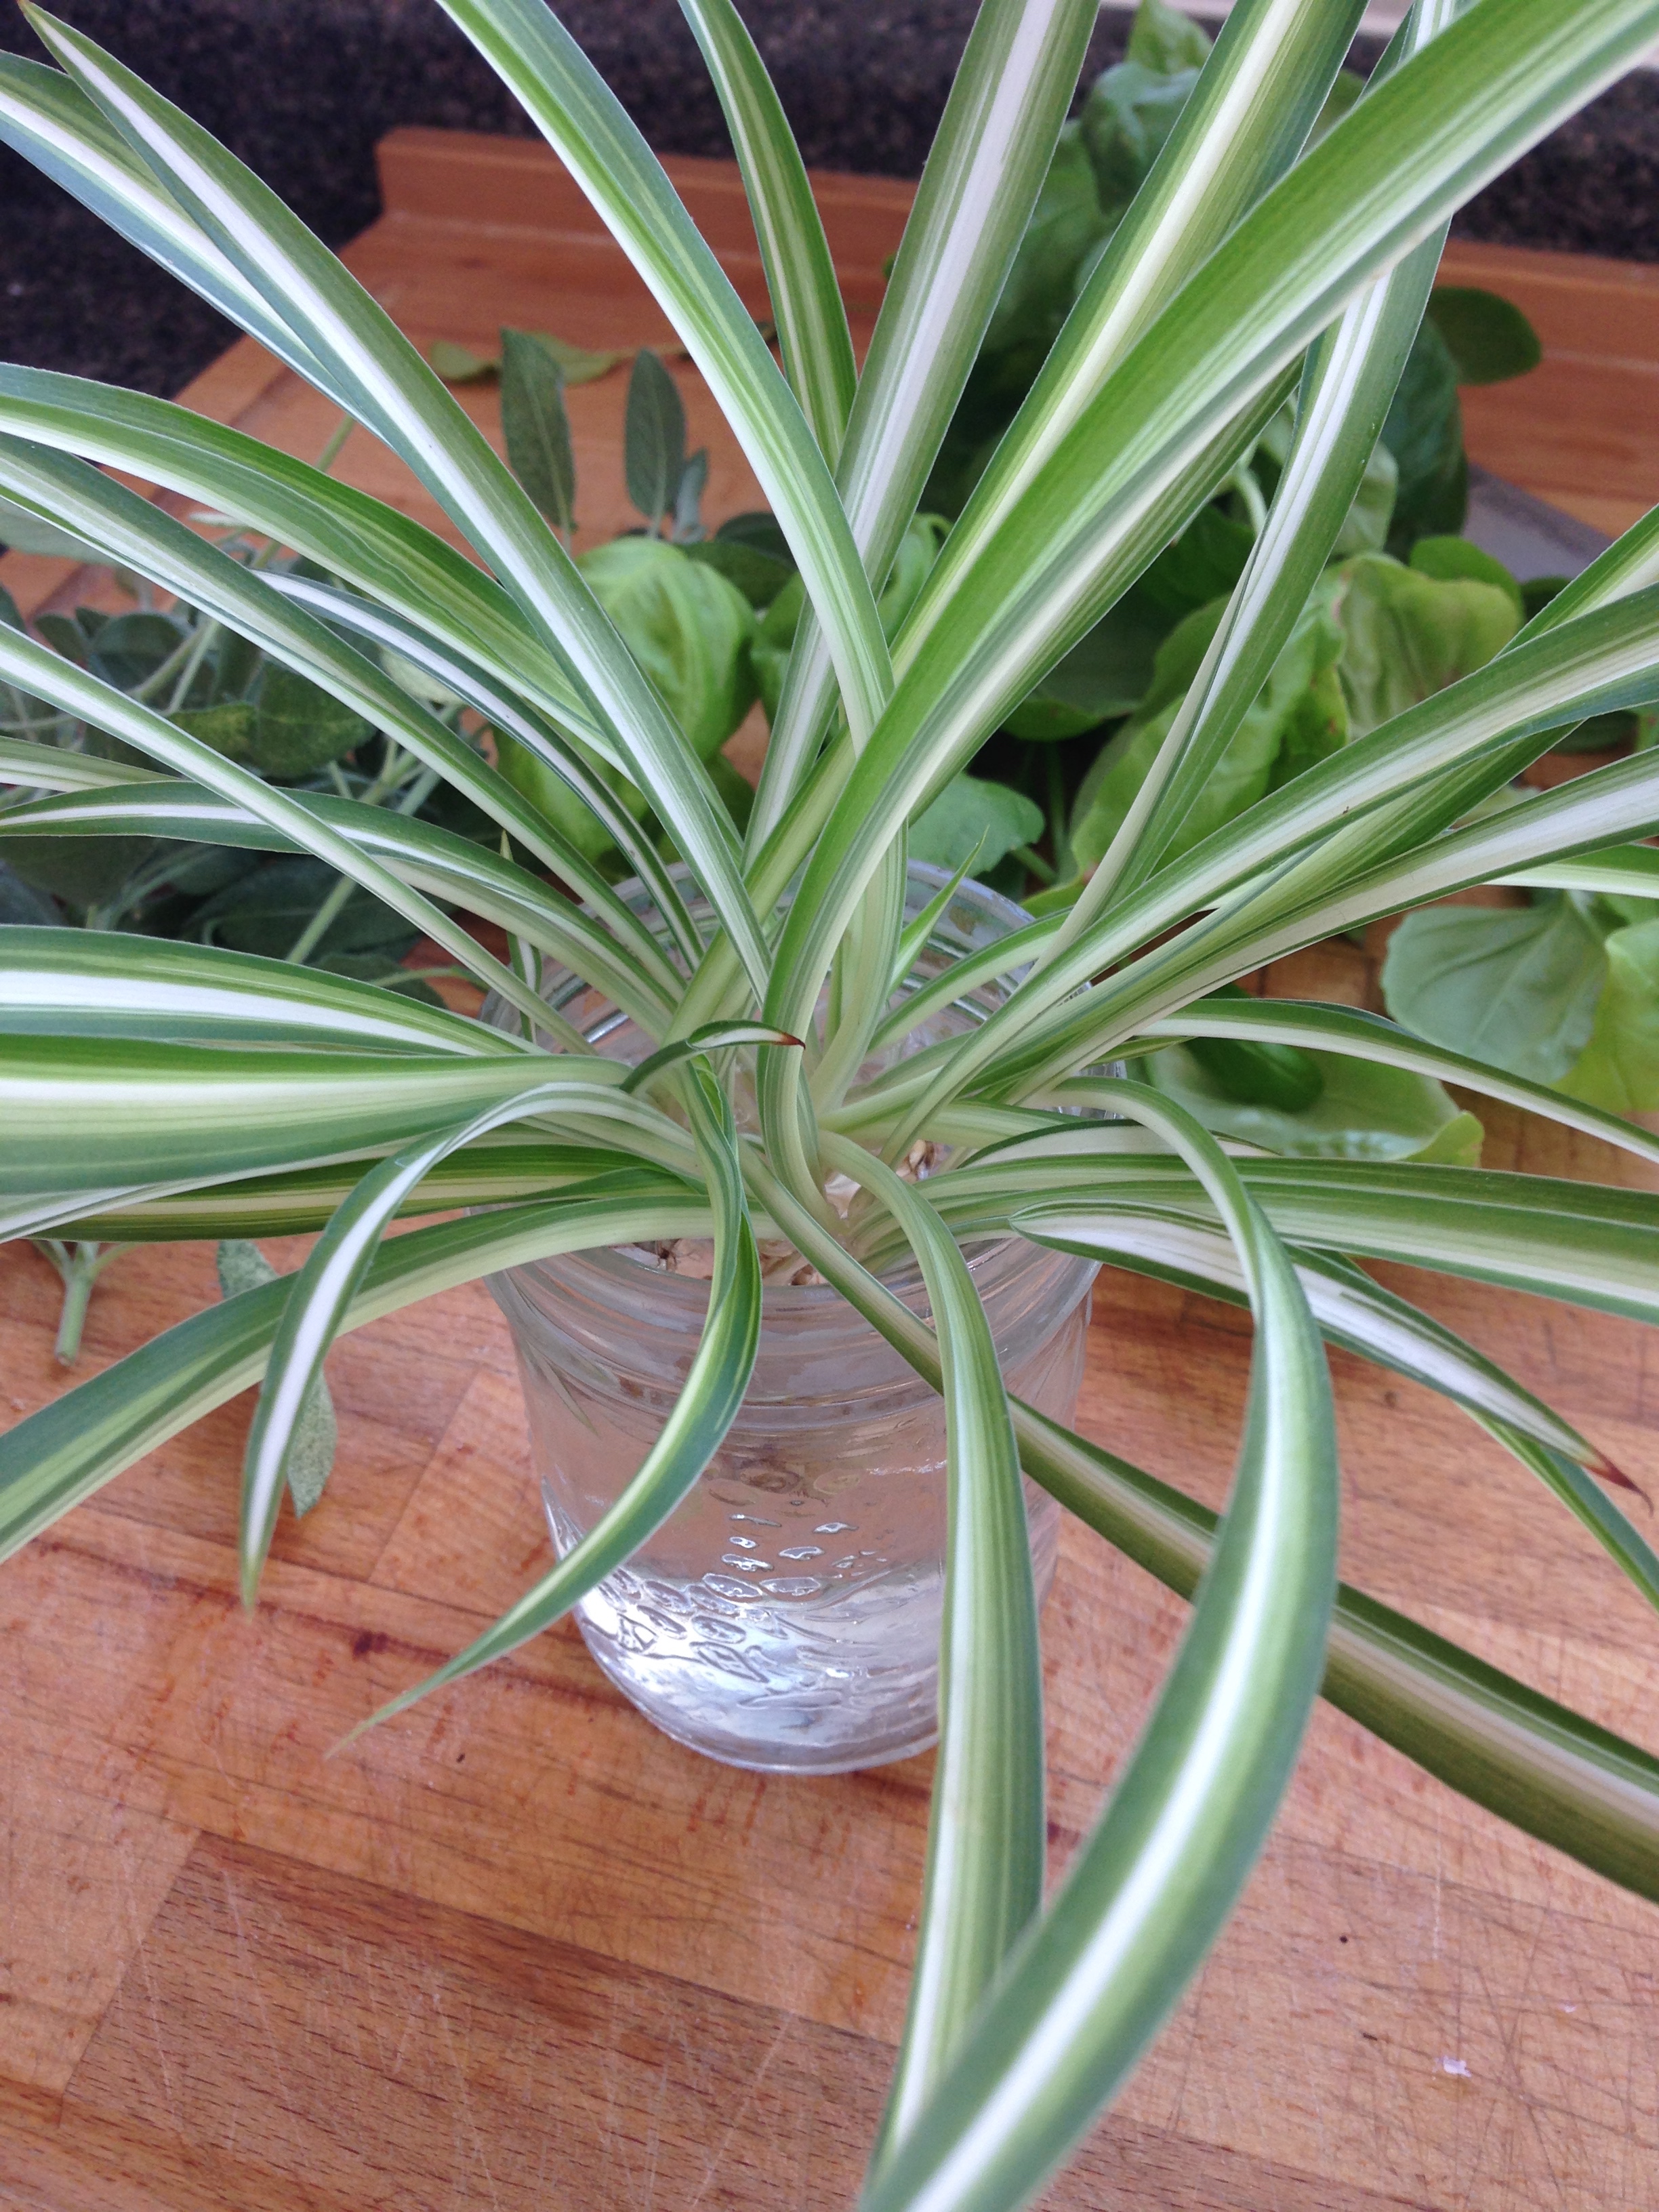
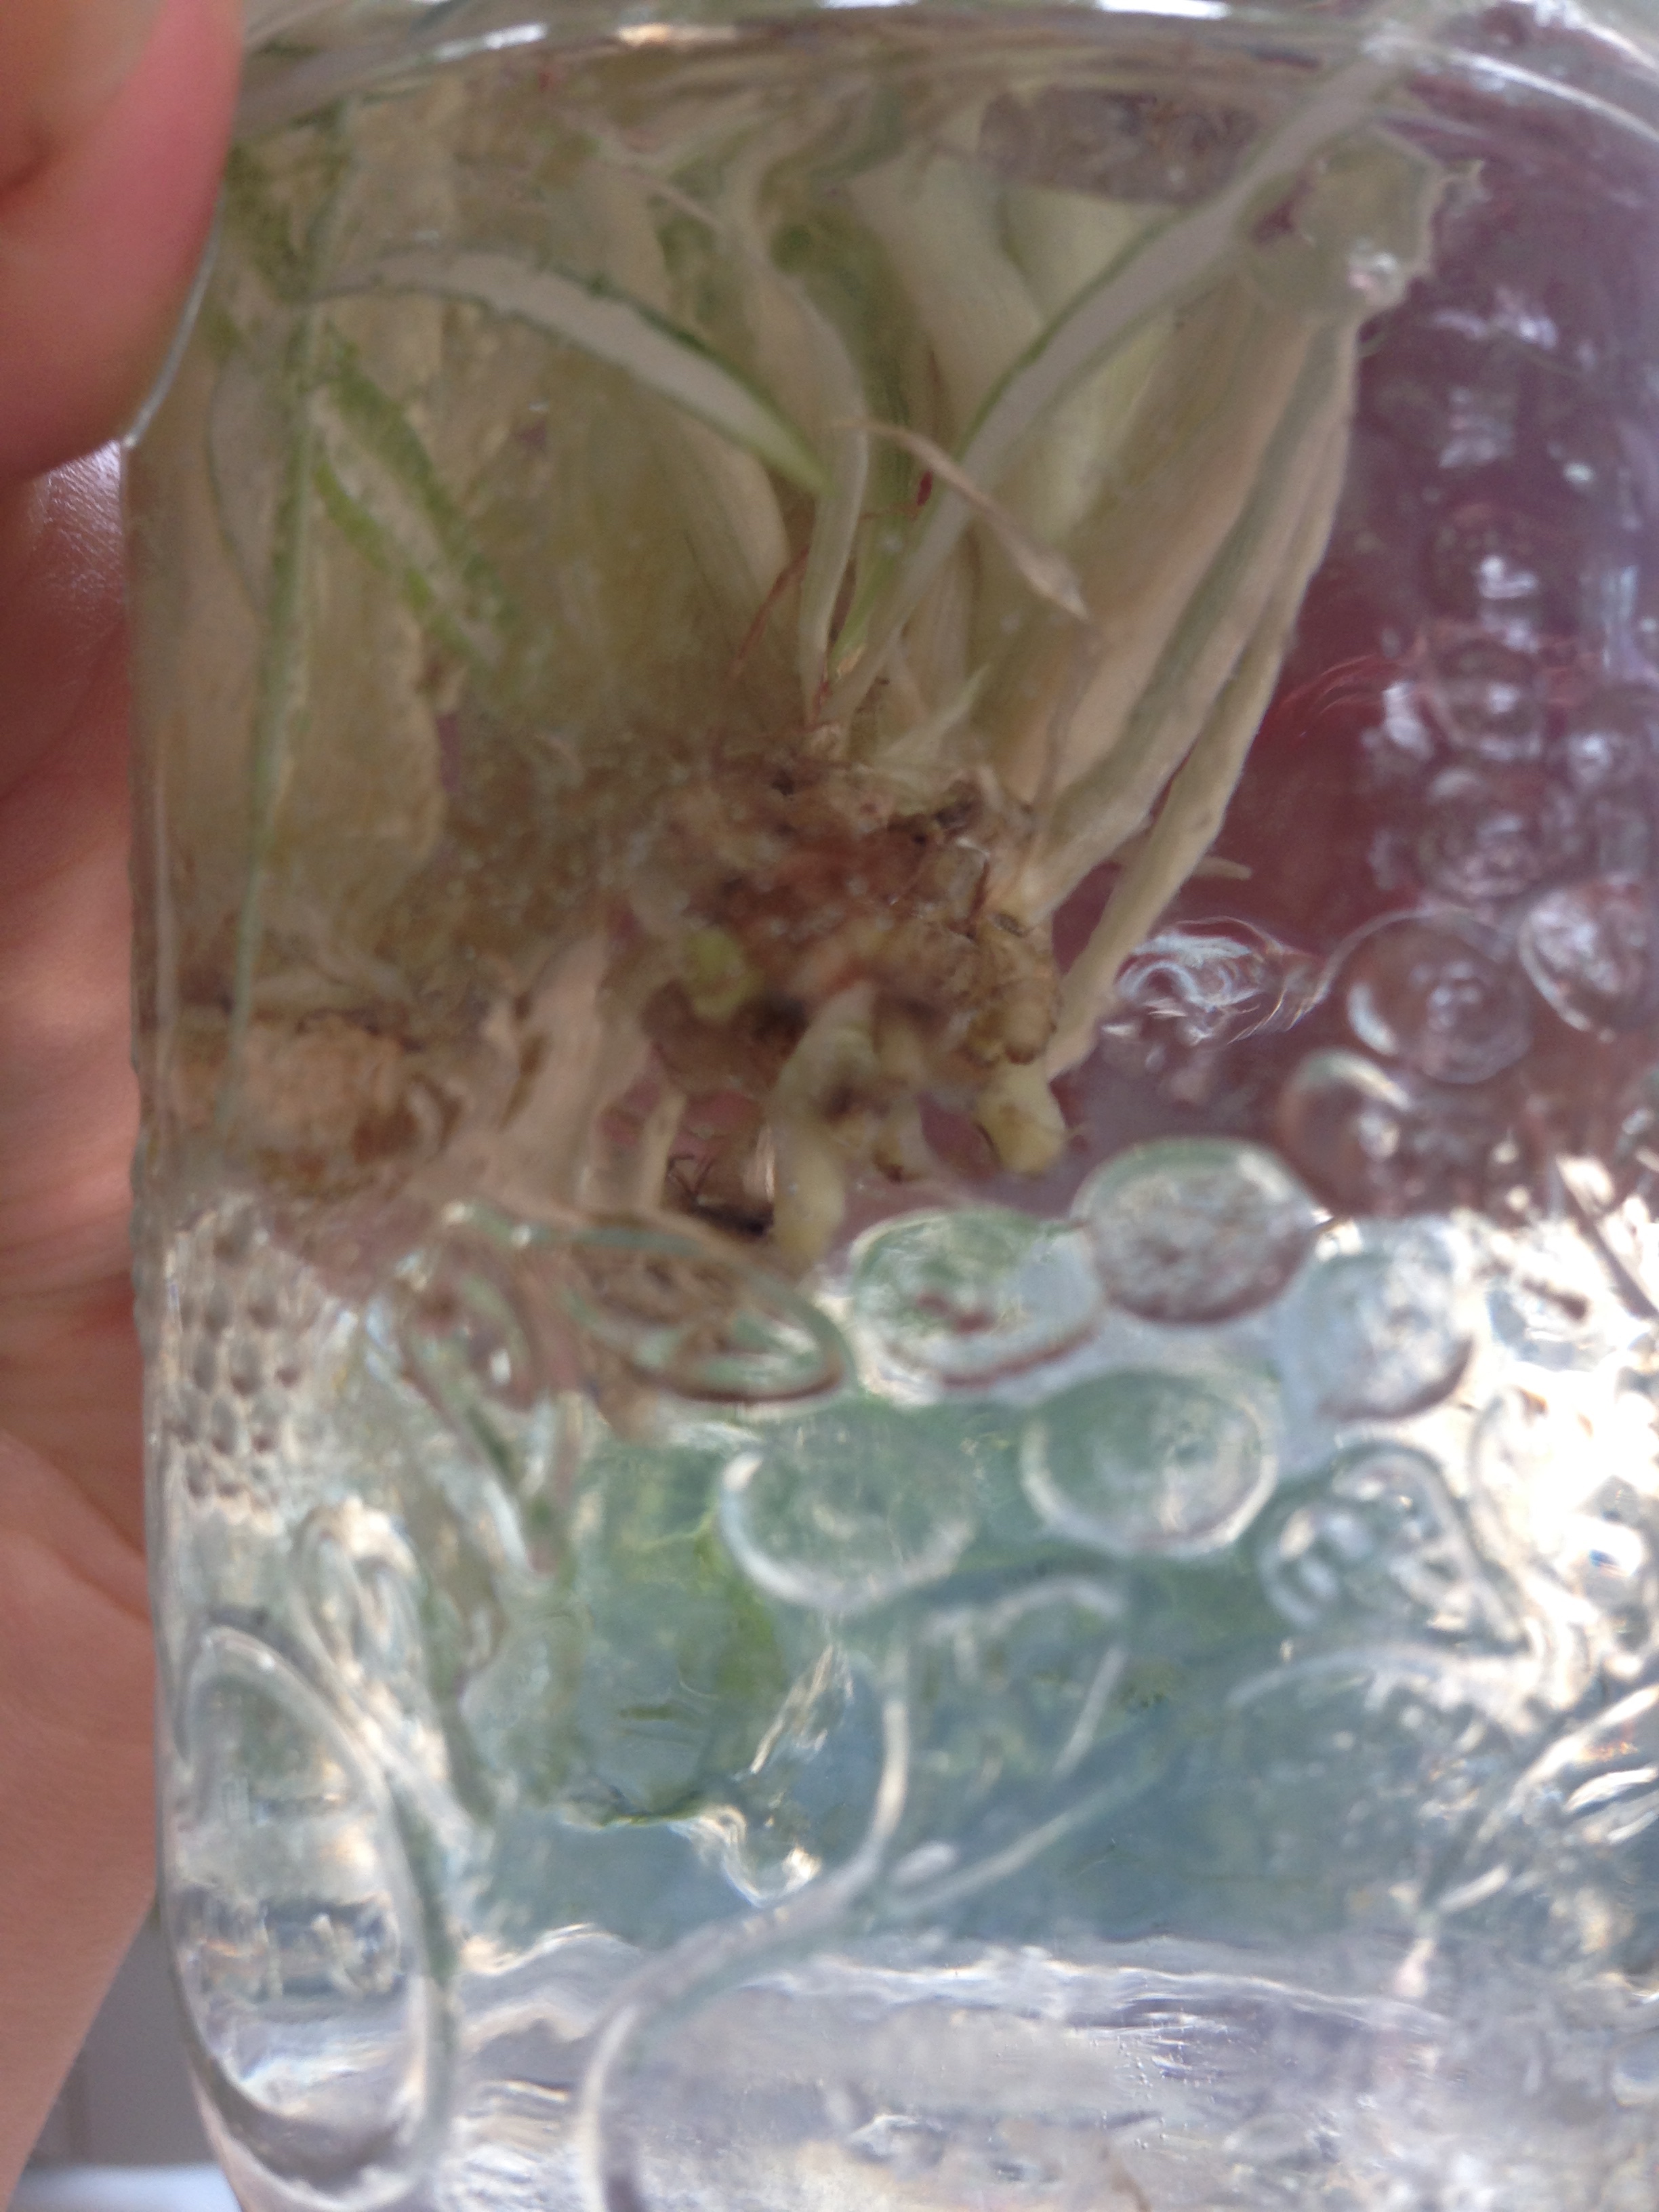
My little plant babies however had spent a lot of time growing and there were in fact two separate plantlings on each of the two tendrils. I thought about cutting them apart but decided perhaps they would break apart of their own accord if I gave them a little force to contend with. Turns out this was the right choice as the both easily separated with a little persuasion. Then it was into a little jar with some water to propagate some roots. 

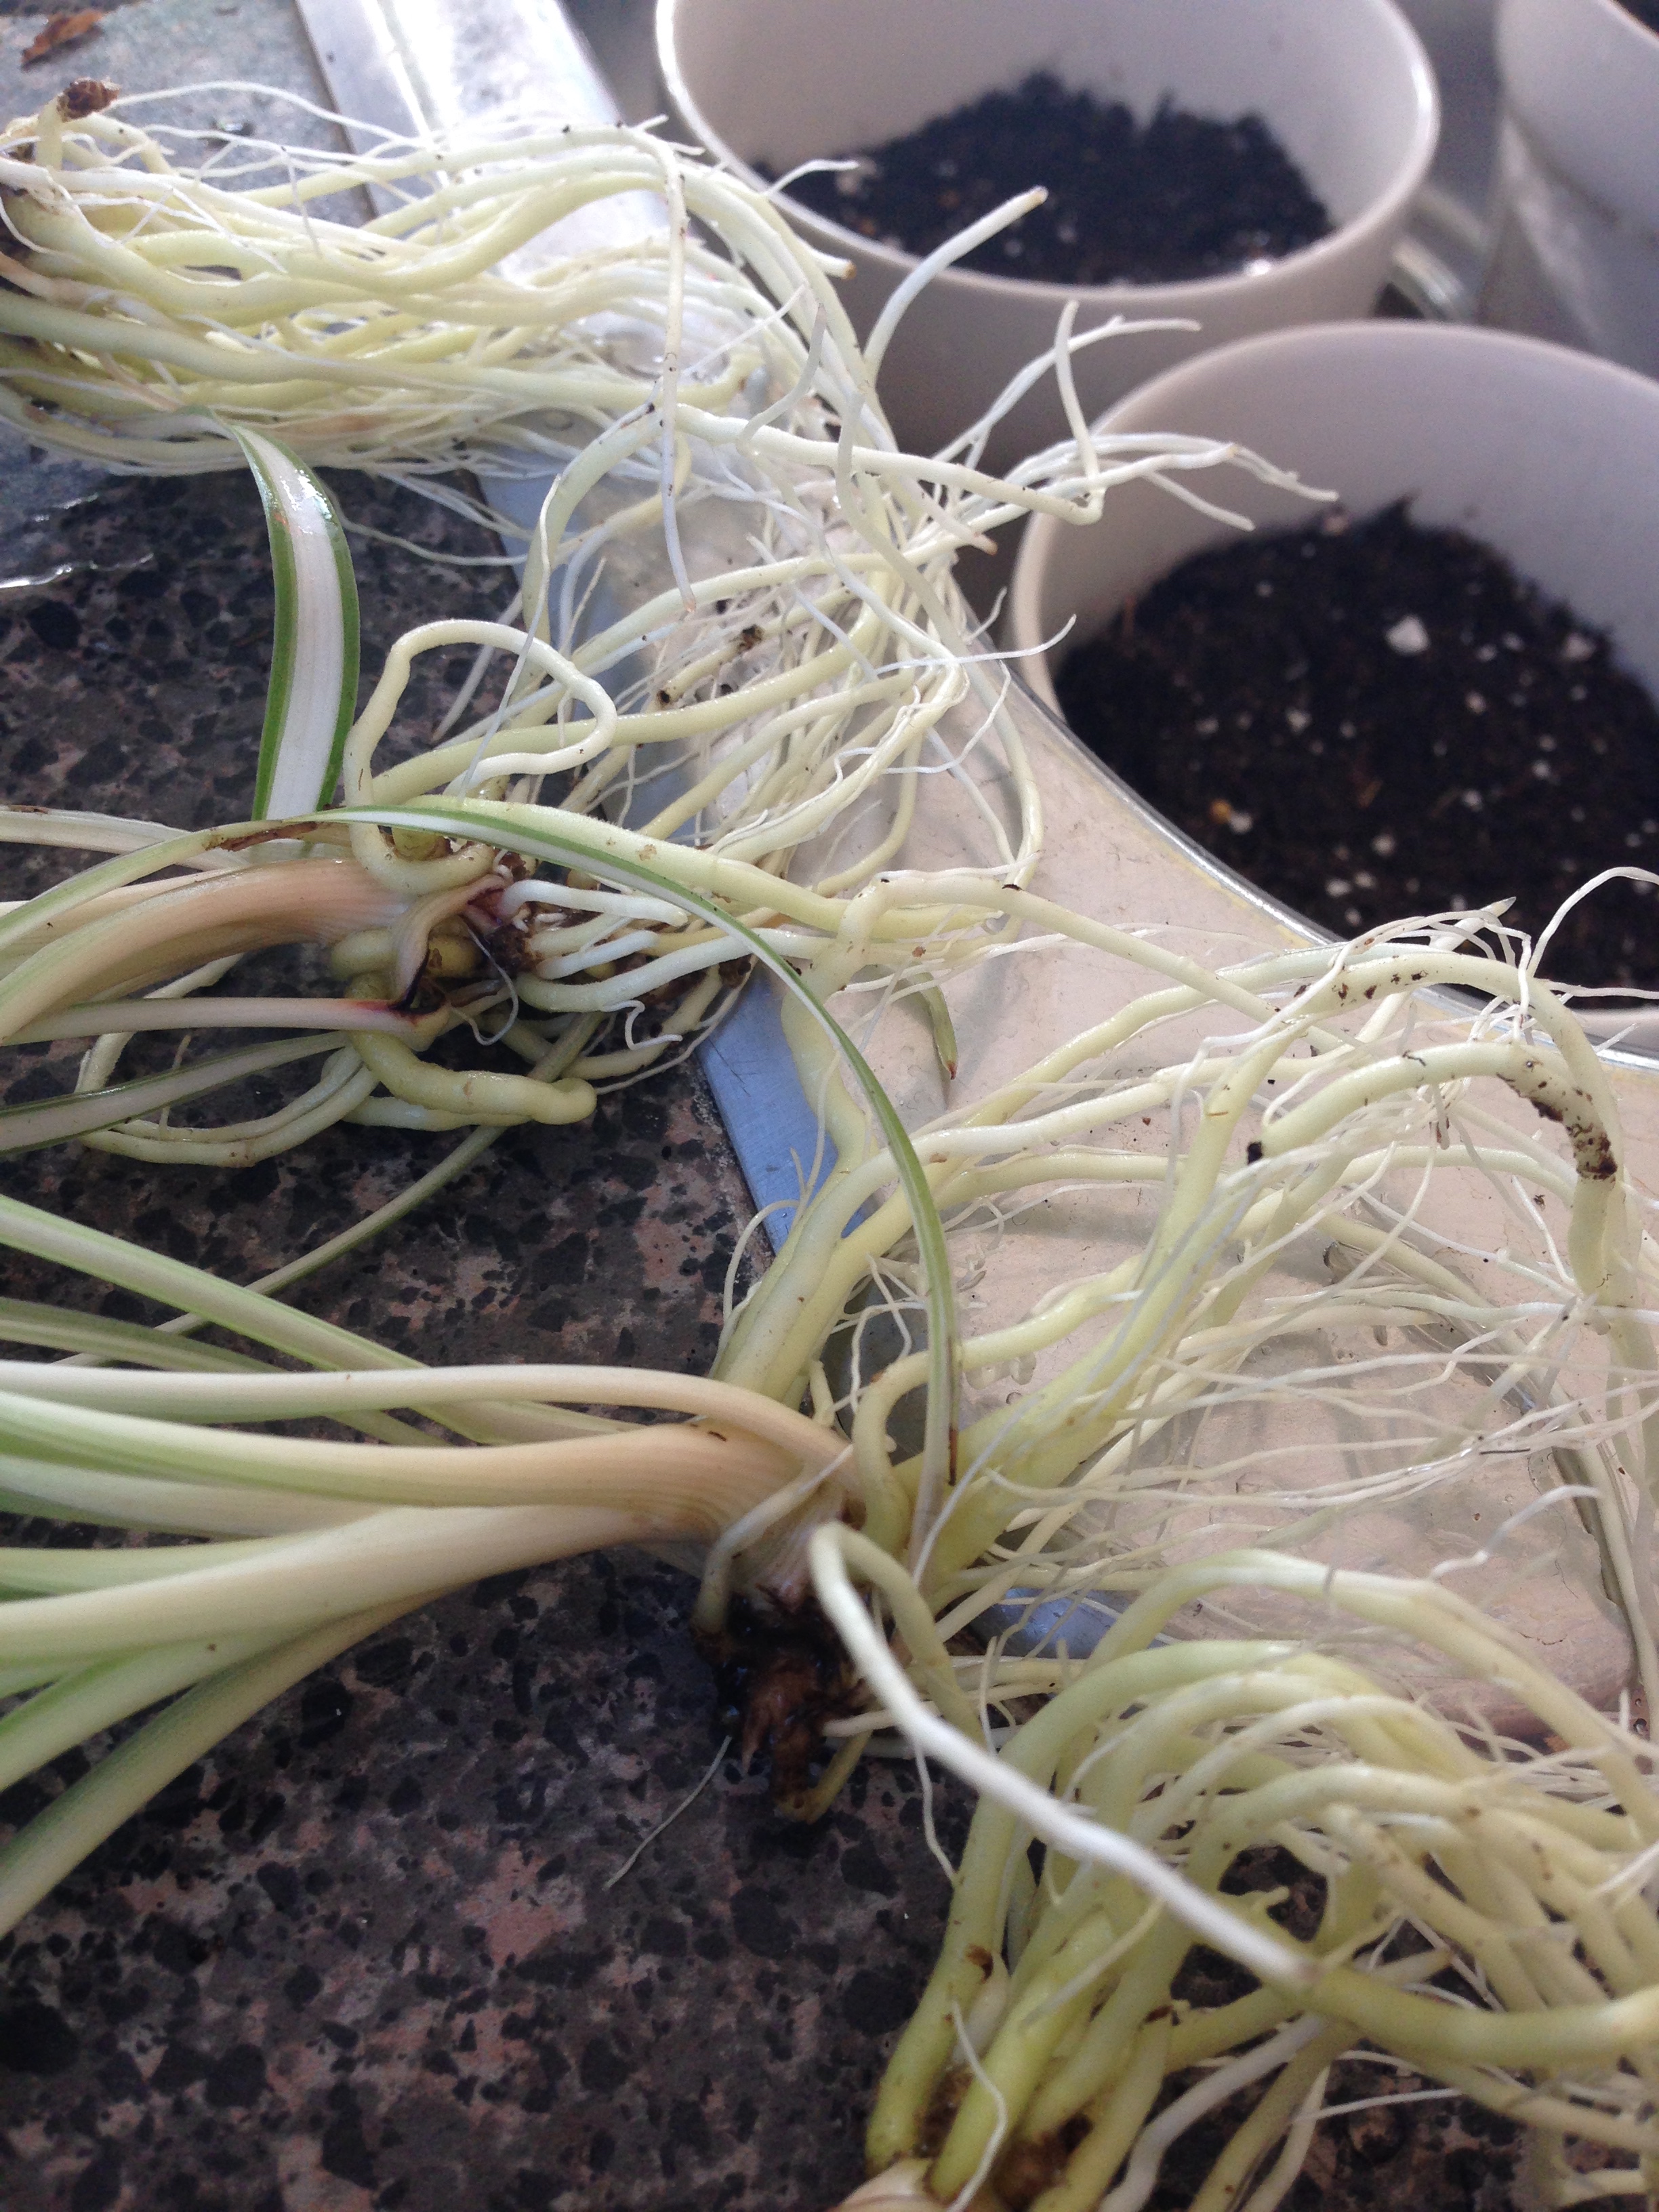
It really should have only taken 2 weeks, but I left my little rootlings in that jar for about a month. Their root systems got all big and ready to plant. 

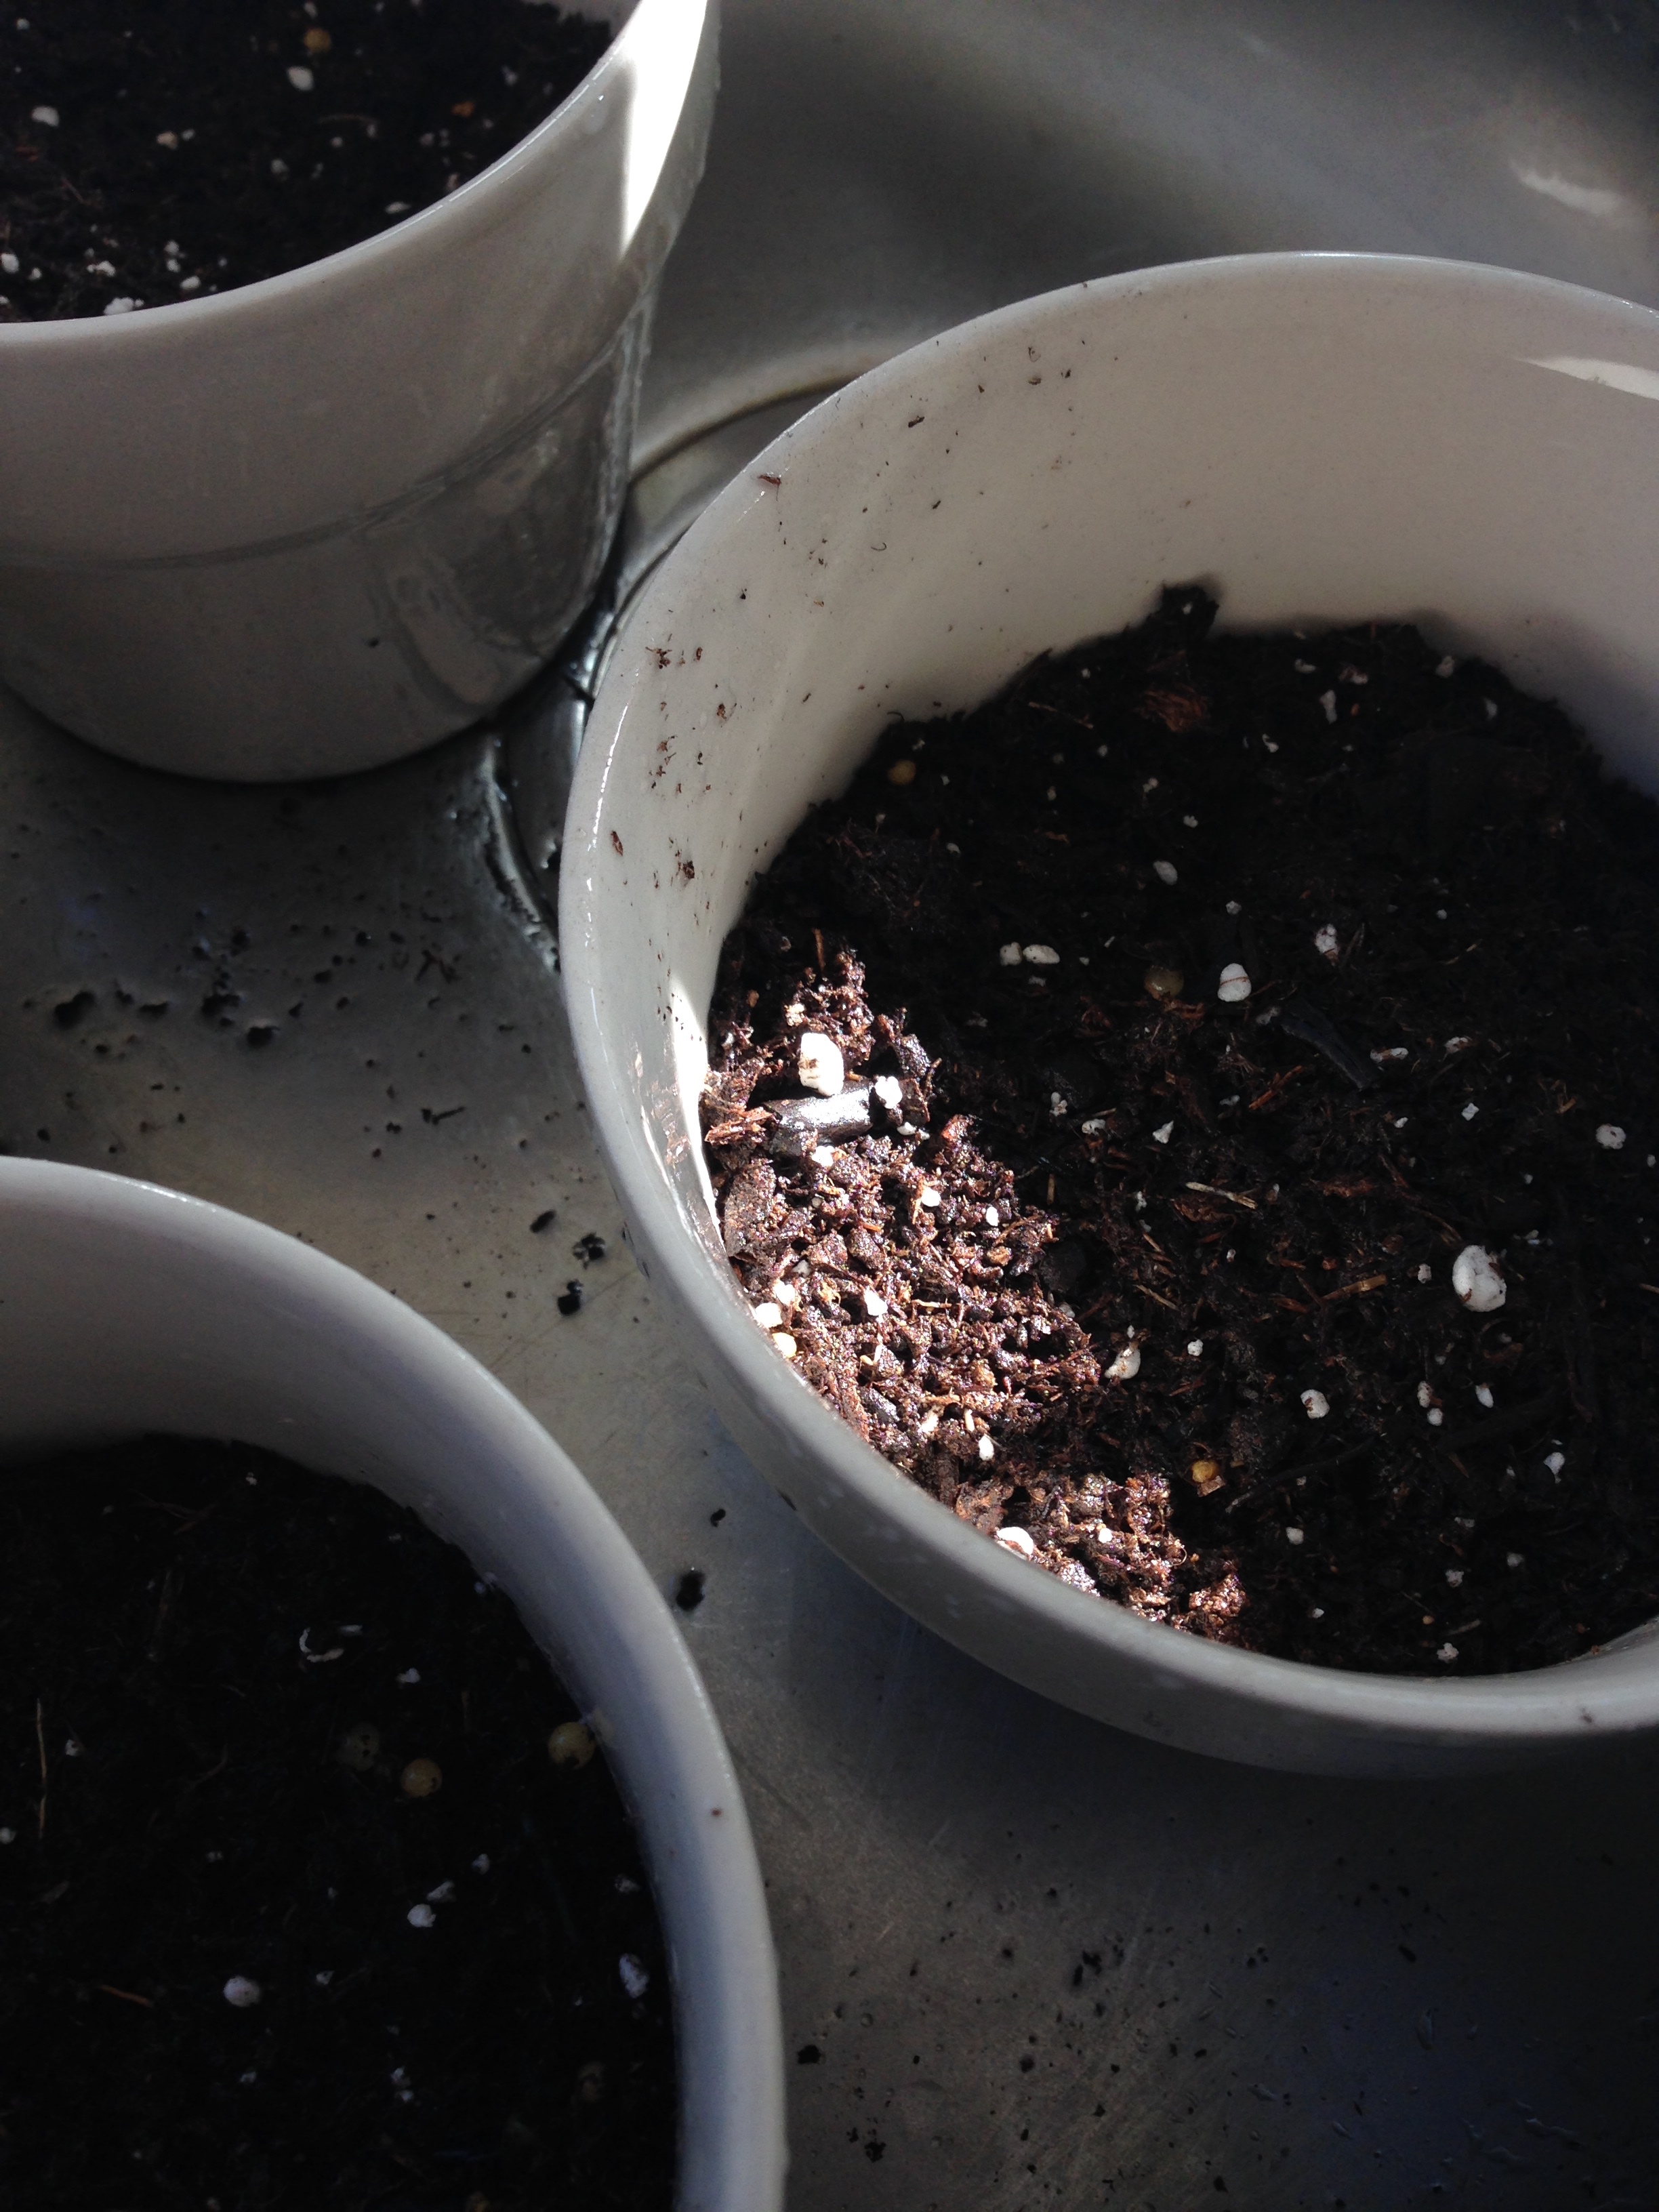
Now it was just a case of finding some lovely (and cheap) pots from IKEA, filling the bottom with rocks (to keep excess water out of the soil) and filling the rest with potting soil. One day I'll have a back yard to do this, but till then, the kitchen sink can be half garden centre as well. 

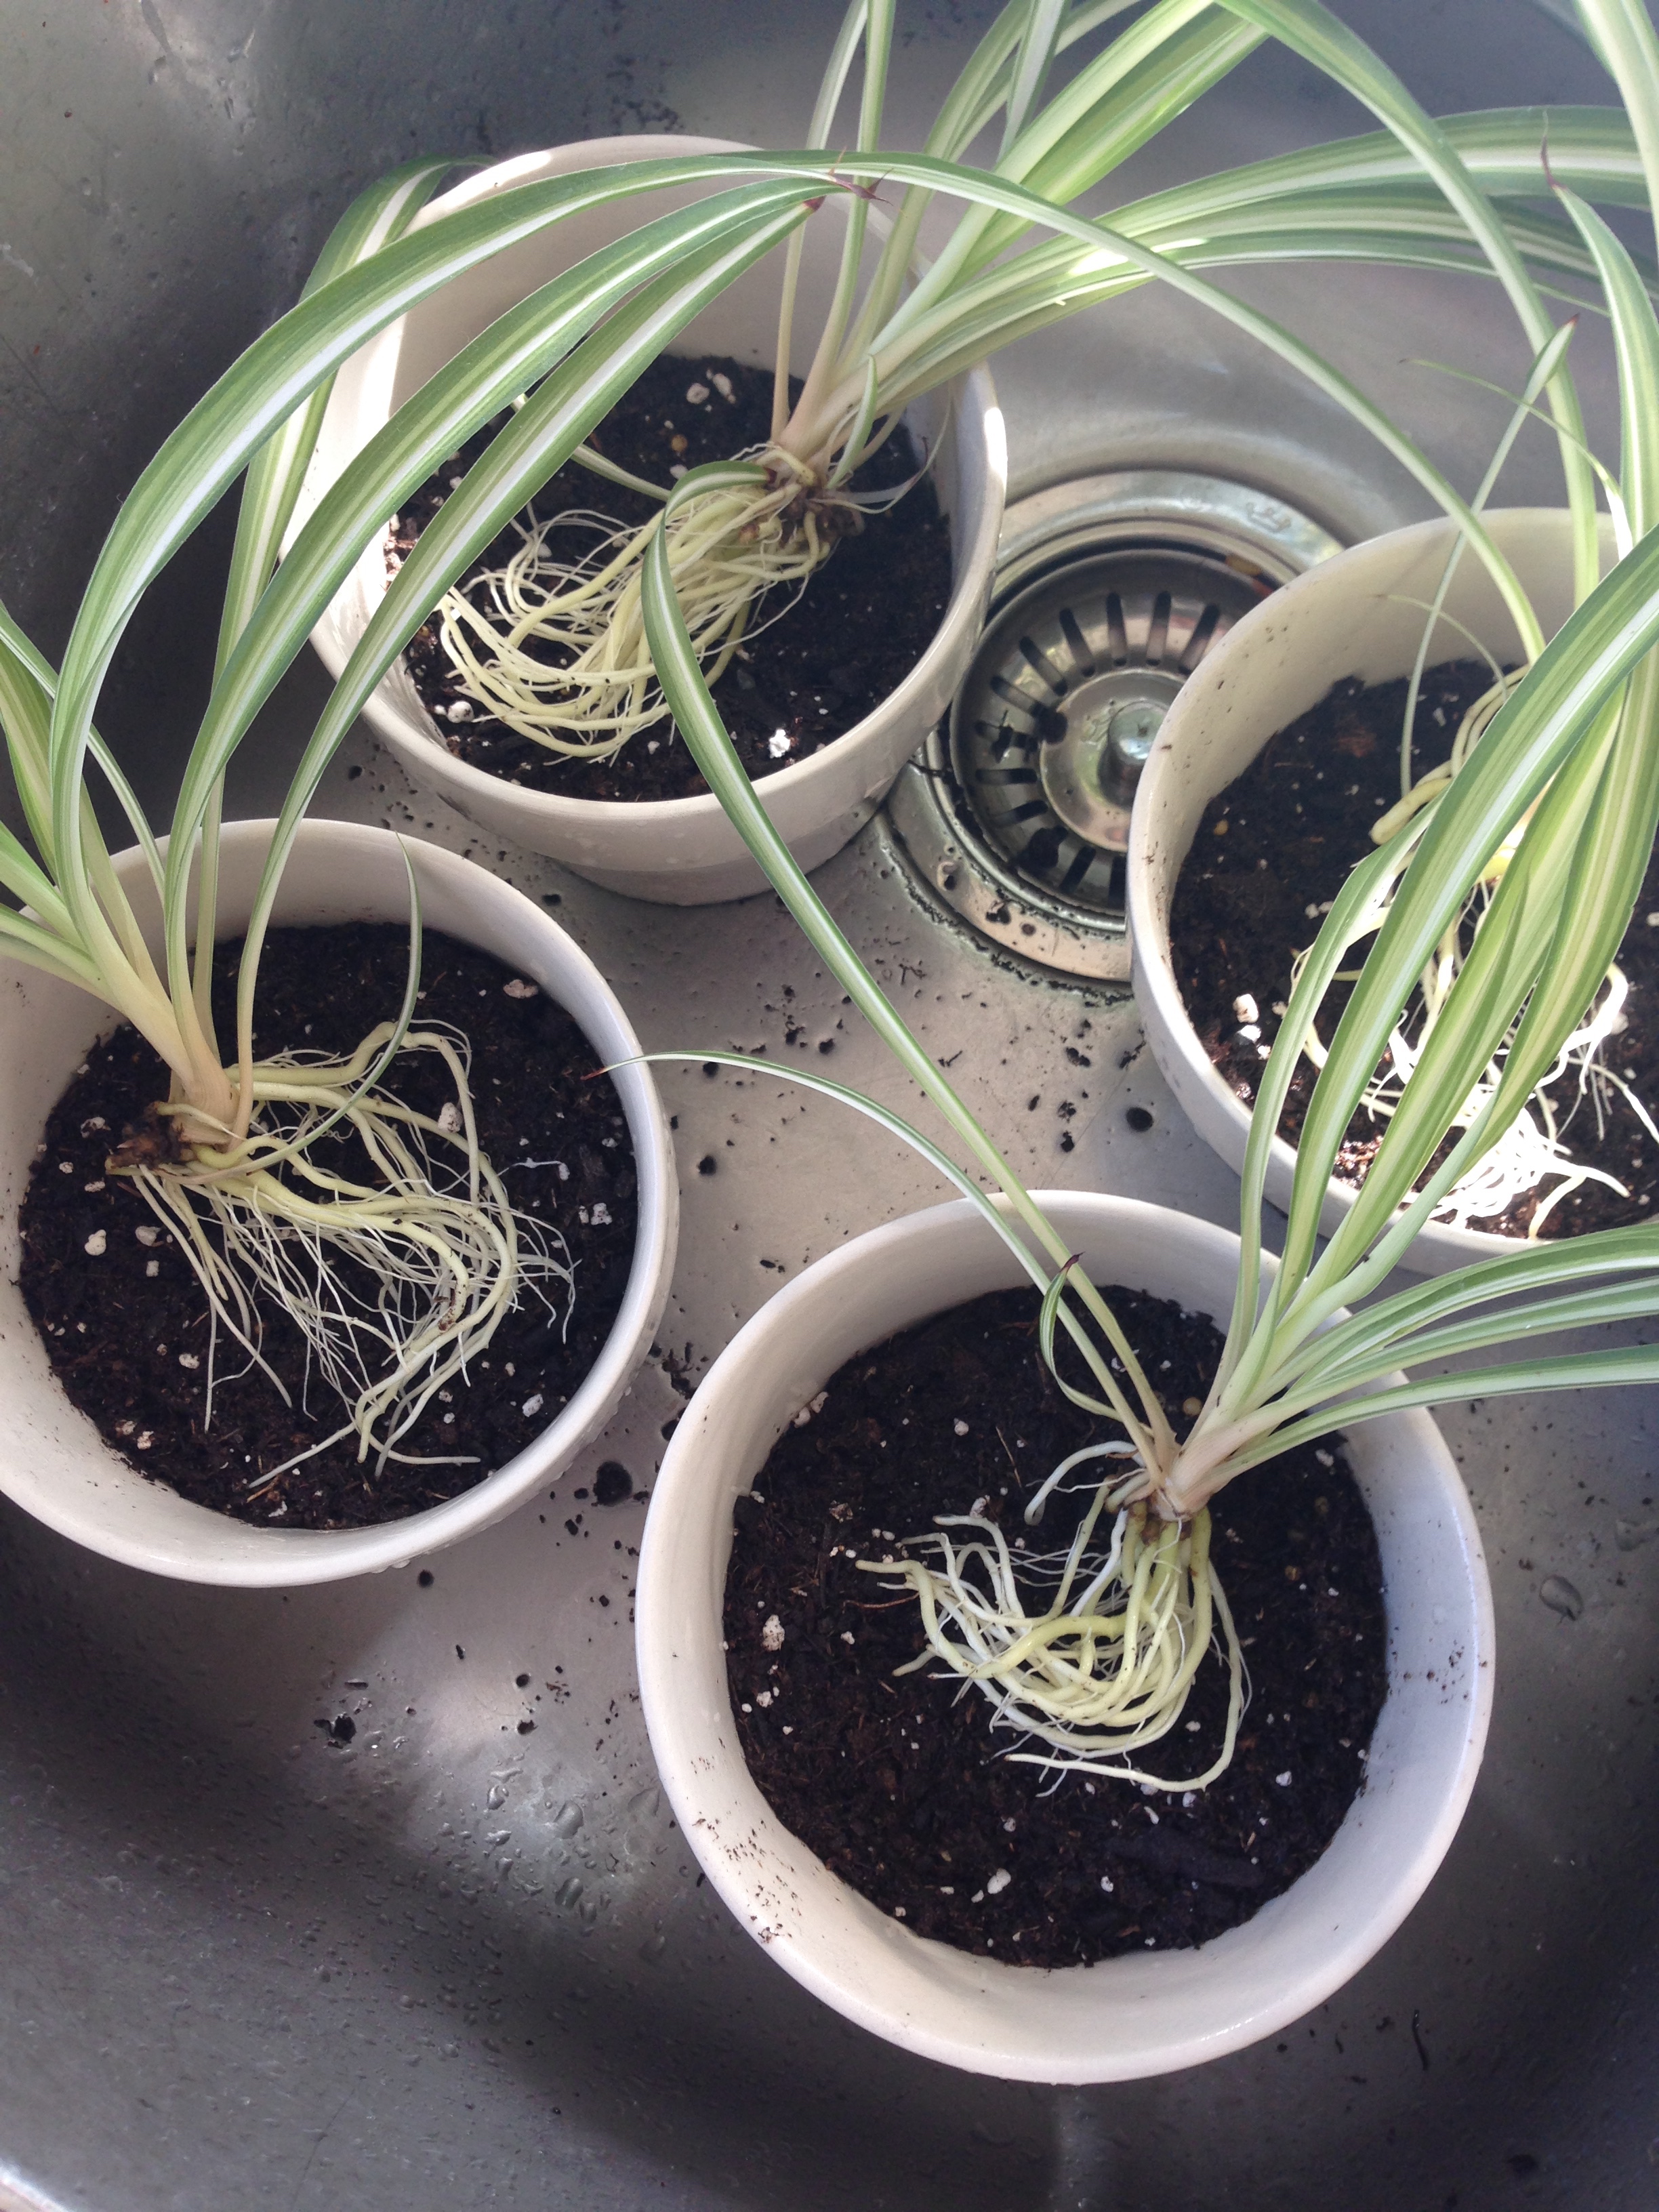
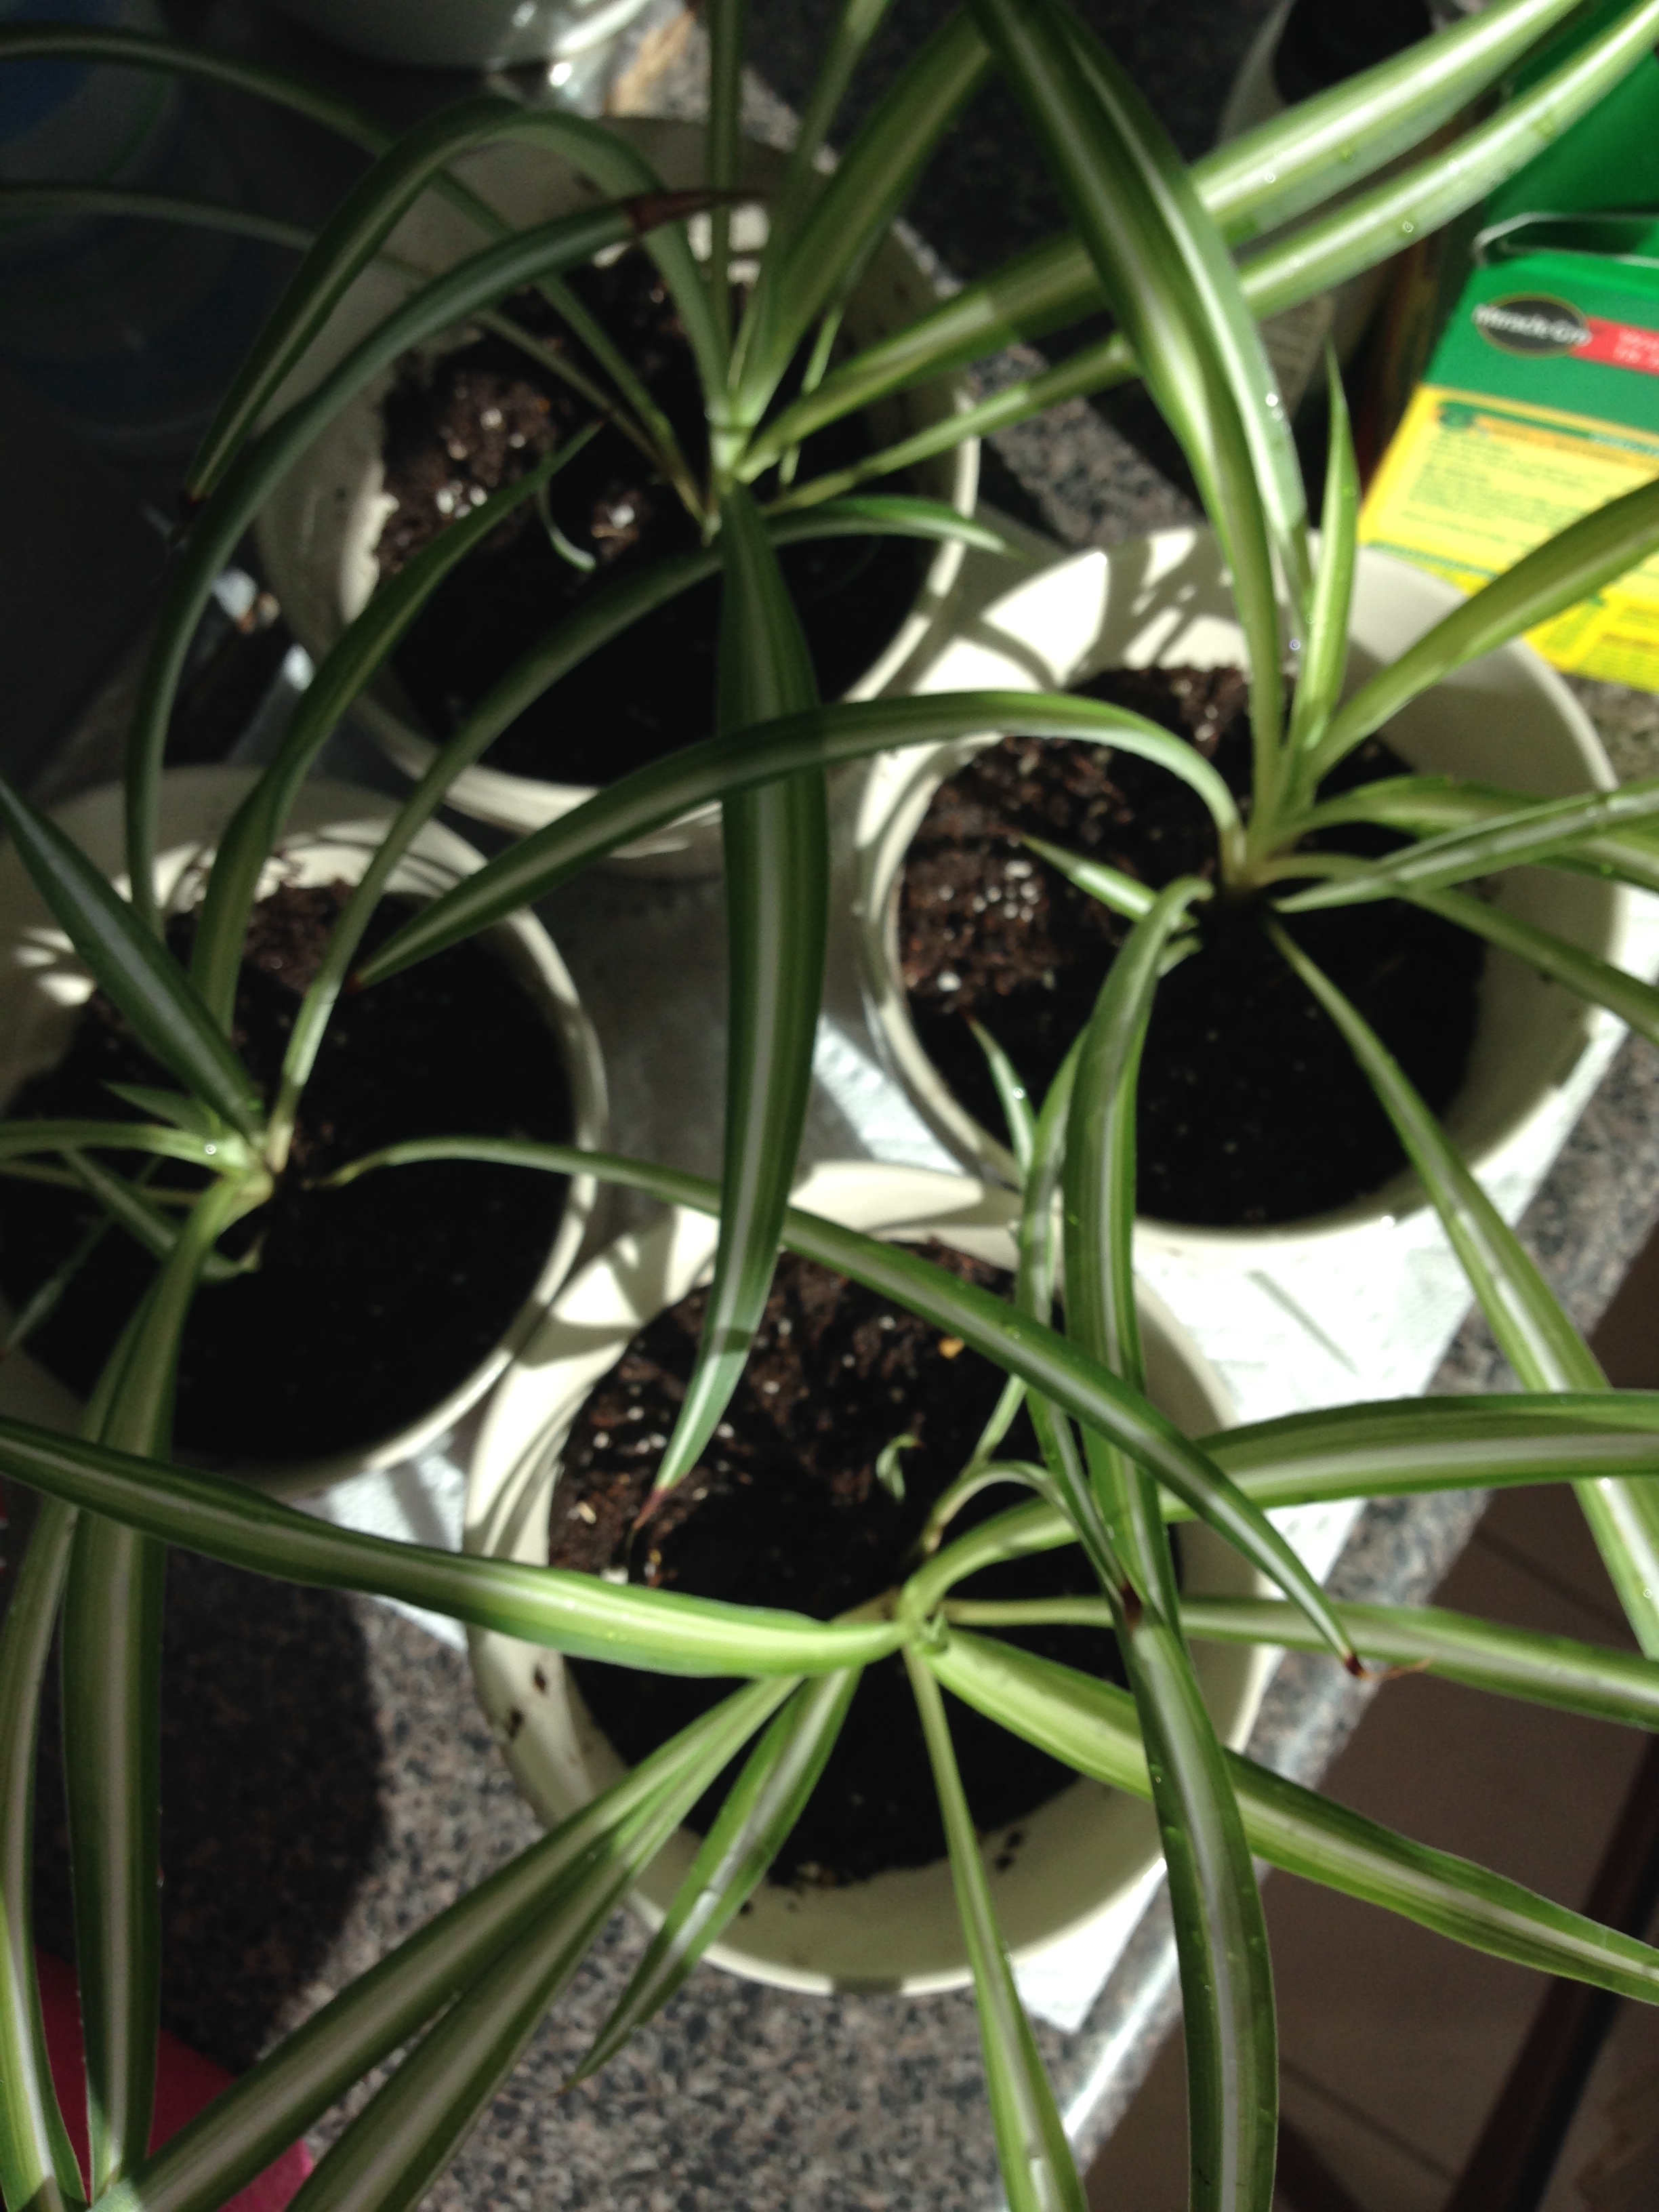
My little babies seem pretty pleased. Now to find new homes for them =) <3 (And wait for more! Haha.)

ย 

-Andrea

The Half-Assed Hobbyist 

The Orchid Continues

As I attempt to not die from whatever lung disease I caught over the holidays, I have had one amazing delight that's helped me through the phelgm-iest illness parts: My orchid is blooming! 

The very same orchid from this post in 2013. I told myself even then that it would bloom eventually, and it did. 

So happy! 

It's been three years since I rescued it from it's near death experience and it seems to finally be happy enough to bloom.

Now for my lungs to get happy... and to get back to posting! <3

-Andrea

The Half-Assed Hobbyist

Orchid Roots look like an Ood's Moustache

Well someone had to say it. 

I recently repotted my orchid (for the second time) and, frankly, the roots look like an Ood's moustache. (Doctor Who Reference. Check). That being said, I hope that Ood's actual moustaches are made of much more hardy stuff.

I haven't been gardening for a while.... Mostly because of the move (and also that I only brought 2 of my previously numerous house plant collection with me to ON). My other plant babies are doing well though! =D The African violet had bloomed twice! The orange and lemon plant are flourishing. The banana plant is growing like a tree. The vine is trailing like crazy. And the shamrock, that for the life of me I could not consistently keep, is growing like wildfire in the care of Aaron. I am very pleased and grateful to all my plant caring friends. <3

But yes. Orchid. 

Repotting orchids is a very easy but delicate task. As long as you've got the right substrate (bark and what-not) and the right sized pot (not too big and not too small!) the rest is easy. As there are many different kinds of orchids it's best to research the one that you have before adventuring to repot it. Some prefer bark, some prefer soil, and some prefer just moss. If you have no idea what kind of orchid you have (like me!) then it may be best to buy a mix of bark and soil (usually a generic orchid substrate). 

STEP 1 - Gathering the Materials
The first thing you'll want to do is buy your repotting necessities. Mainly, a suitably sized plastic pot with large drainage holes, or orchid pot. Usually you can buy these types of pots right besides the orchid substrates at your local garden shop or flower store, which you'll need to purchase too.

STEP 2 - Soaking the bark
Now that you've got all your materials, the bark needs soaking. Measure out enough substrate into your orchid pot to go almost to the brim. Empty the measured substrate into a large bowl and fill it with just enough water to cover the bark. Use a plate to hold the floating bark under the water. Plastic wrap the top of the bowl and let the bark soak for 24 to 48 hours. Check the water level periodically and refill to cover the bark it necessary.

STEP 3 - Unpotting
After the bark has been soaked it's time to get this repotting started.

  1. First, it you don't have an outdoor space to do this, cover your space in newsprint, or do the remaining steps over a very large bowl.
  2. In your new orchid pot, fill it about 1/2 to 2/3rds full of the new pre-soaked substrate.
  3. Back to your orchid. Remove any moss surrounding your orchid from the top of the old substrate (you can still reuse this!). Set aside (I put it to soak in another bowl). 
  4. Grasp your orchid firmly from it's base. If you need to remove some old substrate to get at the base do so carefully. Lift the orchid from it's base straight out of the old substrate. Discard the old substrate. 
  5. Still holding the orchid from it's base, examine the roots. All the roots should be healthy looking aka fleshy and slightly stiff. If any look mouldy or overly limp trim them at the base or at its joints.

STEP 4 - Repotting

  1. Place the orchid base in the centre of the new orchid pot in the new pre-soaked substrate. Make sure that all your roots are delicately placed. Do not force them to fit. If you need to remove some substrate to make room for them then do so.  
  2. Now that all your roots are placed within the orchid pot, while still holding the base centred in the pot, fill the remaining space around the roots and base with more pre-soaked substrate. Don't press the substrate in, simply let the bark and soil fall into place. You can shake the pot a bit (not to wildly) to make sure there are no gaps. You should now be able to remove your hand from the base and fill the remaining space with more substrate. 
  3. TaDa! Now place the moss back on top of th new substrate. You did it! 

STEP 5 - Wait. 
This it the hardest part to do, if I'm honest. The orchid is most likely going to be unhappy for the next couple weeks (but keep to your regular watering schedule anyways). It won't initially like having had it's home moved and it's root system given a trim. But, it should be a lot happier in the long run. Maybe it will even flower...? Please Orchid?

-Andrea

The Half-Assed Hobbyist

ย