So the BF and I just moved across the country (Inner 'AHHHHHH!'). All in all, our options to move our stuff had been plentiful and we booked passage of our stuff using a PODS container. Moving my plants however, that's where the fun began.
I started out heading to a then local greenhouse to see if they had any ideas. I talked with Jim Hole (one of the Hole brothers and part-owner of The Enjoy Centre). He said that travelling with plants is pretty tricky and suggested the best and safest way is to find someone to drive them across the country. The BFs mom agreed and said that when they moved from Ontario to Alberta a super nice mover actually took care of them in the cab of his truck the whole trip. Problem is we weren't planning on driving (my car definitely wouldn't have made it) and a PODS container unfortunately doesn't come with a plant-friendly moving man.

So what next. I had to decide which of my leafy friends were to come with us and who would have the responsibility of caring for the ones left behind. A hard decision. My plants are my babies and it was hard letting them go. My Aloe Vera was definitely coming with me. And I had developed a soft spot for the orchid I had rescued from the trash at my last job. The jade and my mother's vine would have to wait till christmas to come to TO. The rest, all my tropical plants, my shamrock, my spiky plant, the african violet and my flower succulent, would all find new homes with friends. Now that all my plants' future homes were decided, I continued the search for safe passage across the country.
Our friend Laura suggested we travel via VIA Rail. They apparently would transport plants! Yay! But, of course, not in summer. Boo. The nice lady at their call centre said that it just gets too hot in the baggage cars during the summer for any plant life. So nix on the train.
At this point it looked like we wouldn't be able to accompany my plants. So we looked into whether we could ship them Fedex or Purolator. It wasn't as expensive as I thought (Yay!) and with Premium Care it would be handled without any automated systems, only people. But, technically, they don't transport live plants, so we'd have to sneak it....
So apparently travelling with plants is like travelling with vials of deadly viruses: No one really wants to take them, and if they do accept to, they don't guarantee that they'll arrive all in one piece.

Stressing out my plants the week before we moved.
Our last resort was to fly with my plants in baggage. I was sooo thrilled by this. Not.
Peggy the Rhododendron lady at Westjet said that if we could fit the plants in a regulation sized box we could count it as one of our checked bags. Yay free! The downside: She said that it "is handled like all other luggage however", which basically translates to "they will throw it around, bash it like a piñata, and definitely turn it upside down". I was very happy for her honestly, one plant lady to another.
But it seemed that there was no other way to fly the plants. It wasn't until we were driving to my friend Julia's place (to stay for our last dry Alberta-y night) that she suggested checking it as fragile baggage. Julia is a cellist and flies regularly with her cello as fragile baggage. What's good enough for a $15,000 cello is good enough for an heirloom aloe vera. Since this was our best alternative I had to pack the living bejesus out of my plants. I put them in a sturdy see-through rubbermaid container with lots of packing paper in the bottom about a week before the move. Gave them a little water right after I packed them as they would have to be dry to go on the plane (no roots freezing in water allowed!). When moving day came I stuffed the container with lots of paper so that all the limbs of the aloe were supported. Then I stuffed the top as well.
When we got to the airport, we checked our luggage and proceeded to the oversize baggage area, aka the kinda secret fragile baggage area.

Secret fragile baggage screening too!

Hmmmmm....
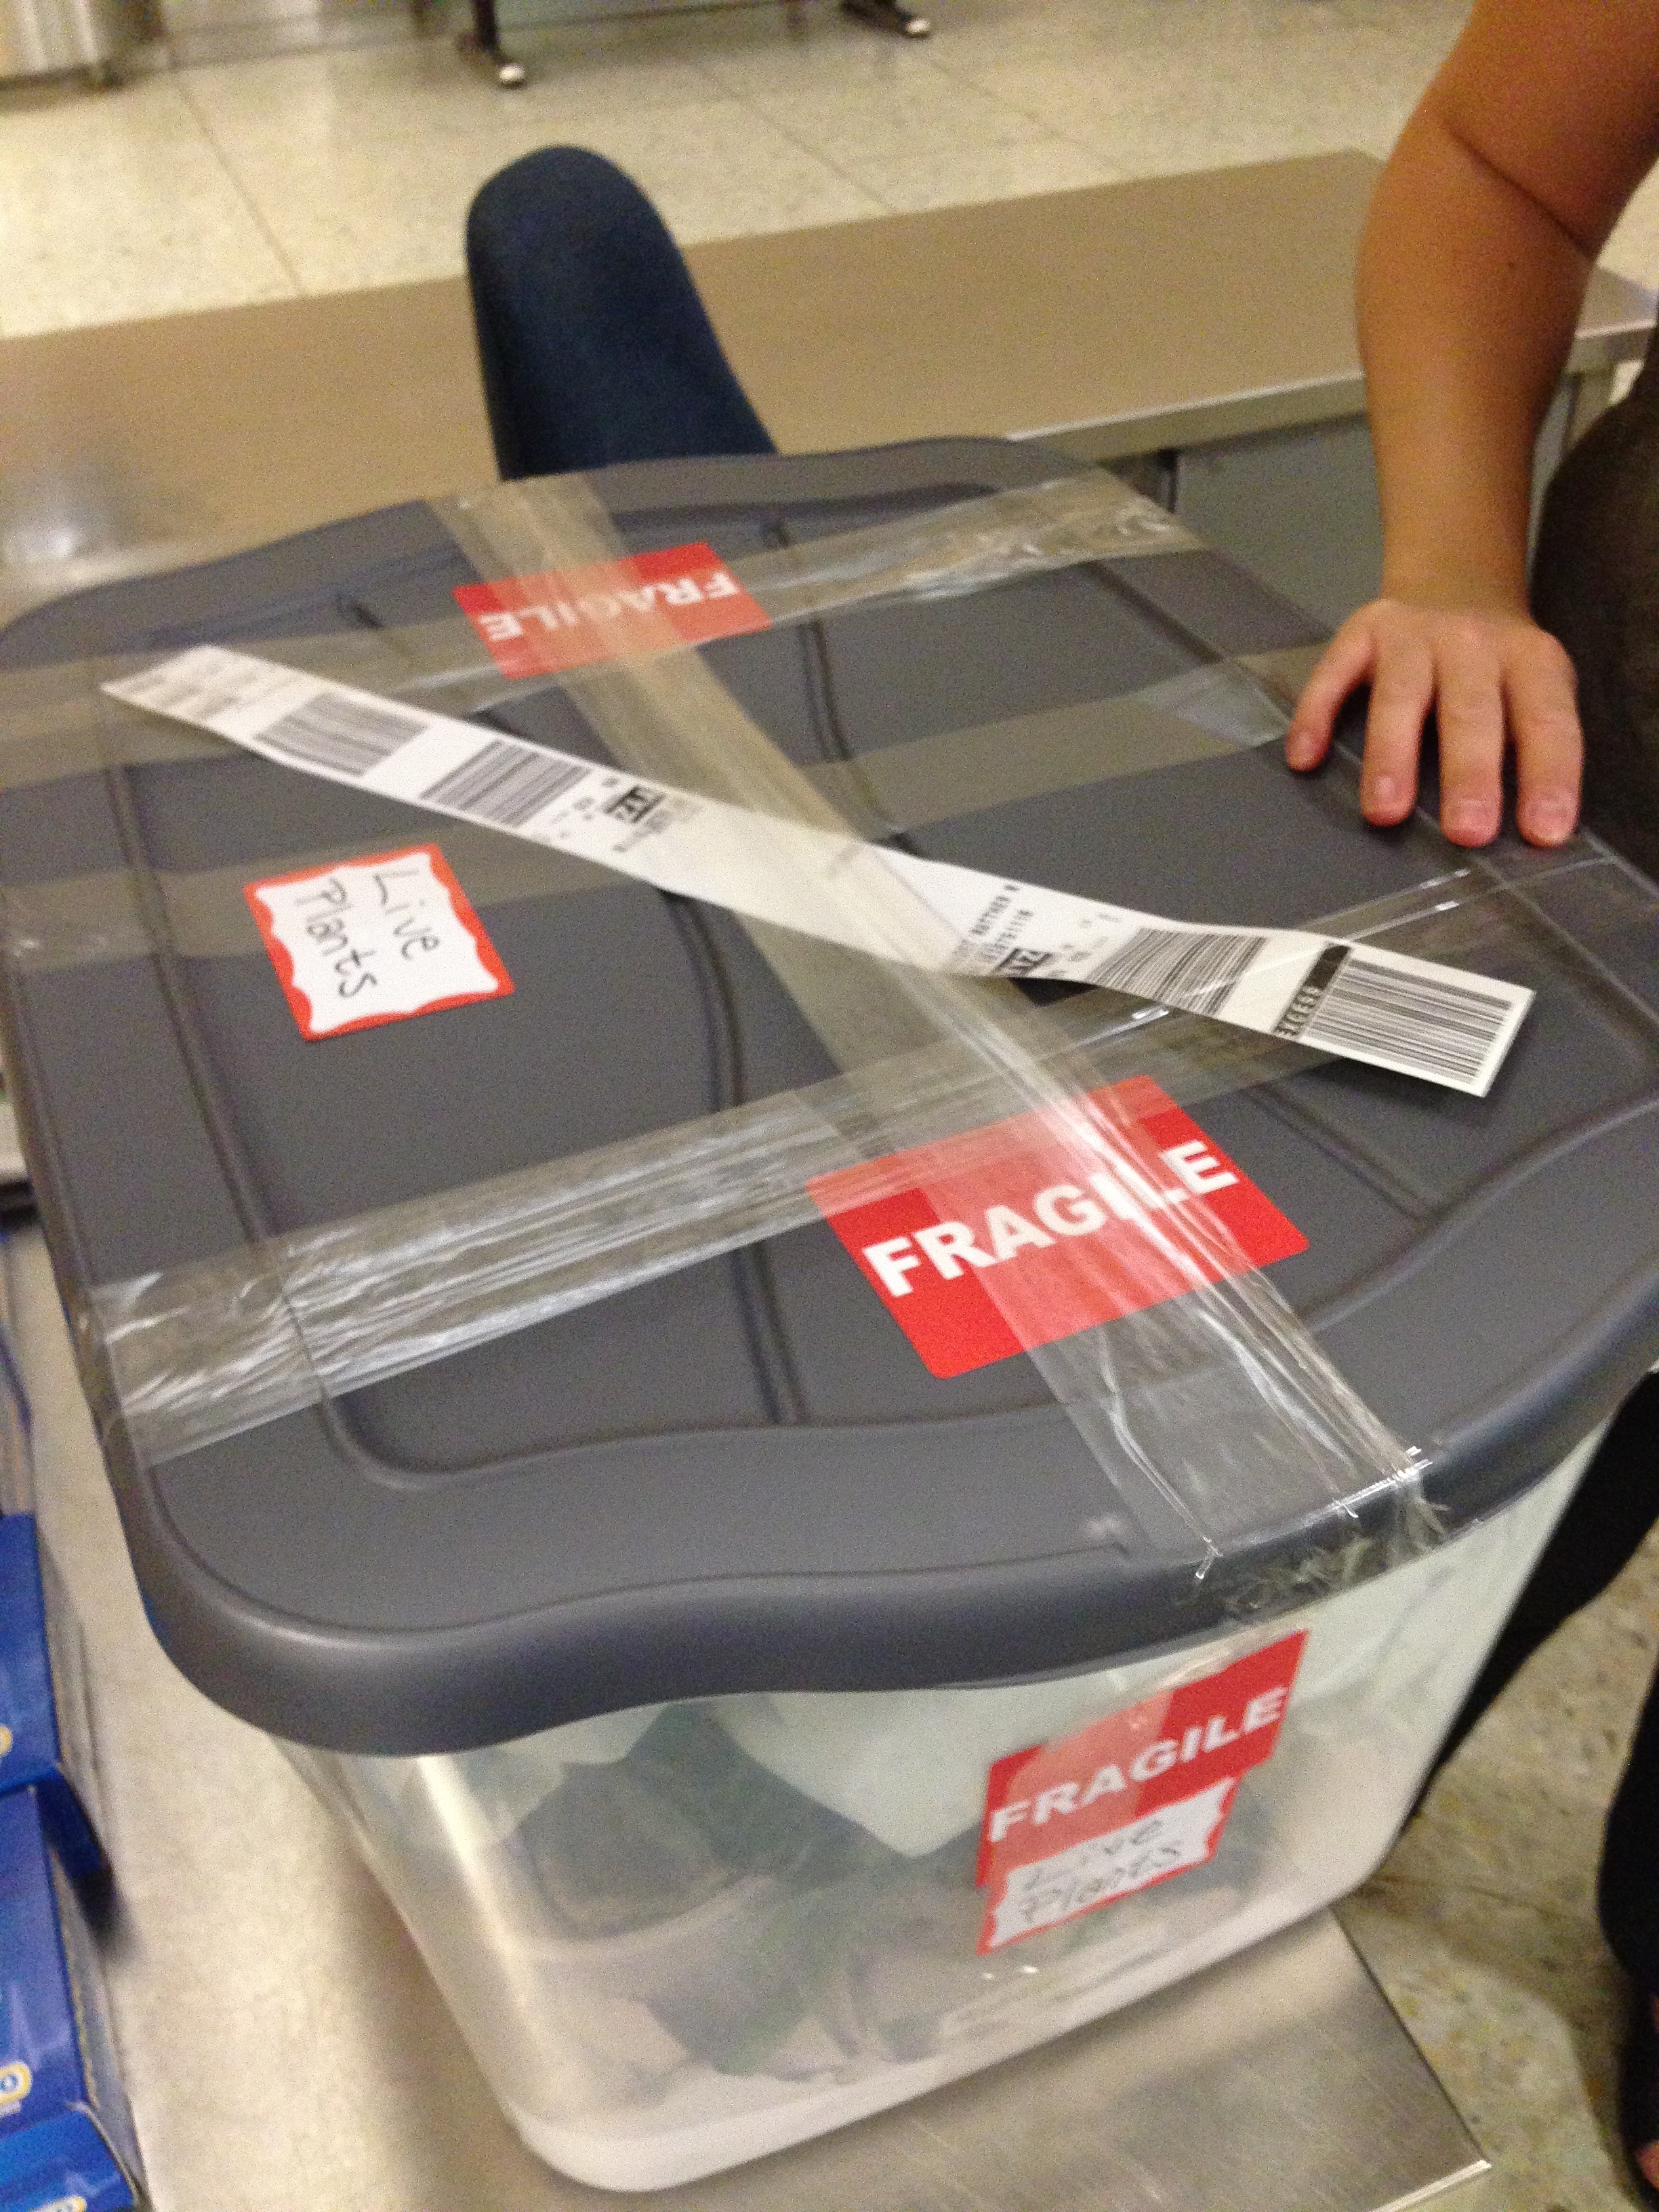
All wrapped up and ready to go!
I said my final goodbyes, not entirely OK with seeing my plants being conveyer belted away, and boarded the plane to our (and their) new home.

After the flight I waited (not really patiently...) at the fragile baggage claim. Success! They looked perfect! Not even a piñata mark to speak of! Now for the hard part: Don't shock the plant more than necessary. I had read on blogs and moving websites that the move itself won't kill the plant, but the stress of being introduced to a new environment so fast might. And frankly, my plants were already pissed at me for putting them in a box. And then I took their air and sunlight away.
I brought it back to the hotel and opened up the lid. It was very humid and warm in the tub. Since our room faced north there was basically no light to speak of but I gave the aloe some water (about half a cup) and the leaves, a tad droopy, perked right back up. (The orchid, it turns out, is really mad and is now proceeding to turn yellow. What a complainer.)
After the initial unpack and water I didn't touch or move or even breath on the plants. Reduce stress! I was worried that even having opened the container I had killed them but they seemed to want to live.
The next step was moving it again, about three days later, to our new apartment. I repacked the paper on top of the aloe, loaded it into the cab, and less than 10 minutes it was back lid off and a half a glass of water happier. This time, as it was in it's final destination for the foreseeable future, I unpacked all the paper from around it's limbs as well. The orchid, such a drama queen, I unpacked fully and placed out of direct sunlight in the kitchen.


Both plants, though worse for wear, are looking like they will pull through! I won't be moving the aloe out of the container for at least another week though. I'll update when my trooper of a plant is in it's final final home.
Cheers!
-Andrea
The Half-Assed Hobbyist