Photo Op(eration)

In an effort to home-ify the apartment, I decided to put my loved ones faces on a wall! Nothing says "I love you" like a collage of memories, right? I originally got the collage idea from my friend Marley, who at some point over the last year posted a how-to article about hanging groups of photos easily using a paper templates. (Engage foreshadowing with the use of the word 'easy'. Check.)

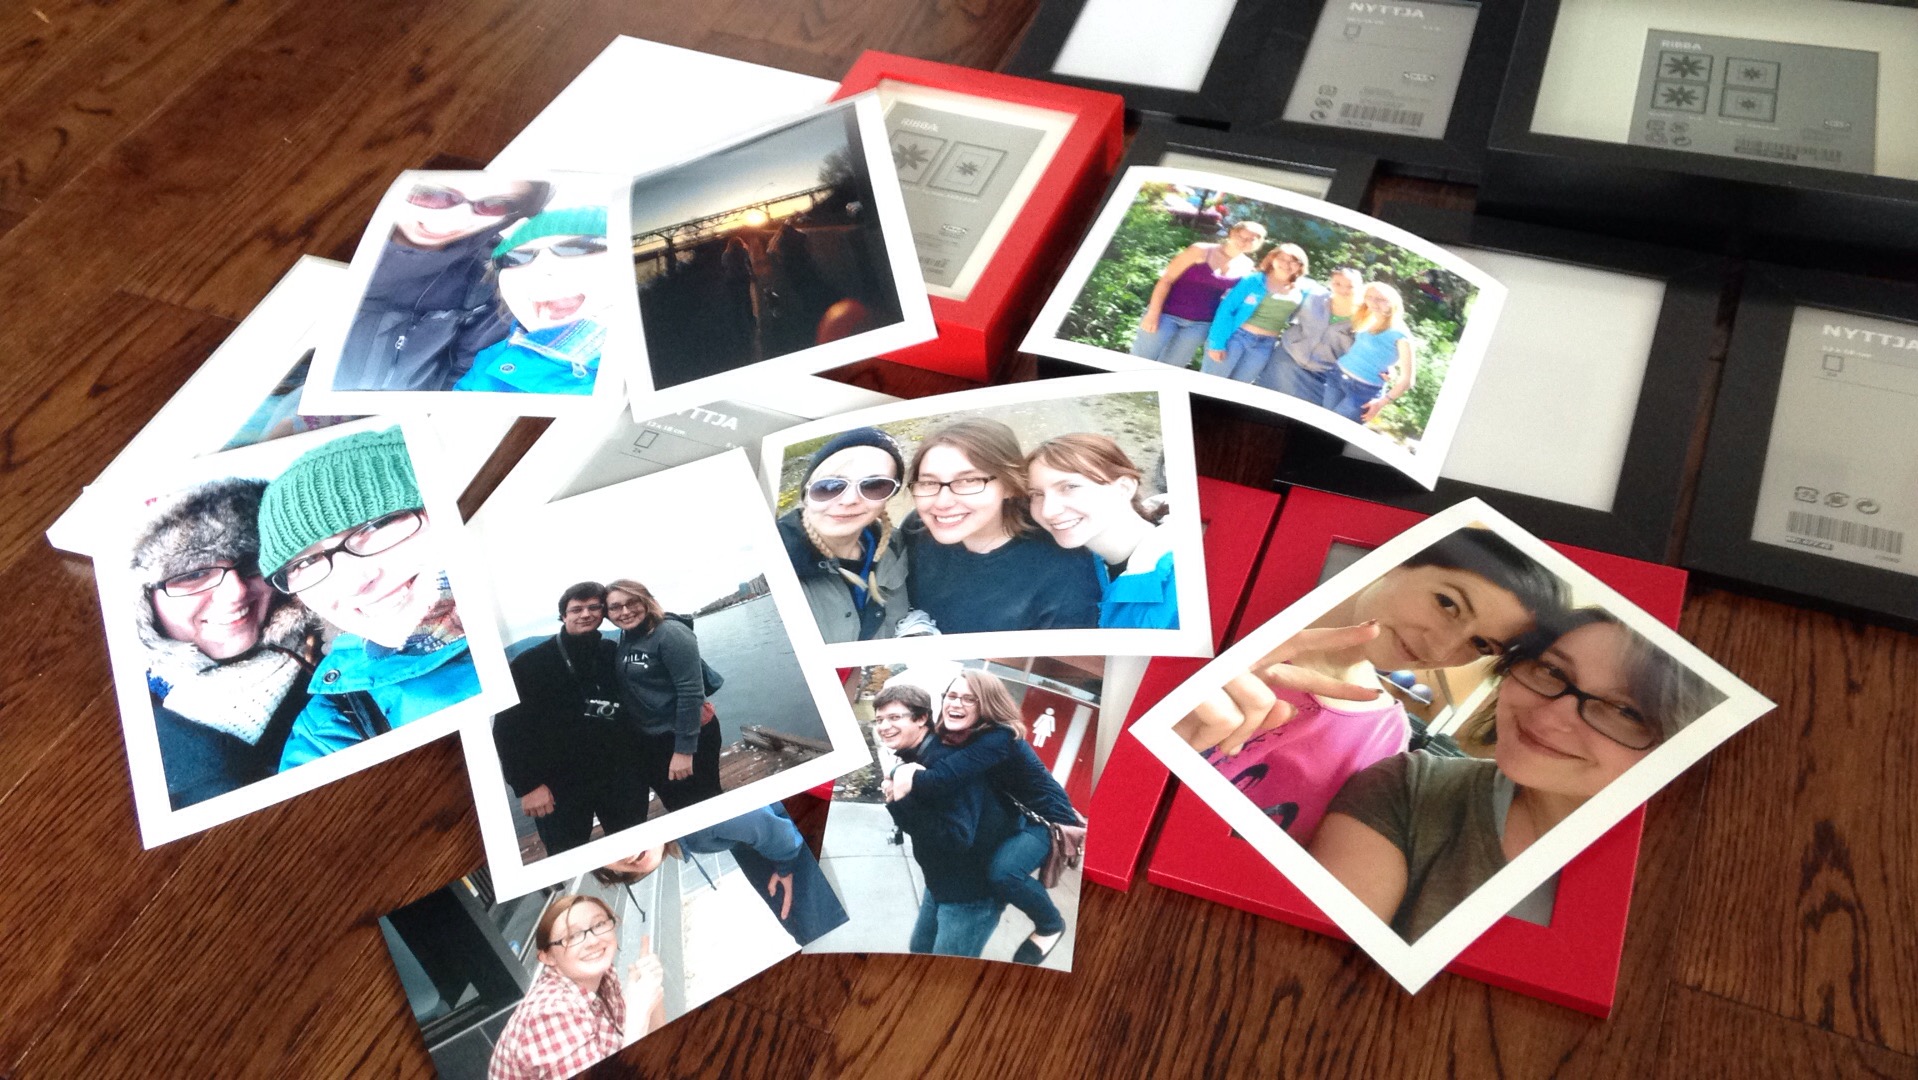
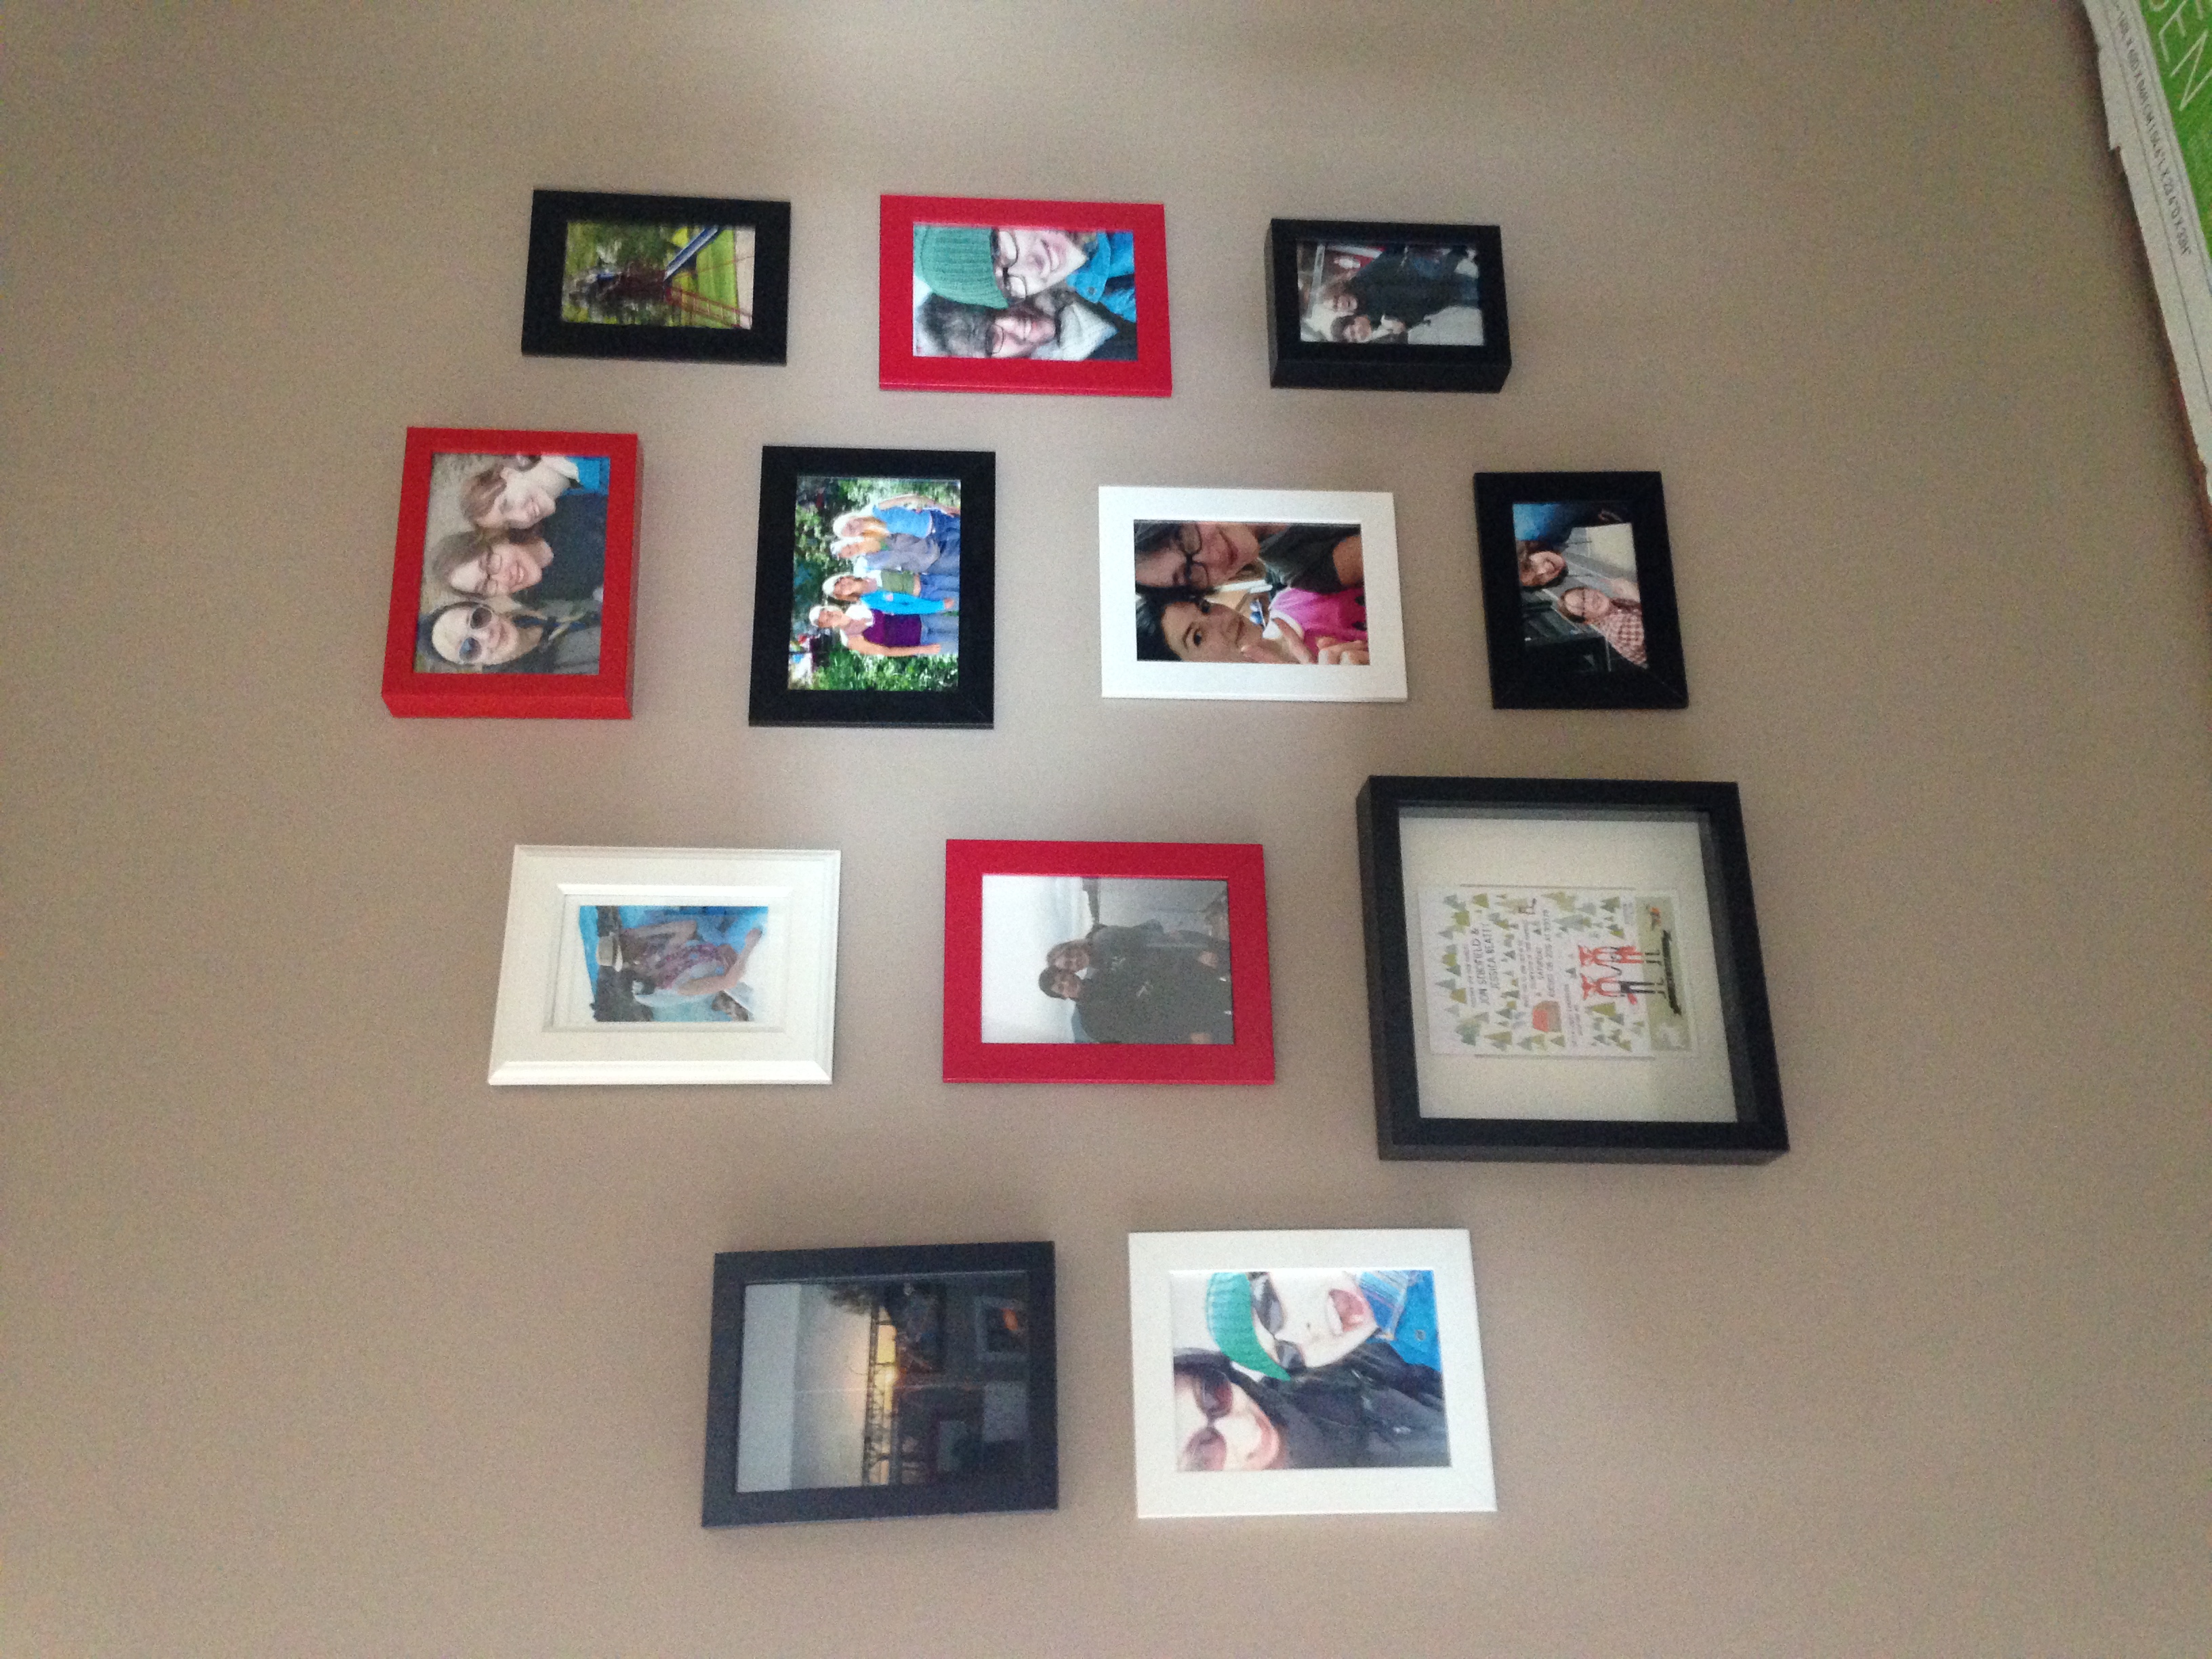
So I planned out what photos I wanted to print. Turned out there were 27 of them. It was time to cull the memories! Awkward! Instead I decided to head to IKEA for all the chea... I mean modern style frames. Success! 17 frames for under 100$. (I assume that's a good deal. >>) 

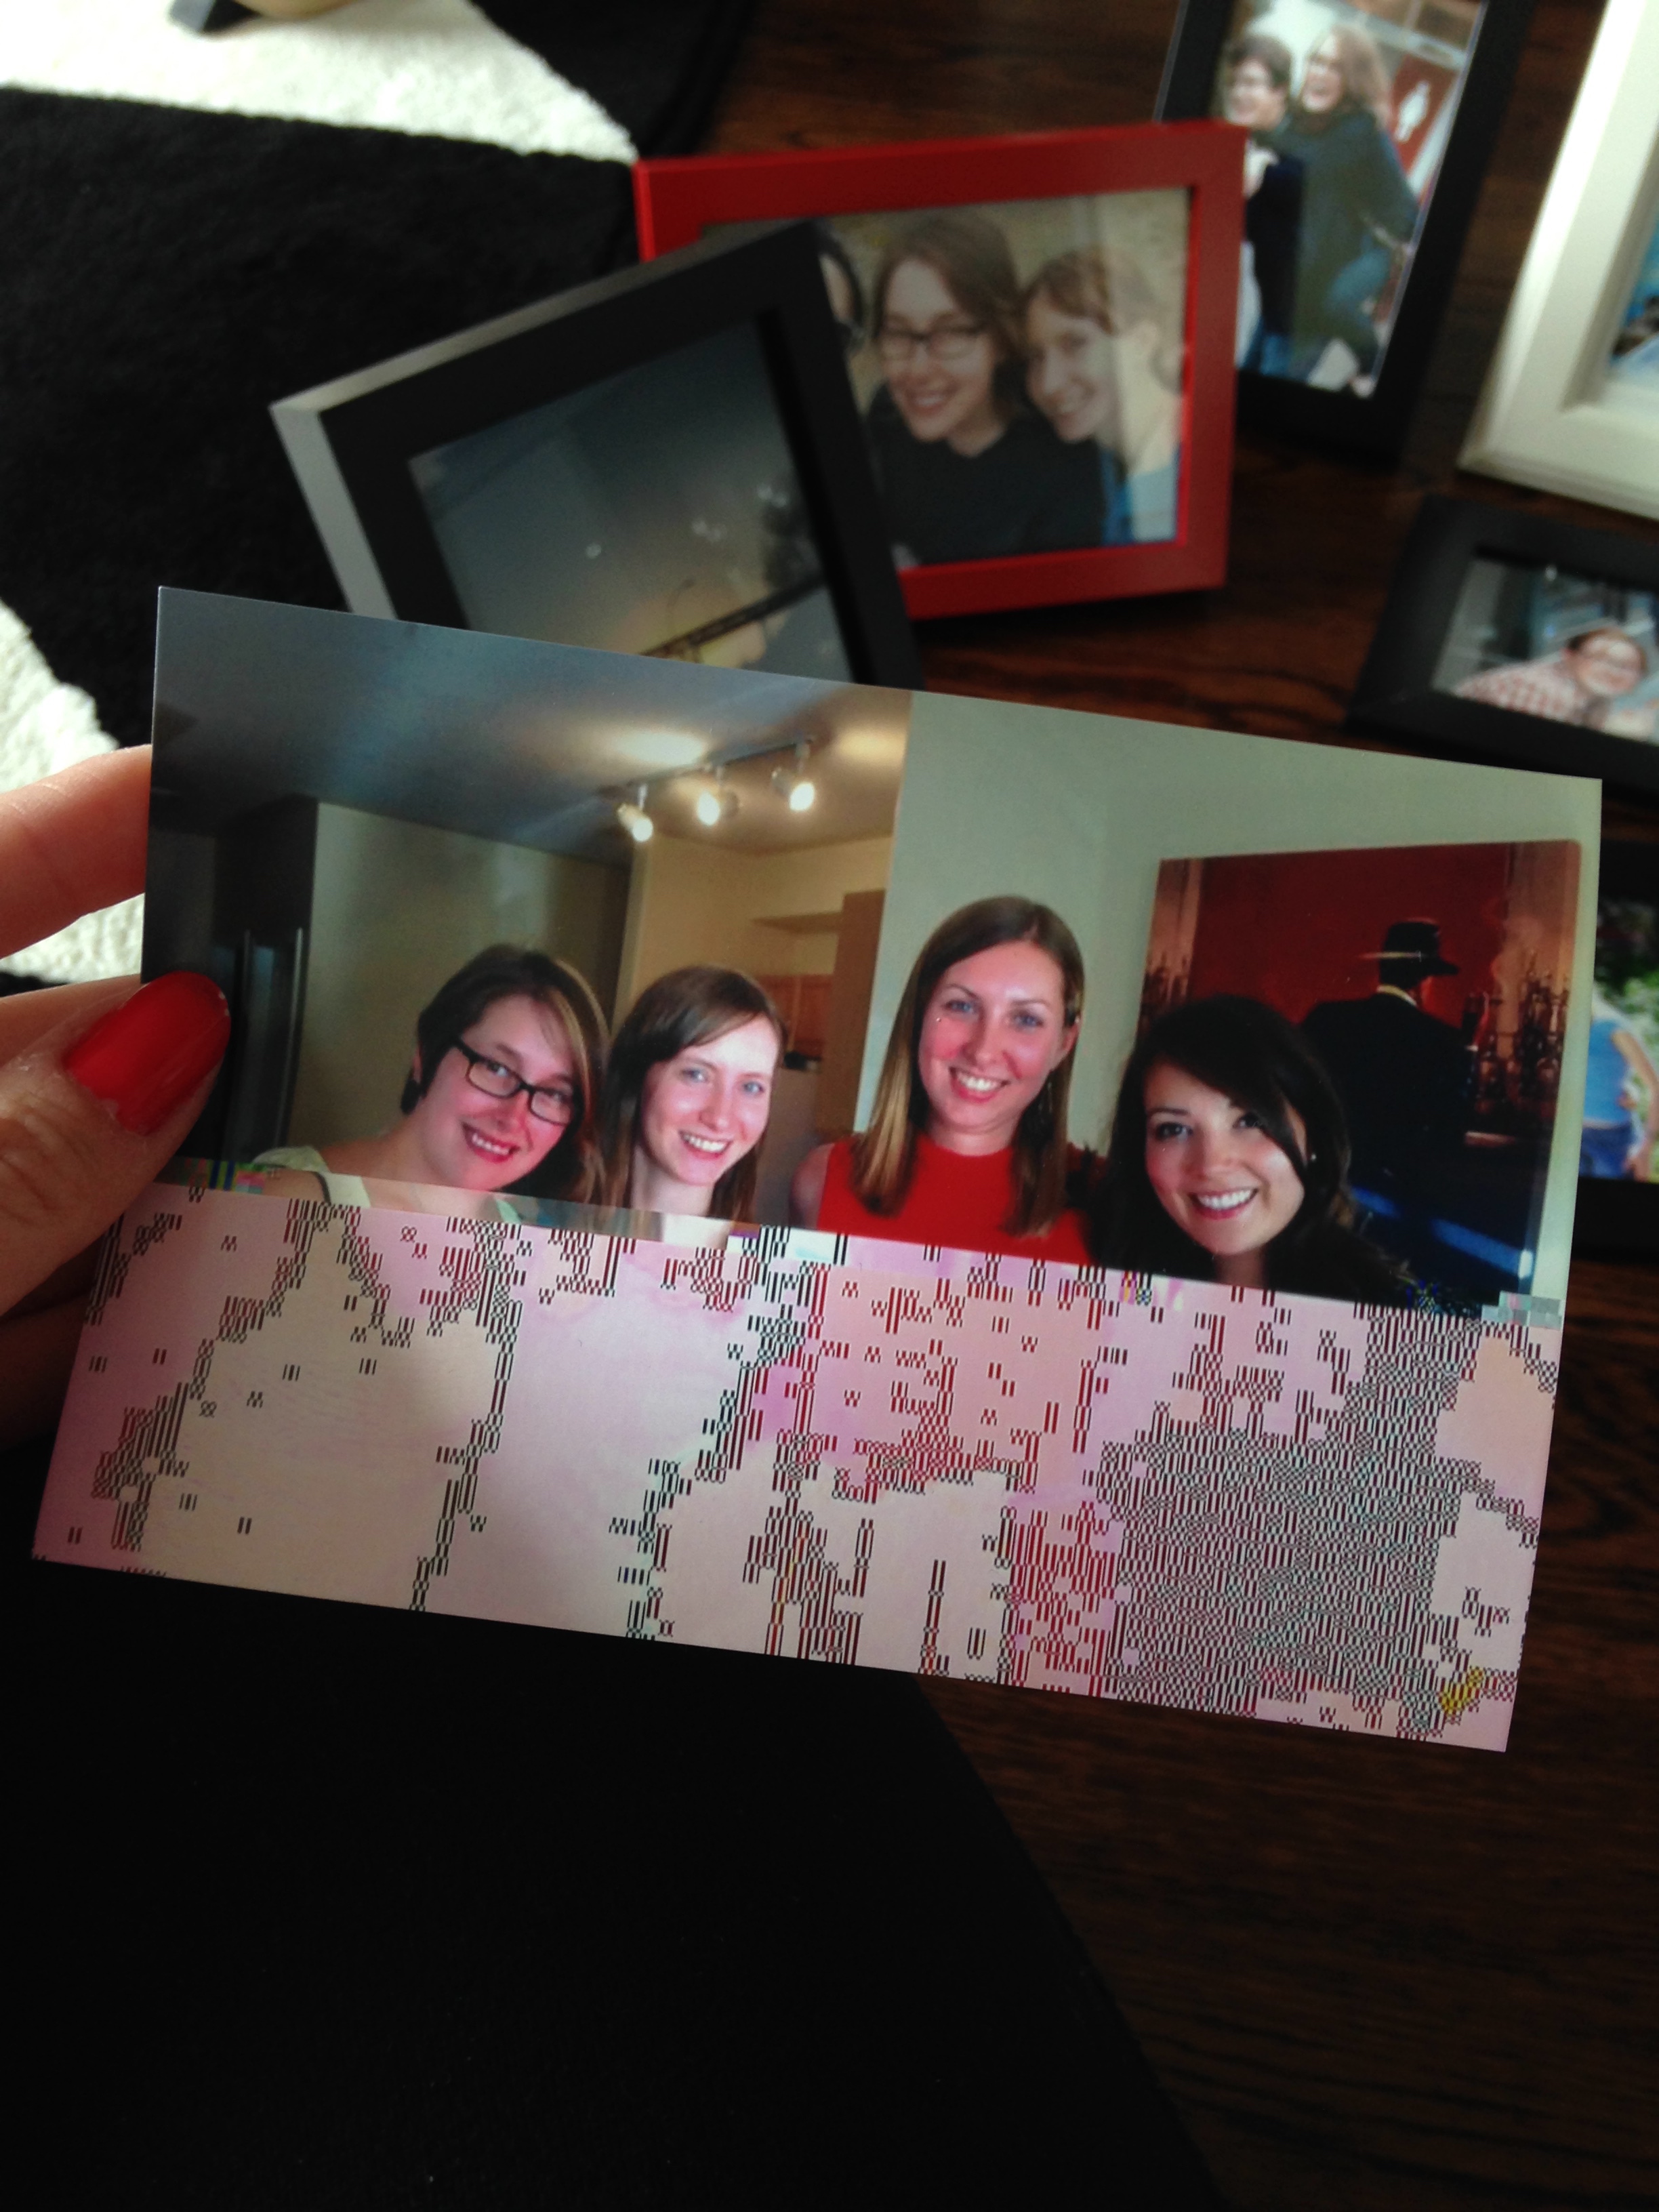
Now that I had my number of pictures picked out, it was photo printing time! Back in AB, it was easiest to do a 1-hour photo print at the LDs (London Drugs) buuuuut there is no such thing in ON apparently. Luckily-ish there were instant kodak print machines at the grocery store that would serve their purpose. Only had one minor issue with one of my prints: The Matrix bled through. 

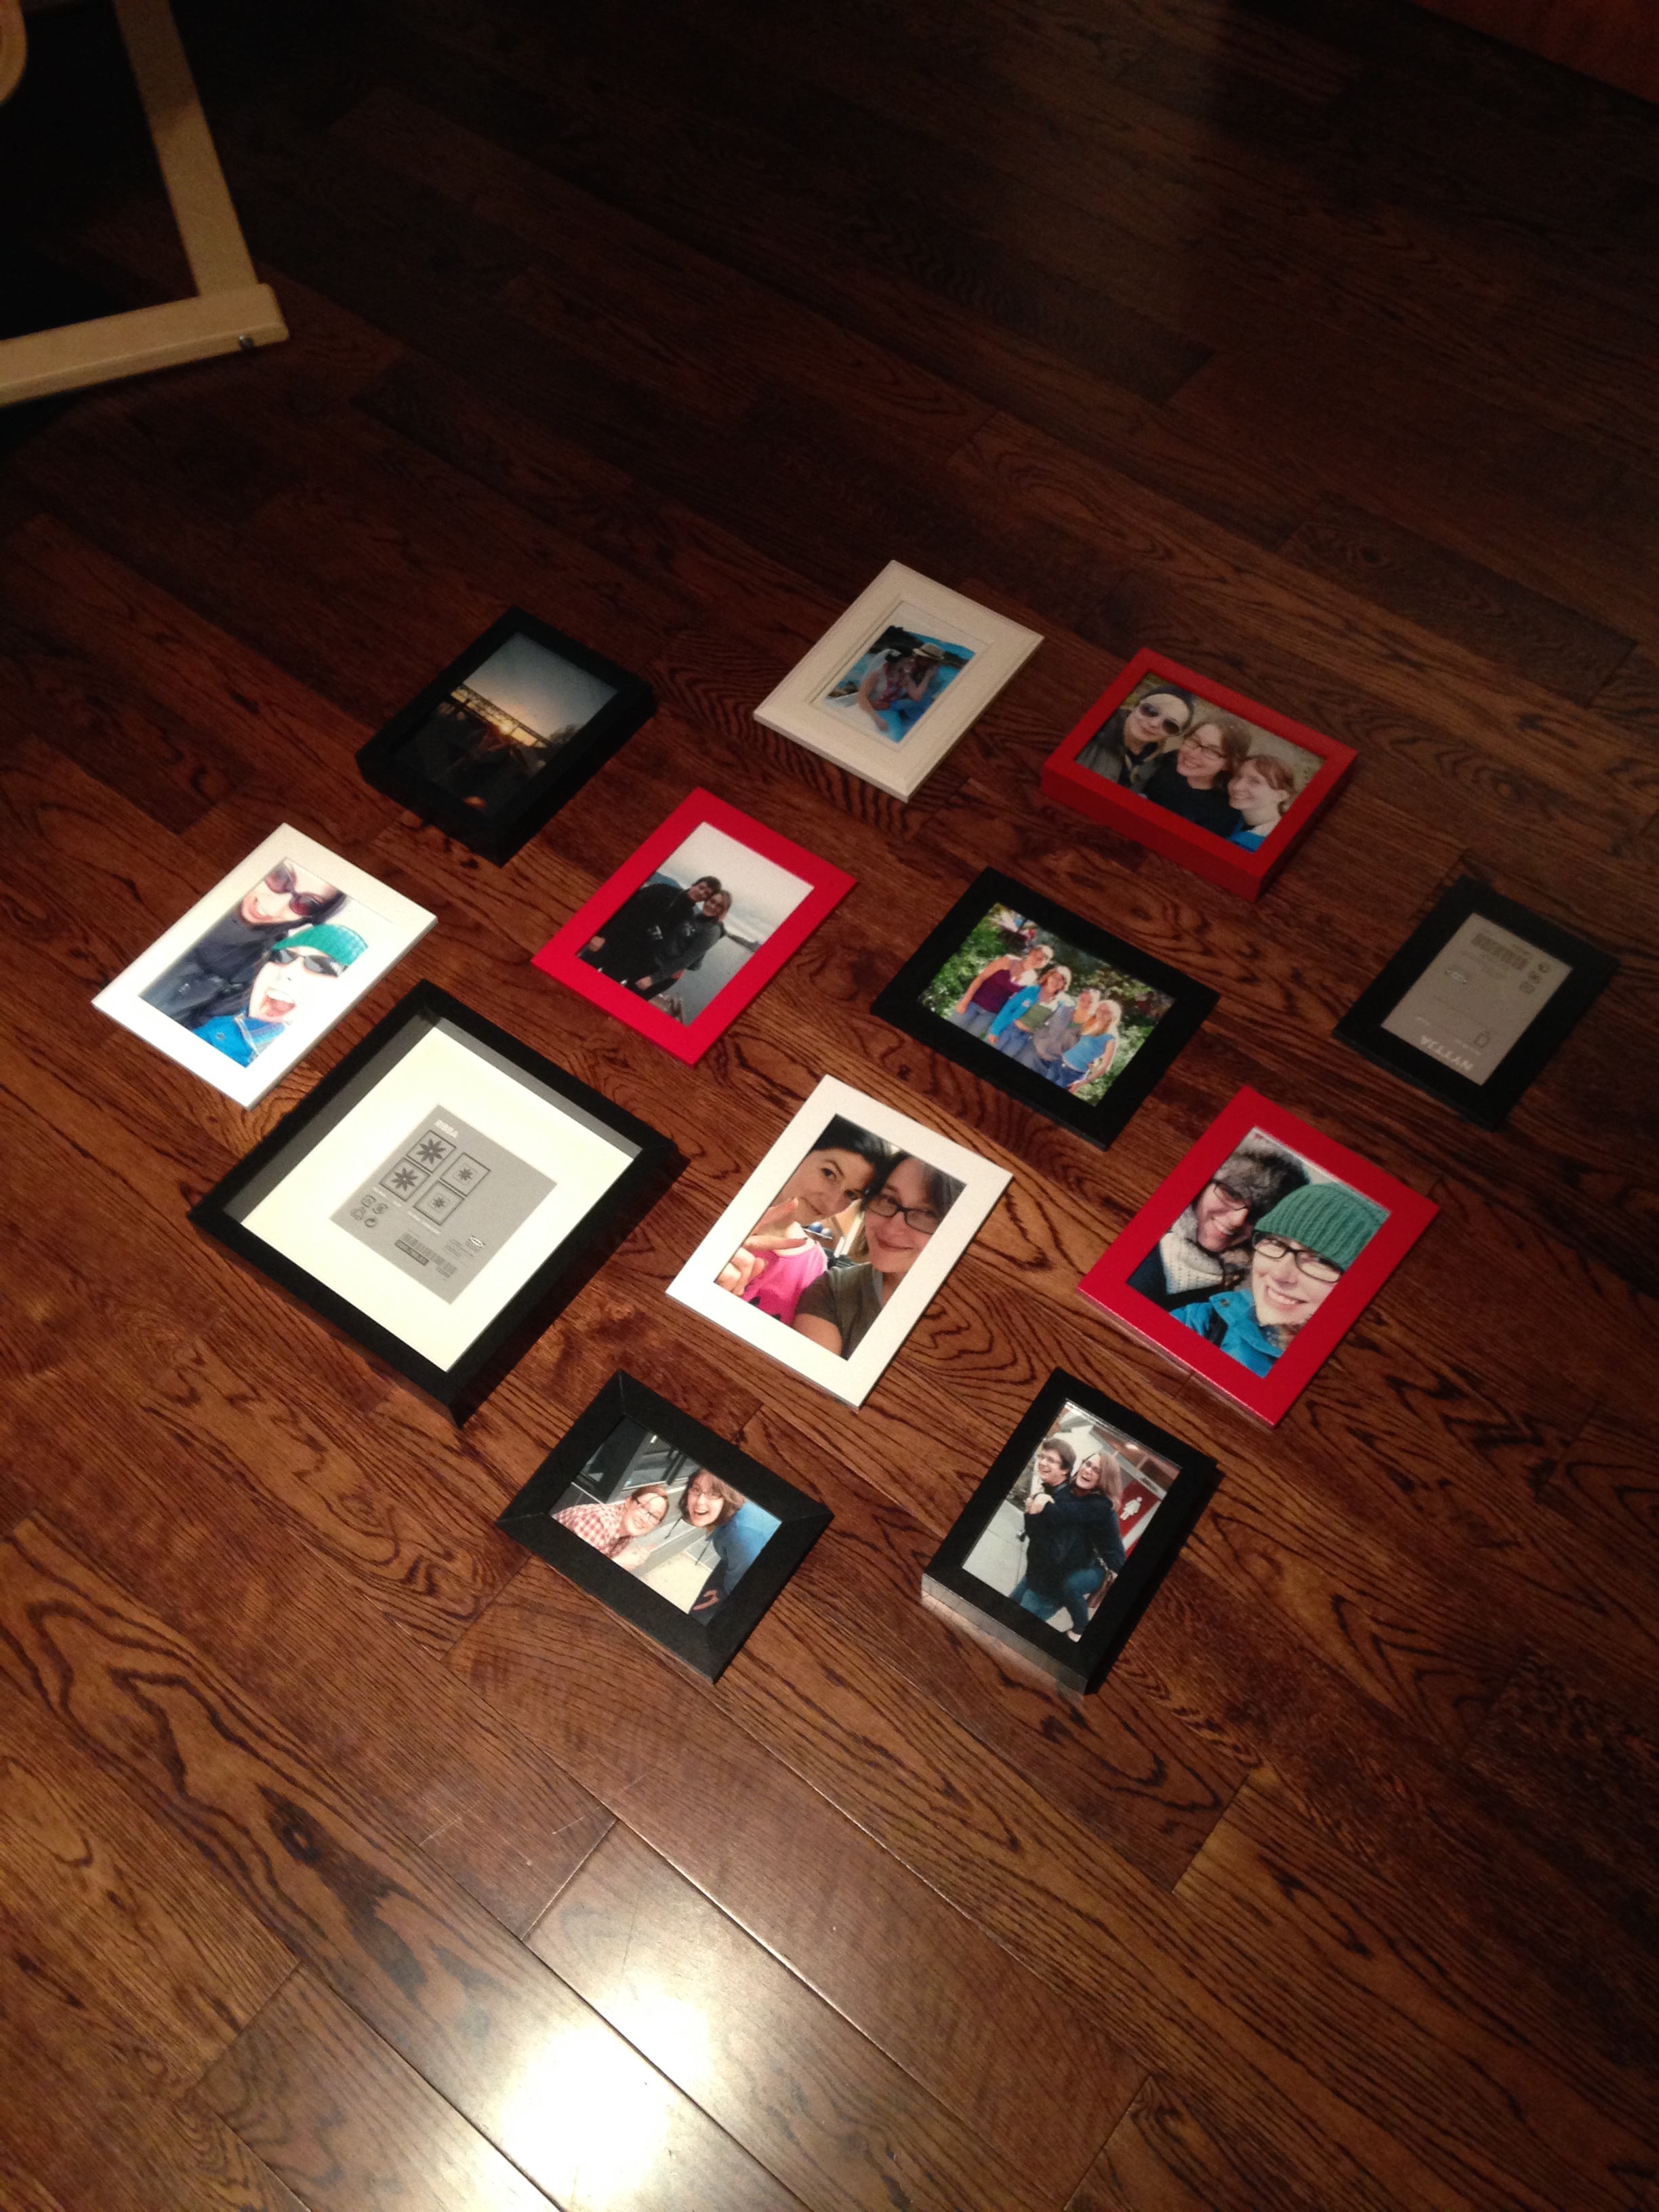
After writing dates and peoples names on the back of photos (cause I'm 98), I got all the photos in their frame homes. The article said to lay out the photos the way they will hang on the wall and trace their size and positions onto paper. Which I obviously kinda only did half of. Foreshadowing achieved! I laid out the pictures and then, working in lines, hung them up using the frame edges as spacers. Worked very well actually! Yay!

Now I have many a smiling face staring at me when I leave and come home. Miss all y'all. <3

Cheers!

-Andrea 

The Half-Assed Hobbyist

The Cheesecake

Dinner's at 6!

Dinner's at 6!

This past easter, I put on a dinner party. Main reason (we're not religious in the slightest): I wanted turkey. So I cooked a 14lbs turkey with all the fixings and had some friends come to enjoy cocktails and appies and, what turned out to honestly be the main attraction, a Spumoni Cheesecake.

I'd made this cheesecake recipe before, back when I was working in the test kitchen at the Blue Flame Kitchen in Edmonton. All I really remembered about it though was that it was mind blowingly good. And for someone that's lactose-intolerant to want to eat a cheesecake, it is a big thing. 

Below is the recipe, adapted from the BFK website. But really, the pictures and smiles speak for themselves. 

Spumoni Cheesecake

Crust
6 shortcake biscuits, coarsely broken (about 1 cup)
1 cup shelled roasted pistachios
1/4 cup butter, chilled and cubed
1 tbsp sugar

Filling
24 oz cream cheese, cubed and softened
1 cup red candied cherries
3/4 cup sugar
1/3 cup whipping cream
3 eggs
2 tsp vanilla

1 cup chopped candied mixed fruit

Topping
1 1/2 cups sour cream
1/4 cup sugar
2 squares bittersweet chocolate, chopped, melted and cooled (~4 mins in microwave on low)
1 tsp vanilla

  1. Preheat oven to 350F. Grease a 10 inch springform pan.
  2. To prepare crust, place biscuits, pistachios, butter and sugar in a food processor. Process, using an on/off motion, until mixture is crumbly. Press mixture evenly onto bottom of the prepared pan. Bake crust for 10 minutes. Cool crust completely in pan on a rack. 
  3. Reduce oven temperature to 325F. 
  4. To prepare filling, place filling ingredients (cream cheese through vanilla) in a food processor. Process, using an on/off motion, until combined. Continue blending until mixture is smooth and pale pink. Transfer to a bowl and stir in candied mixed fruit. Pour filling into prepared pan, over crust.
  5. Bake cheesecake for 1 hour or until centre of cheesecake is puffed and jiggles slightly when shaken. 
  6. While cheesecake is baking, take sour cream out of the fridge, measure it into a bowl, and let sit on the counter to come to room temperature. 
  7. Start preparing the topping about 10 minutes before cheesecake is done. To make topping,  combine sour cream, sugar, cooled melted chocolate and vanilla. Remove cheesecake from oven and spread topping evenly over cheesecake. 
  8. Continue baking for 10 minutes. Remove cheesecake from oven and cool completely on a rack. Cover and refrigerate cake for 8 hours or up to 24 hours. 
  9. To serve, remove sides of springform pan. Decorate top of cake with pistachios and cherries. Cut cake with a warm knife. 

So if you're in the mood for a crazy good dessert that will make you fight your inner glutton (so you stop eating cheesecake for breakfast for the rest of the week), defs try making this cheesecake. 

Much recommended.

-Andrea (and inner glutton)

The Half-Assed Hobbyist

Reupholstery: A Challenge in Forethought

I have a beautiful teak dining set given to me by my Uncle. The set was given to him and my late-Aunt as a wedding gift some 27 years ago. The set was originally ordered by Oma, so, it has a little bit of sentimental value, you might say. Actually, if you ask the BF, he'll say it has a lot. (The dining set is the main reason why we packed the apartment up into a POD when moving from AB, instead of just buying all new things when we got to ON.)

Despite my love for the set (and the memories of thanksgiving dinners had around it), it's time for a new look. The upholstery was redone (supposedly) in the late 80s, and it shows. Although I still like the pastel-y blue linen zig-zag weave, the seats are stained and the padding nearly disintegrated. So its was time for some TLC and a sewing machine attack. 

I'd been looking for fabric for quite a long time (this reupholstery idea was initially kindled about 3 years ago by our then upstairs neighbours, after I saw the success they had had with reupholstering a dining chair of their own). But the BF and I could never decide on a look that we both liked. I wasn't until, in the depths of Queen Street's fabric lair, we found a durable and thoroughly "inoffensive" fabric we could both live with. So the Grand Plans began. 

Now, for those that have read my blog and those who know me, I typically dive into things head first. Learn on the go! I suppose I should have probably stopped and read up on some upholstery techniques but my blog isn't named The Half-Assed Hobbyist for nothing. I started by tearing off the old upholstery (kinda delicately... kinda) in order to make a pattern for the chair back. First thing I noticed was the staples previously used were brass. Fancy-pants staples. Defs didn't have any of those. Only stainless steel. Second thing I noticed: the foam cushioning had indeed disintegrated and, as it got all over me, I super hoped it wasn't made of anything too poisonous. Third thing I noticed, once the fabric was off the "foam", the previous upholsters had wrapped the foam in thin linen. Whether to keep the foam in place or make the fabric slip on easier, I don't know. But good trick! Learning. Check. 

Next step, I traced out a pattern for the new covers. I obviously made the mistake of thinking I should iron the old upholstery flat first. Turns out it was coated in some kind of glue which has now made very good friends with my iron's plates. Upholstery - 1. Me - 0. 

Anyway, I managed to trace a pattern out of the old cover and create a new pattern and cover! Success! 

Having the pattern made and the new cover sewn was not terribly helpful as I still had quite a lot of sandy crumbly foam to try and not inhale off the chair back. To my surprise and minor delight the foam easily shluffed right off the wood, taking off the age-old glue that had once held it in place. A quick vacuum and all evidence of a yellowed foamy massacre was gone.

Finally it was time for some upholstery batting. I cut out a piece to fit around the chair back and wrapped it in a new linen securing strip. I slipped on the cover and it fit! Some slight corner adjustments to the pattern was needed but I got out my staple gun and prepared for the transformation! Unfortunately, I only Thought I had one-up on the beast called Upholstery, and it reminded me abruptly who was the master. My brand new staple gun got two staples into the newly covered chair back when a metal shearing crack stopped my project dead. Well played dining set, well played. (Current score: Upholstery - 2. Me - 0.)  

-interlude of Home Depot voyaging variety-

Back from the land of the staple having! I had bought an even heavier-duty staple gun and finished the chair back piece up and screwed it back to the chair. Success! 

I then started on the seat. While cutting the old fabric off I noticed that the seat was fancily stuffed with upholsterers batting. I defs did not have any of that. However! The batting I did buy was reasonably dense. Works for me! I cleaned off the old glue and started shaping and stapling the batting to the seat. The cover itself was a square of fabric stretched over the sides of the chair seat. So I measured enough fabric to overlap the seat evenly, with a bit to spare that I could trim off afterwards. Starting with two opposing edges I stapled across, keeping the fabric tension as even as I could. (I assume people who do this for a living have an innate sense of fabric tension... that would be a weird but relatively useful super power.) I left the corners free (about 2 inches from each point). Then I repeated the process for the two remaining edges, making sure to keep tension and leave room to finish the corners. So far so good! Last To Do was the corners! I stretched the fabric over and around the corners, attempting to avoid any creasing... which was more difficult than I thought it would be. Note for future chairs, leave a bit more room for corner fabric stretching.

Eventually I managed to get the corners stapled down, with minor creasing (shhhhh). Success! I still have the rest of the chairs to do but here's a before and after picture!

Mission Reupholster: Relative Success! Now to do the other three.... Haha. 

-Andrea

The Half-Assed Hobbyist

Seedling Update!

Quicky Update!!

My baby plants are growing up! I've thinned out the scraggly seedlings (poor little guys... it was hard to do!) and transferred the heartier guys to some new tubs where they will hopefully grow some stronger roots. 

It's exciting to see plants grow from teeny tiny dots of matter into lovely bright green splendour. Now to wait for flowers and fruit! Fingers crossed for warmer weather! 

-Andrea

The Half-Assed Hobbyist