The Veils

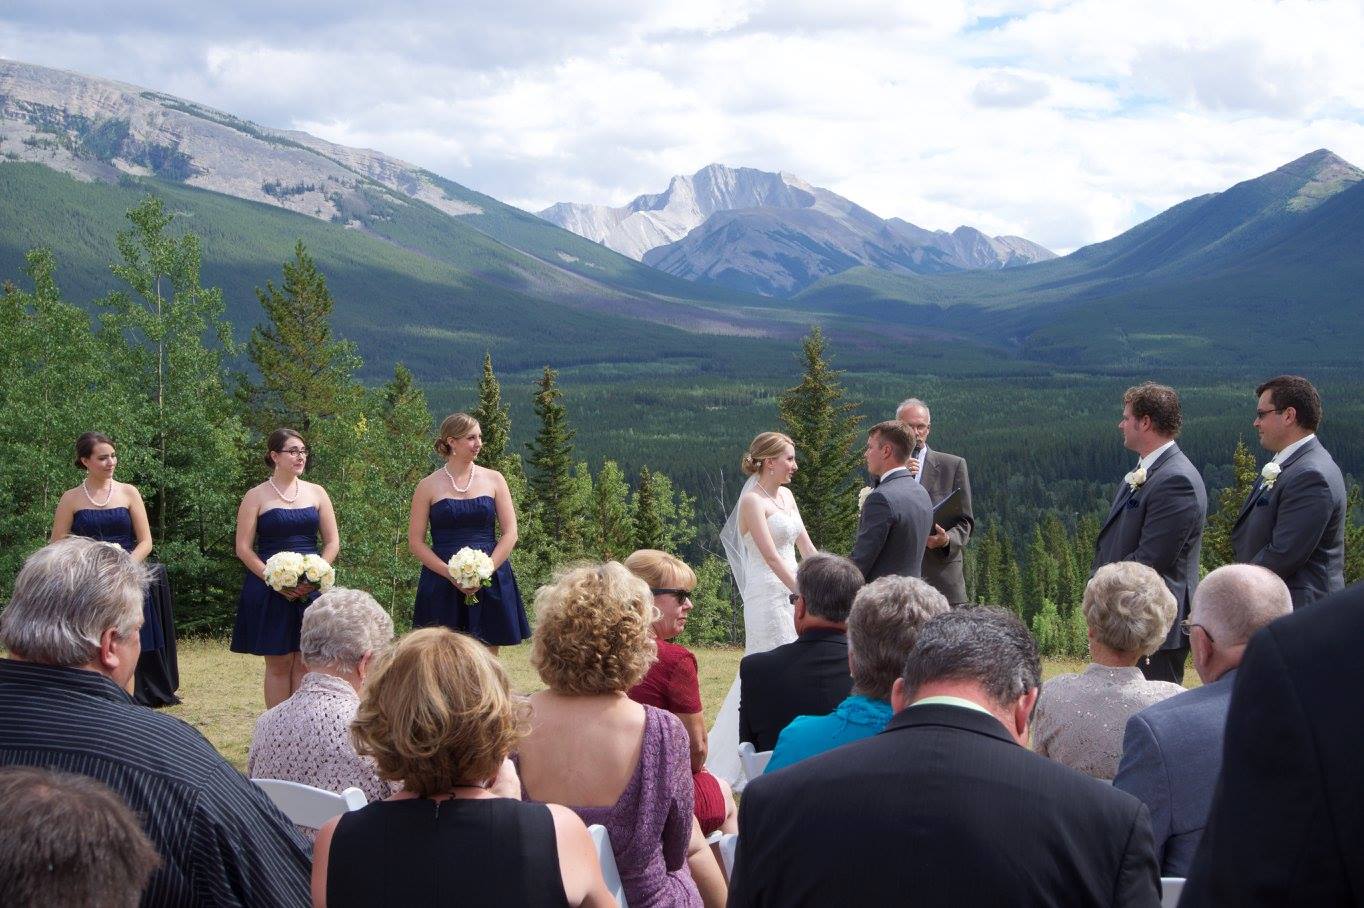
My lovely lady Jessica got married in the Beautiful Rockies of Alberta this past August. It was a simply Breathtaking ceremony, right on a cliff opening up to the Amazing view. Spectacular. I have known Jess since we were 5 years old, and I blatantly stalked her in kindergarten until she became my friend. (True friendships = someone is Always the creeper.) She is one of the most important people in my life and I'm so glad I got to share in her and Jon's day. <3 

I also got to make her veil for her too! 

Wedding veils are one of the many wedding items that are Stupid expensive. Especially when the actual cost of the mesh and comb and various trimmings is typically no where close to the sale cost of the veil. While shopping for a wedding dress with Jess, we tried on veils that were over $300. Most of which didn't even have any embellishments; straight up mesh on a comb. So I offered to make her a veil instead. 

Of course, making a veil in itself has it's issues, not helped by the fact that I moved 3100kms across the country.... But we did it! And here's my story on how. 

First thing, what kind of veil did she want? There are many different kinds (which I found out). From variations in length to how many layers to how the mesh falls either down the back or over the shoulders, there are a lot of factors.

Jess decided on a two tiered veil with a ribbon trim, similar to one she liked from a bridal shop. I started the recreation.

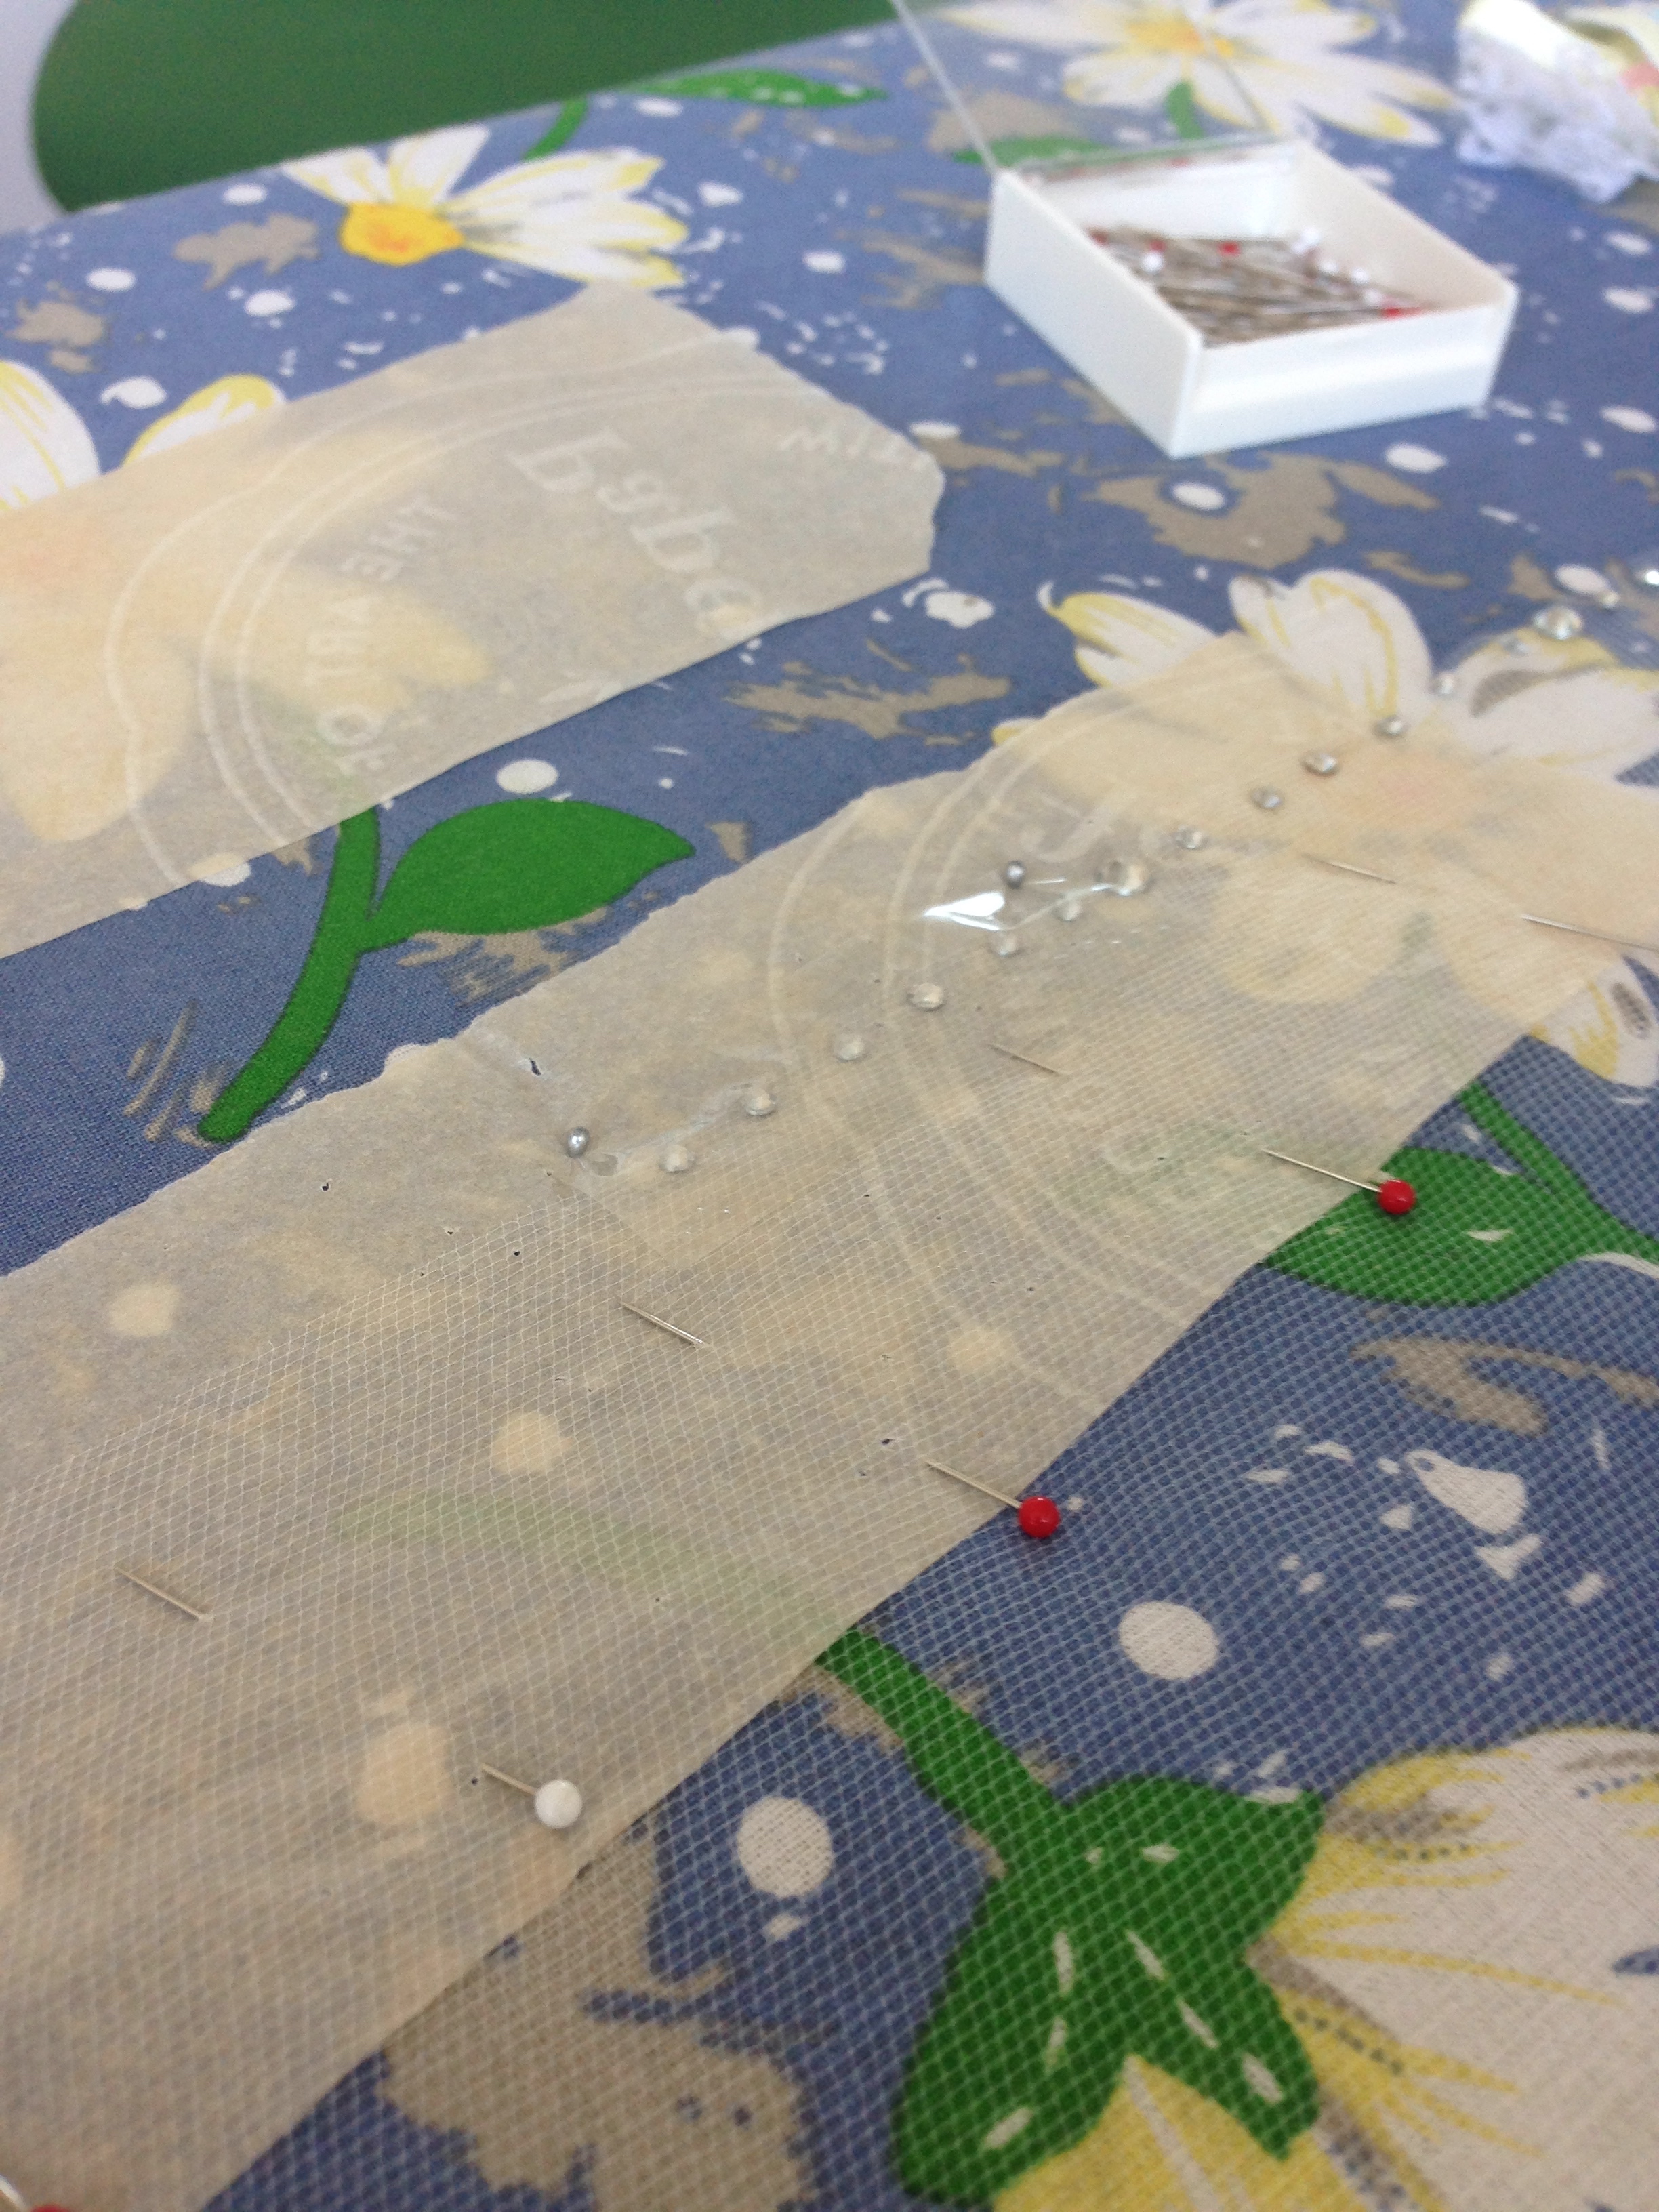
I bought the mesh from a store on Dufferin St called Finer Fabrics Ltd. The place has basically no internet presence. I actually stumbled upon it walking after I went to a very disappointing Fabricland. It was a good thing because Finer Fabrics is Amazing. The guy who owns and runs it is of the old school of tailoring and sewing. Quite a rarity in this day and age. His fabric is of the highest quality. I haven't seen quality like this since the old Sig Plach in Edmonton closed down. I bought his finest Italian ivory mesh and went on my way.

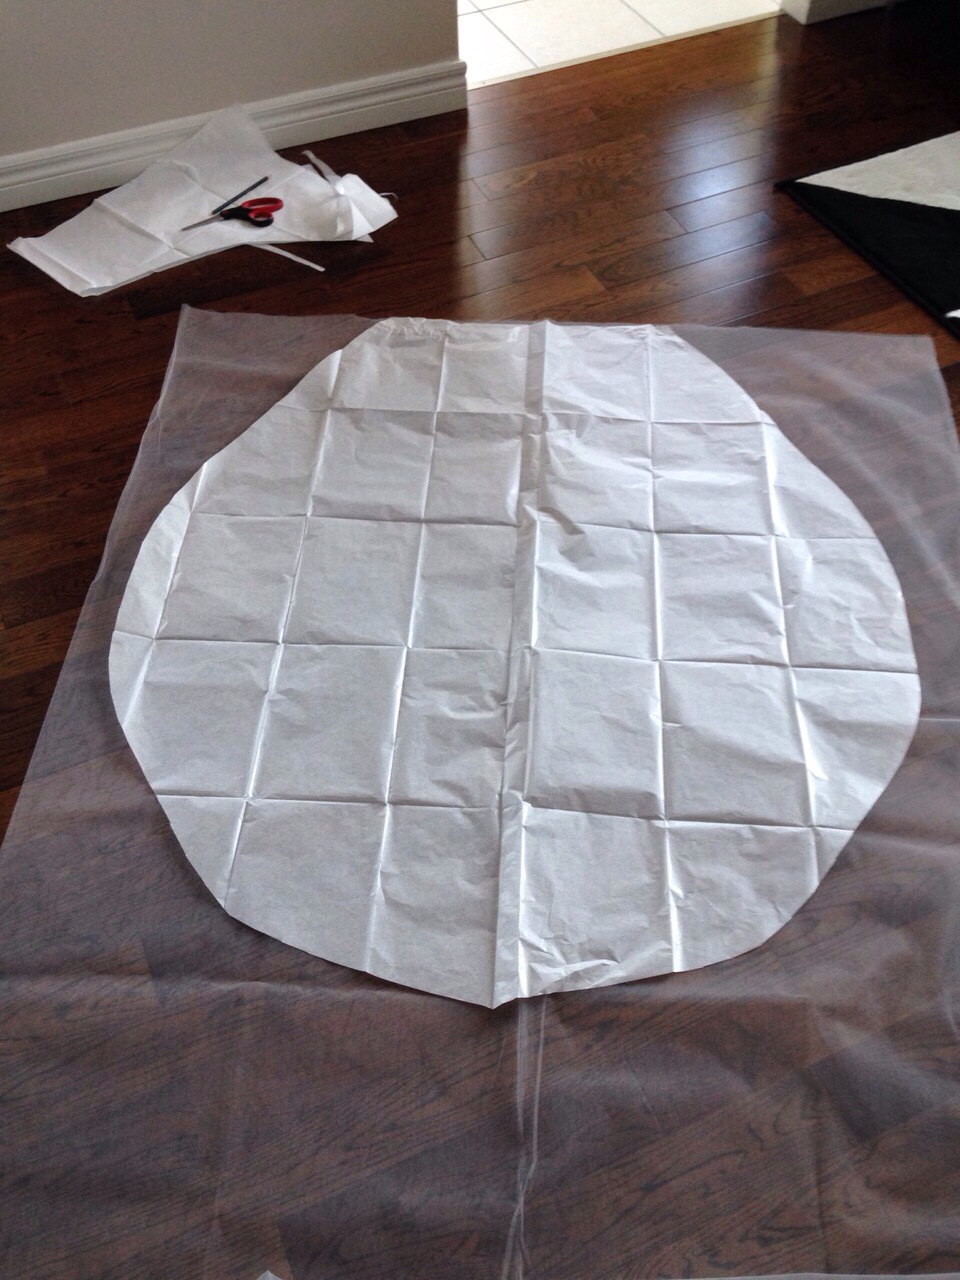
Next was to make a pattern. I have made a veil before but I went a researched patterns anyway, specifically draping. It's about at this point where I started to realize the reason veils are so flipping expensive is because they're annoying to make. Only insane people like dealing with tulle. 

Oh wait. (Hah.)

Almost Done!

Almost Done!

I found the comb at a bridal store that begrudgingly charged me $5 for it. In retrospect, I could have ordered 30 combs from China for that price, but retrospect is always so well informed. 

After I made my pattern to length, via skyped butt measurements, I cut out my mesh and basted the top pieces for gathering. Once gathered to fit onto the comb's length, I basted the two tiers together. Ready for comb attachment! I decided to make fasten the veil right to the comb. I know many designs have detachable mesh/comb, but I didn't want this sucker to go anywhere. 

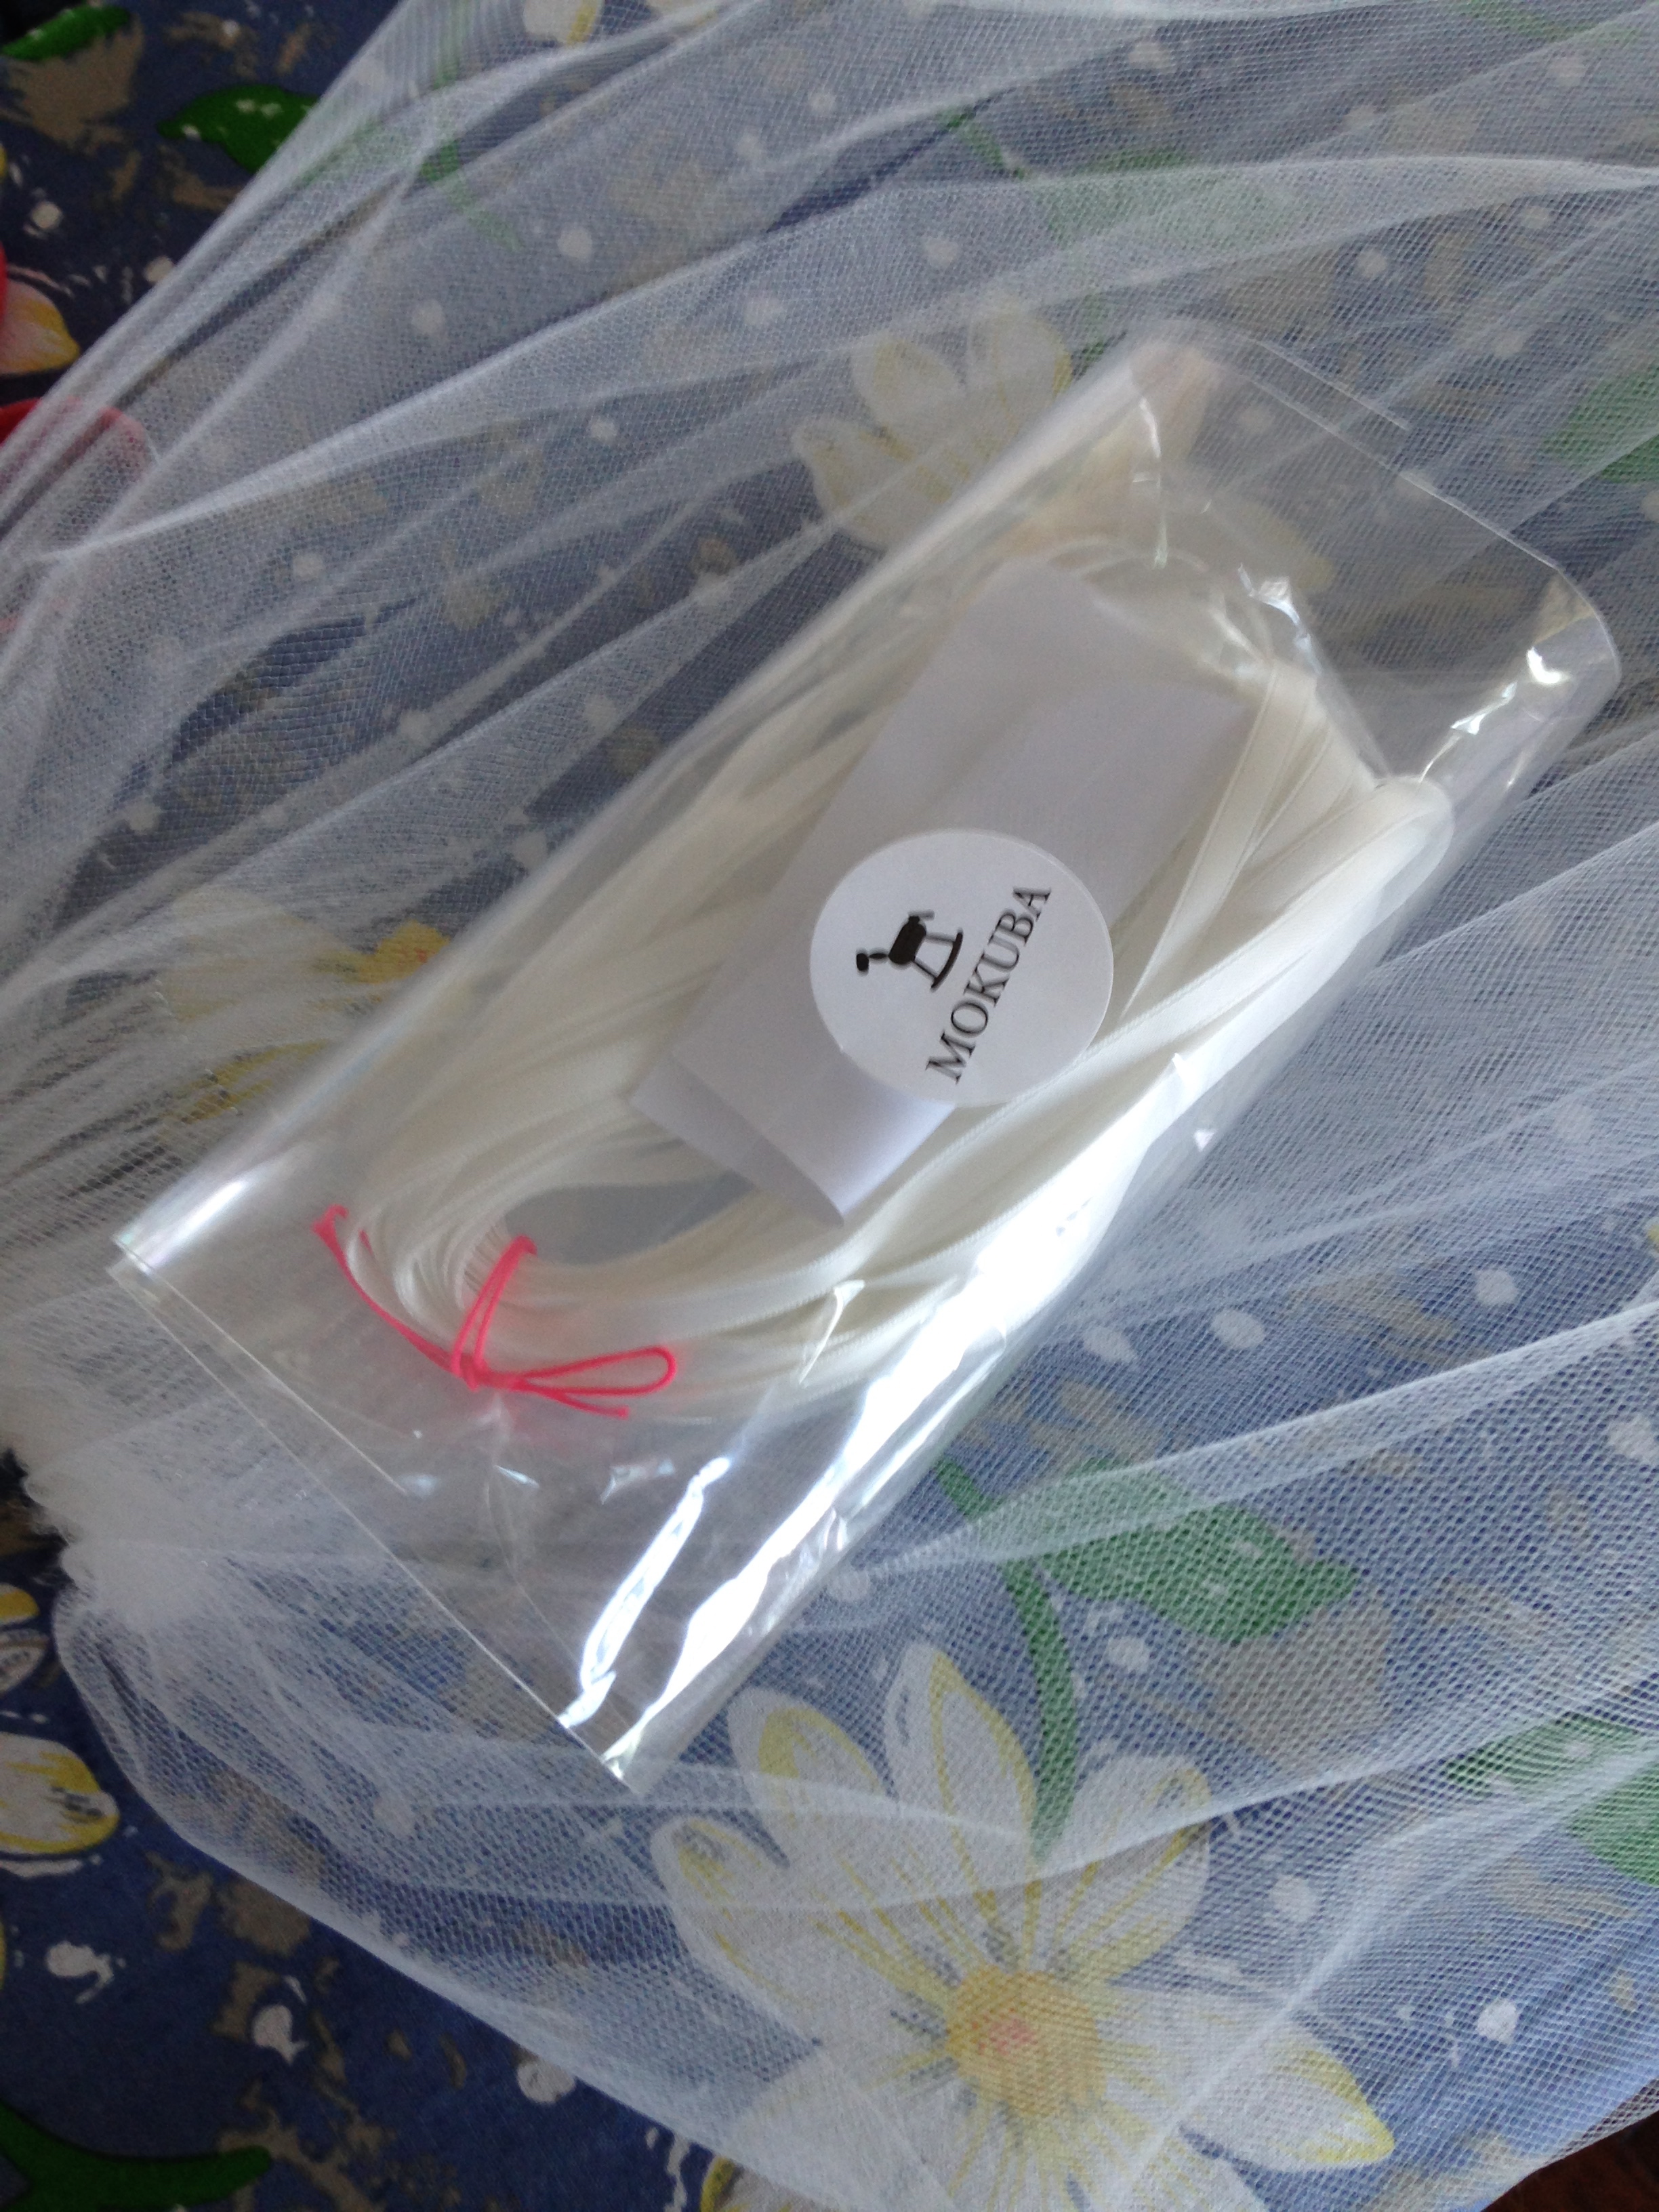
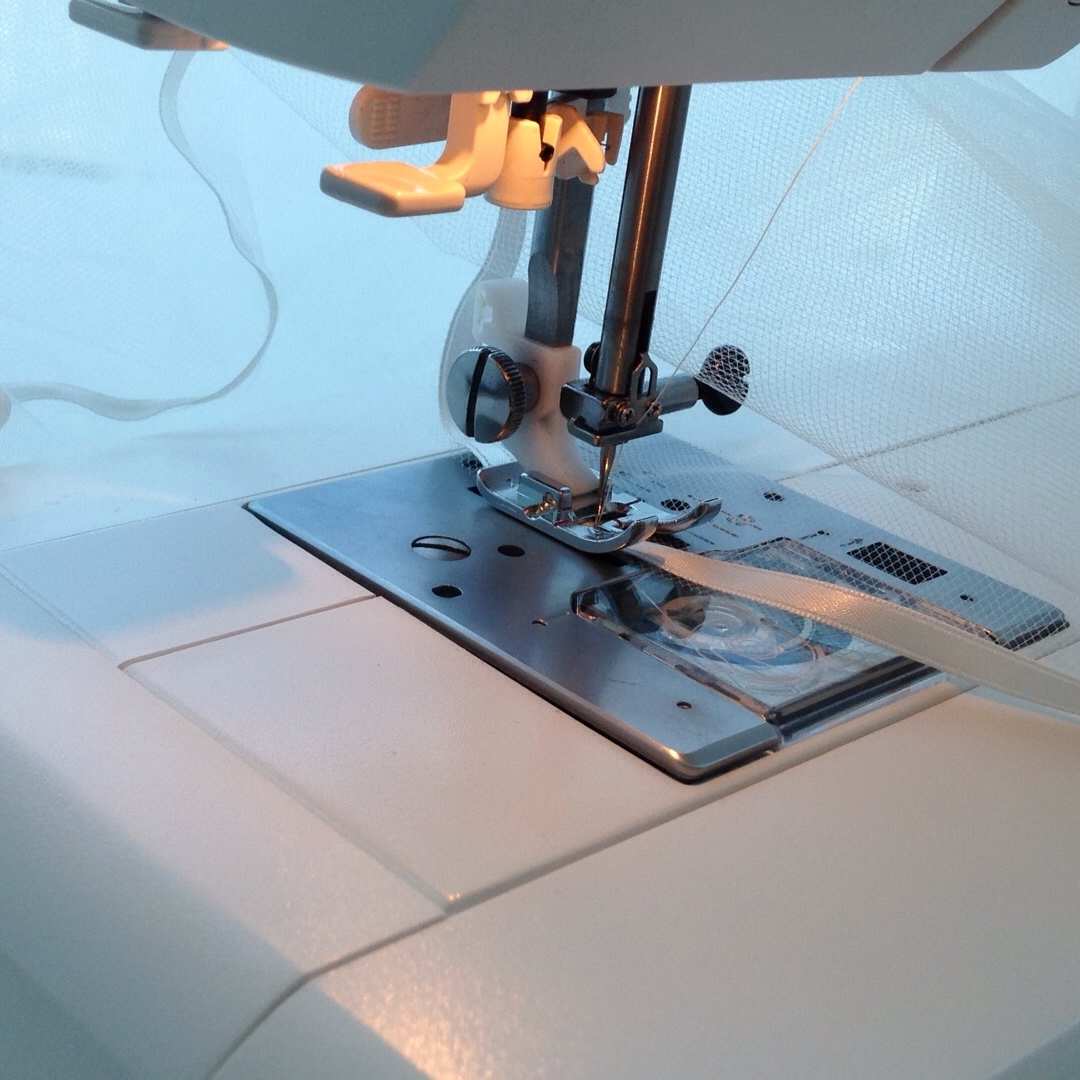
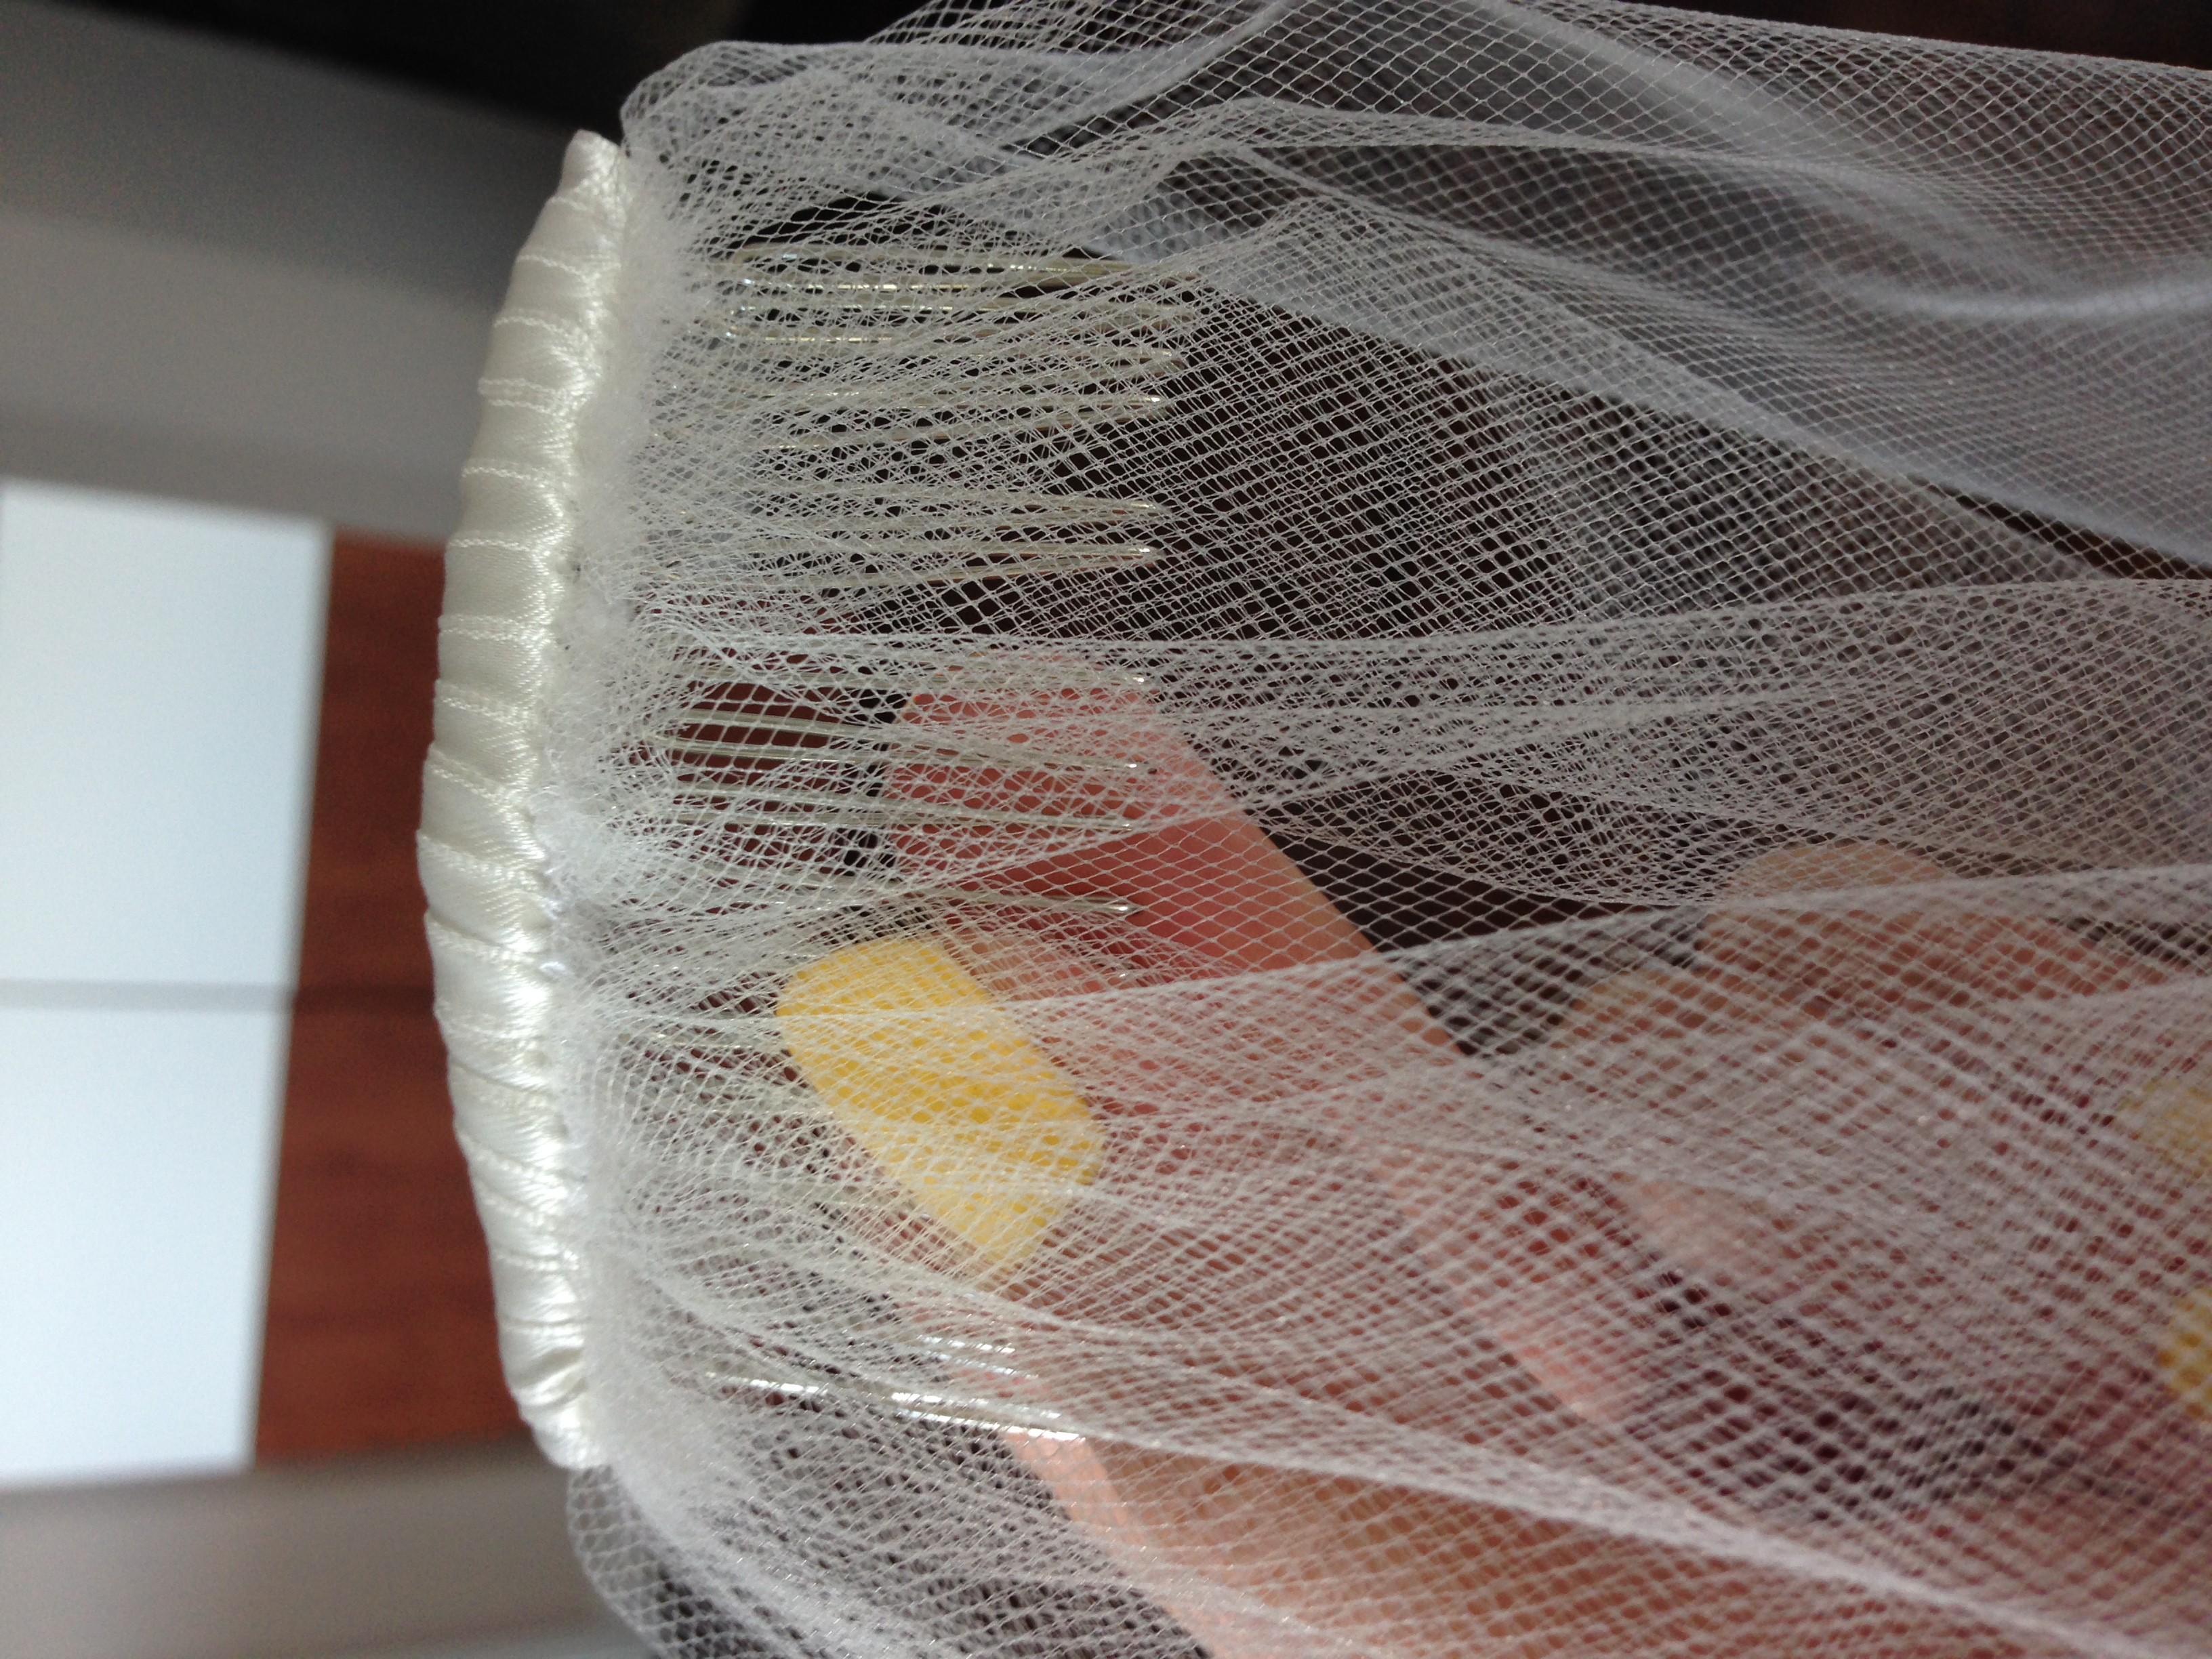
I bought the ribbon from a place called Mokuba on Queen West downtown Toronto. It was ribbon heaven. I had to leave before I got tangled in the lushious ribbon walls. At home, I contoured the veil edges in the ribbon with my handy dandy sewing machine. I used a light zigzag stitch as the mesh is stretchy and I wanted it to lay flat. Success!! 

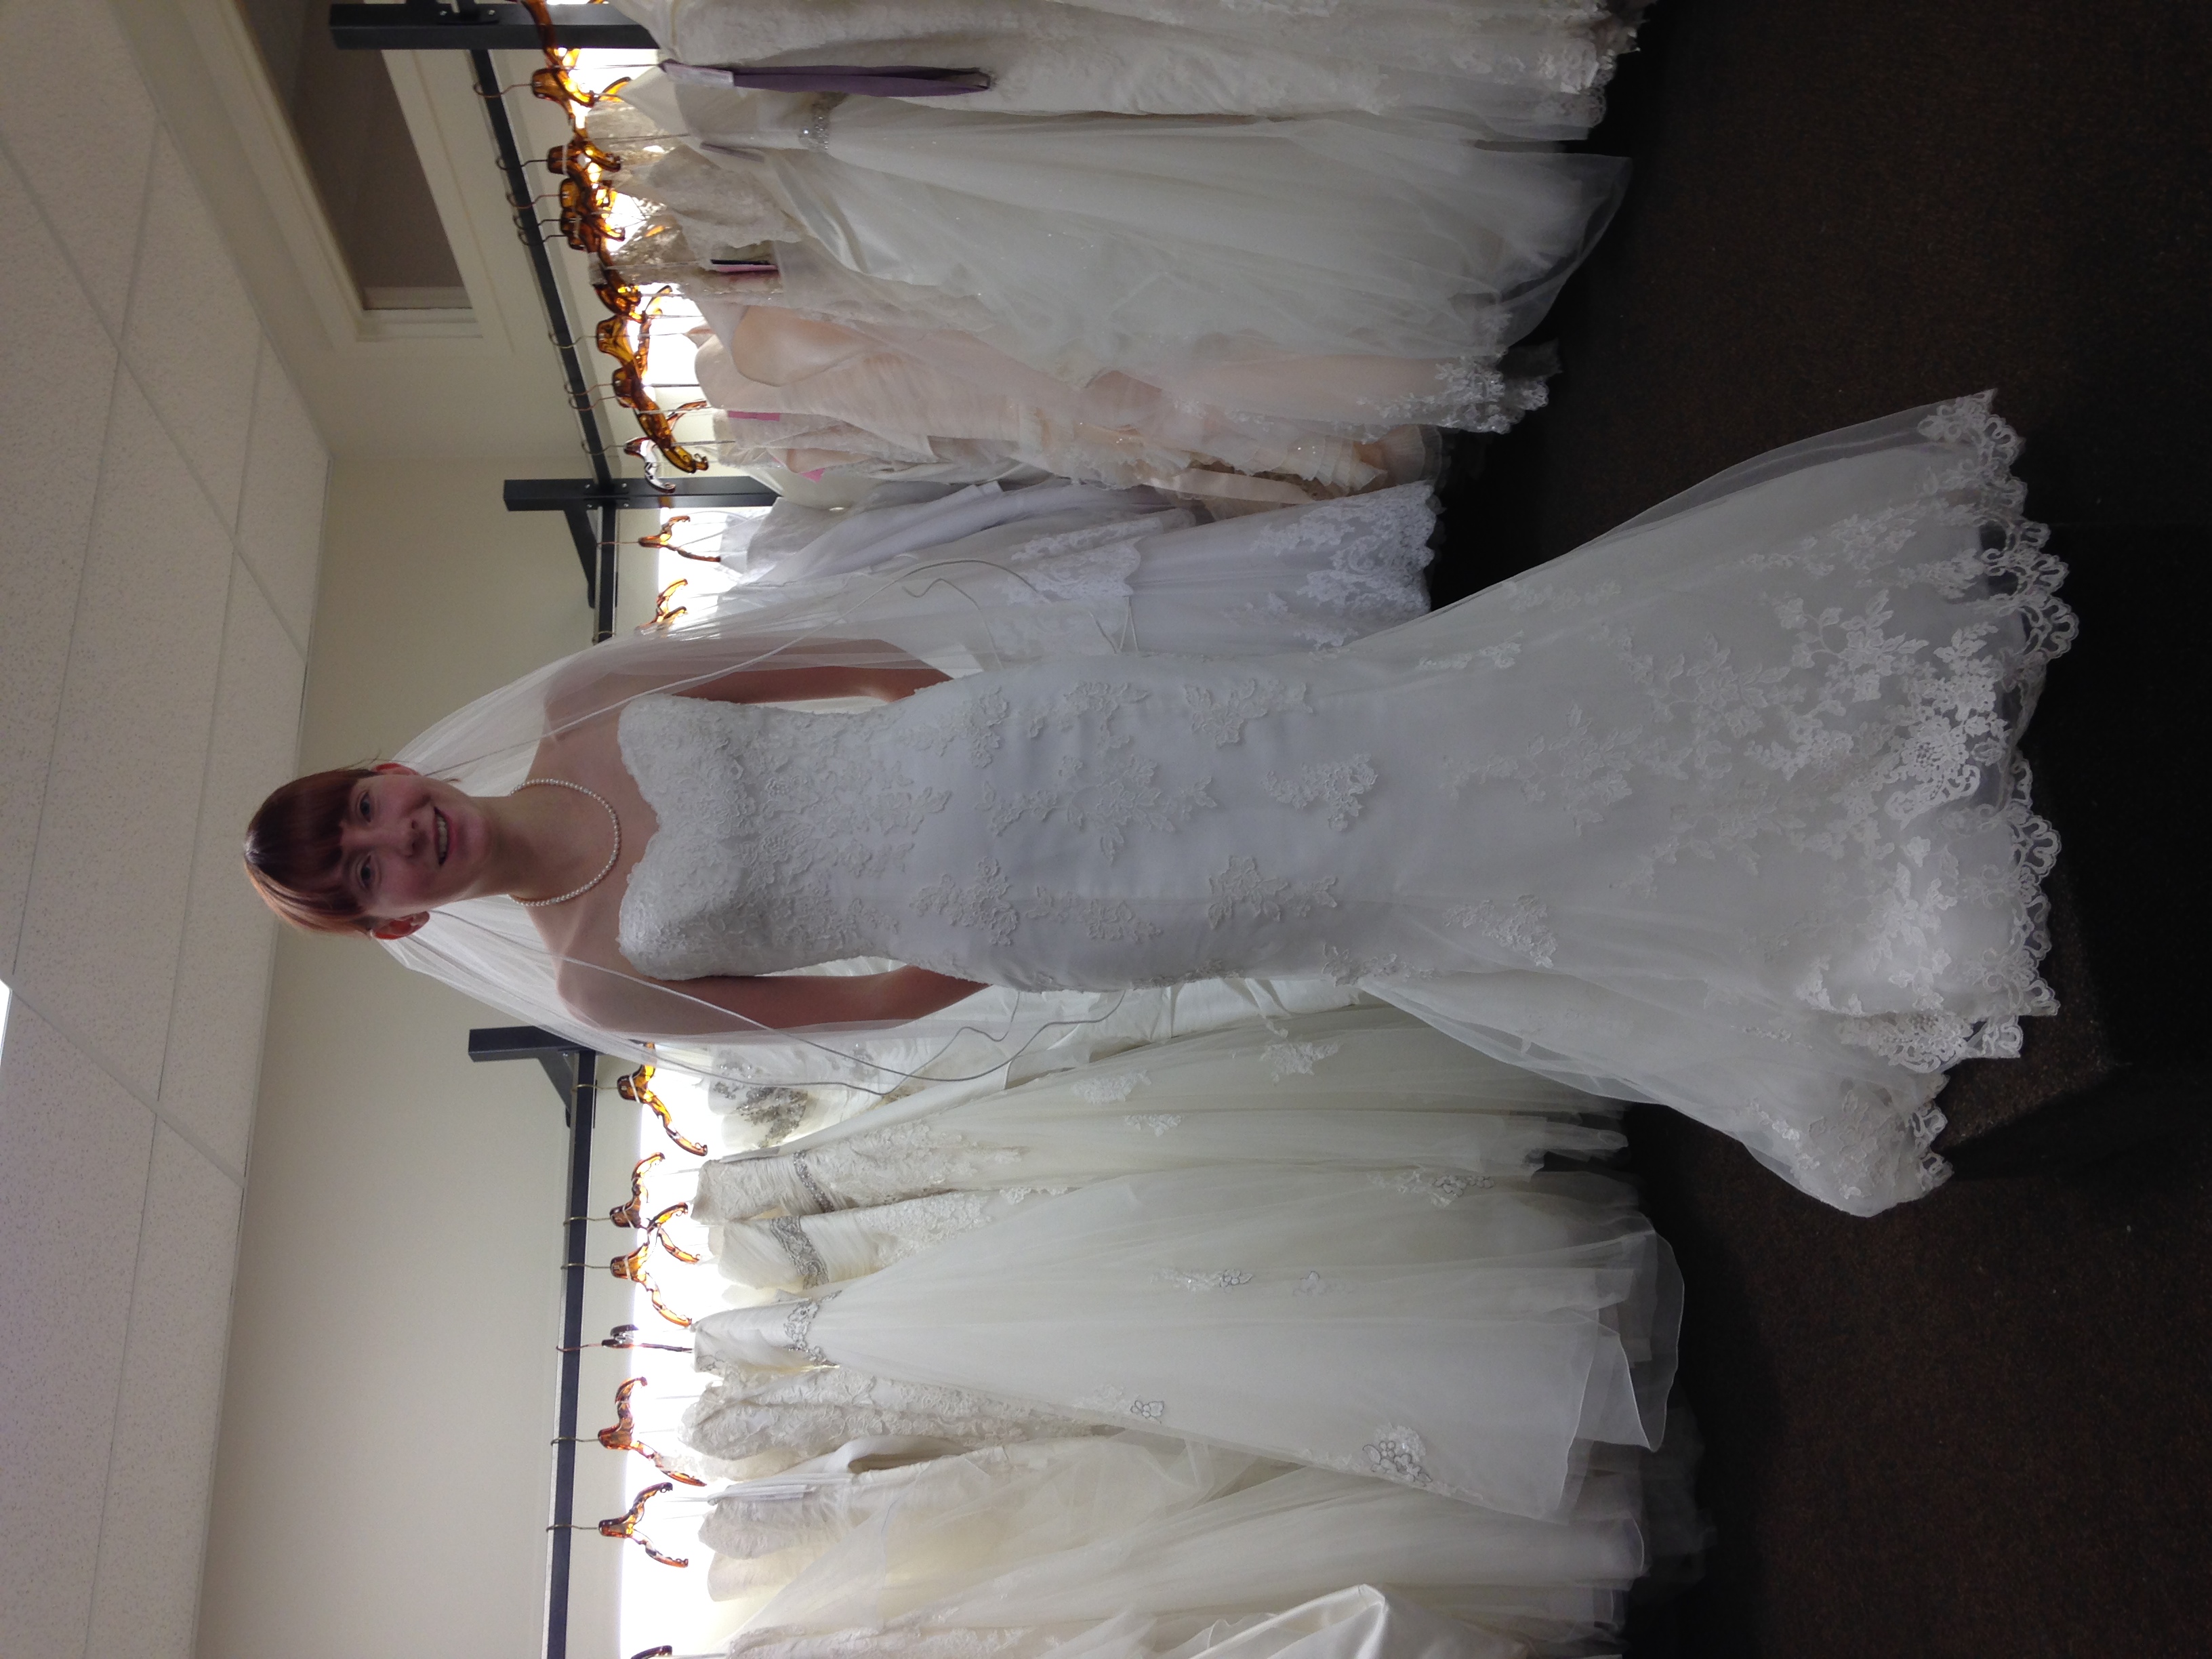
Once finished I shipped it across the country with the BF (he was off to bachelor party on a houseboat in the shuswaps). Unfortunately it got mega smooshed. Sadly it did not retain it's ribboned wooshies over the flight. Also, the dress had been finished, and in the final fitting, decisions were made. The final decision was the viel wasn't what she wanted. No worries though. $38 down isn't bad at all. 

And I had a new example to go off of! 

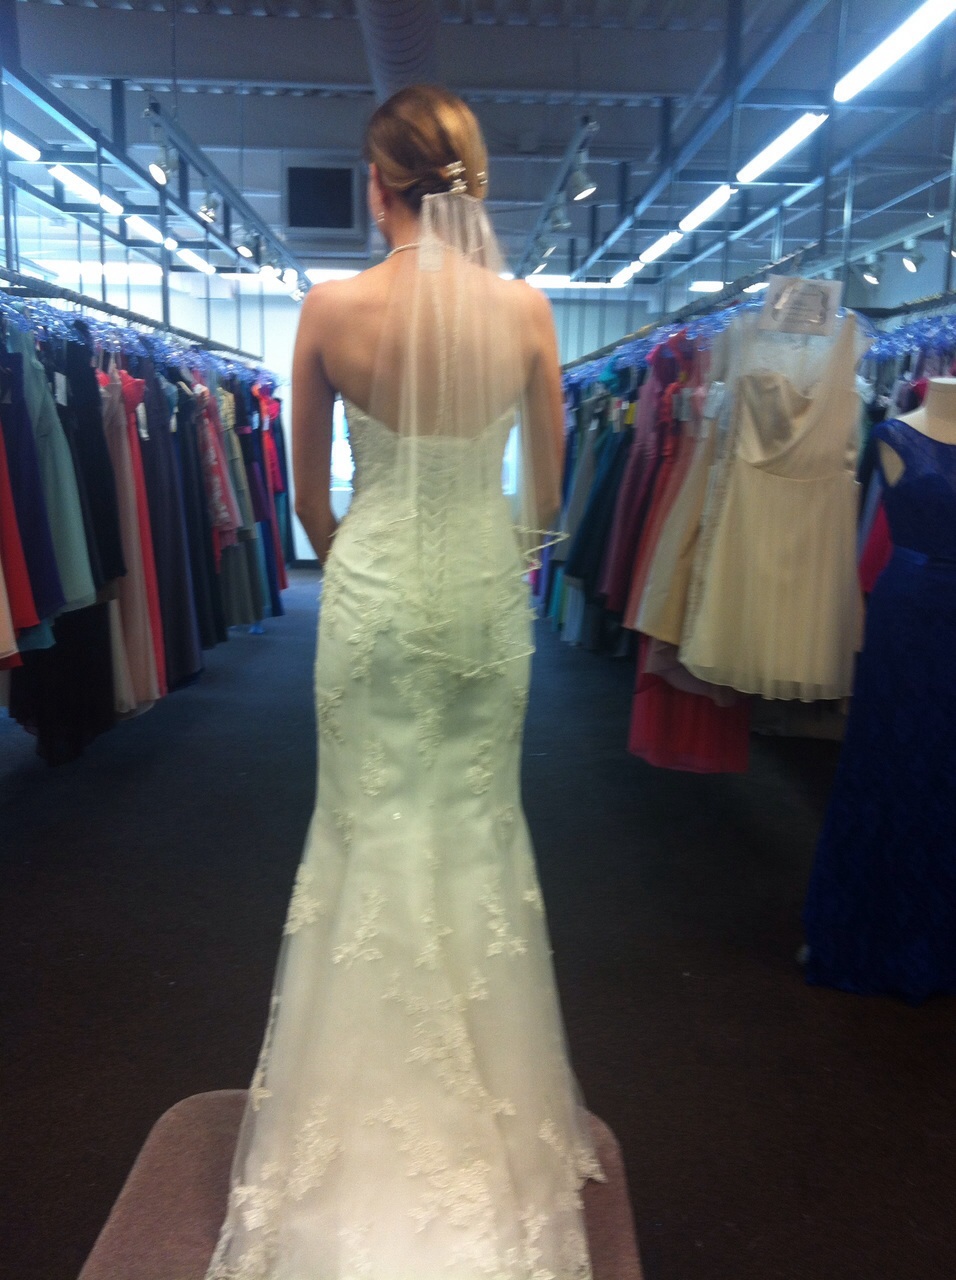
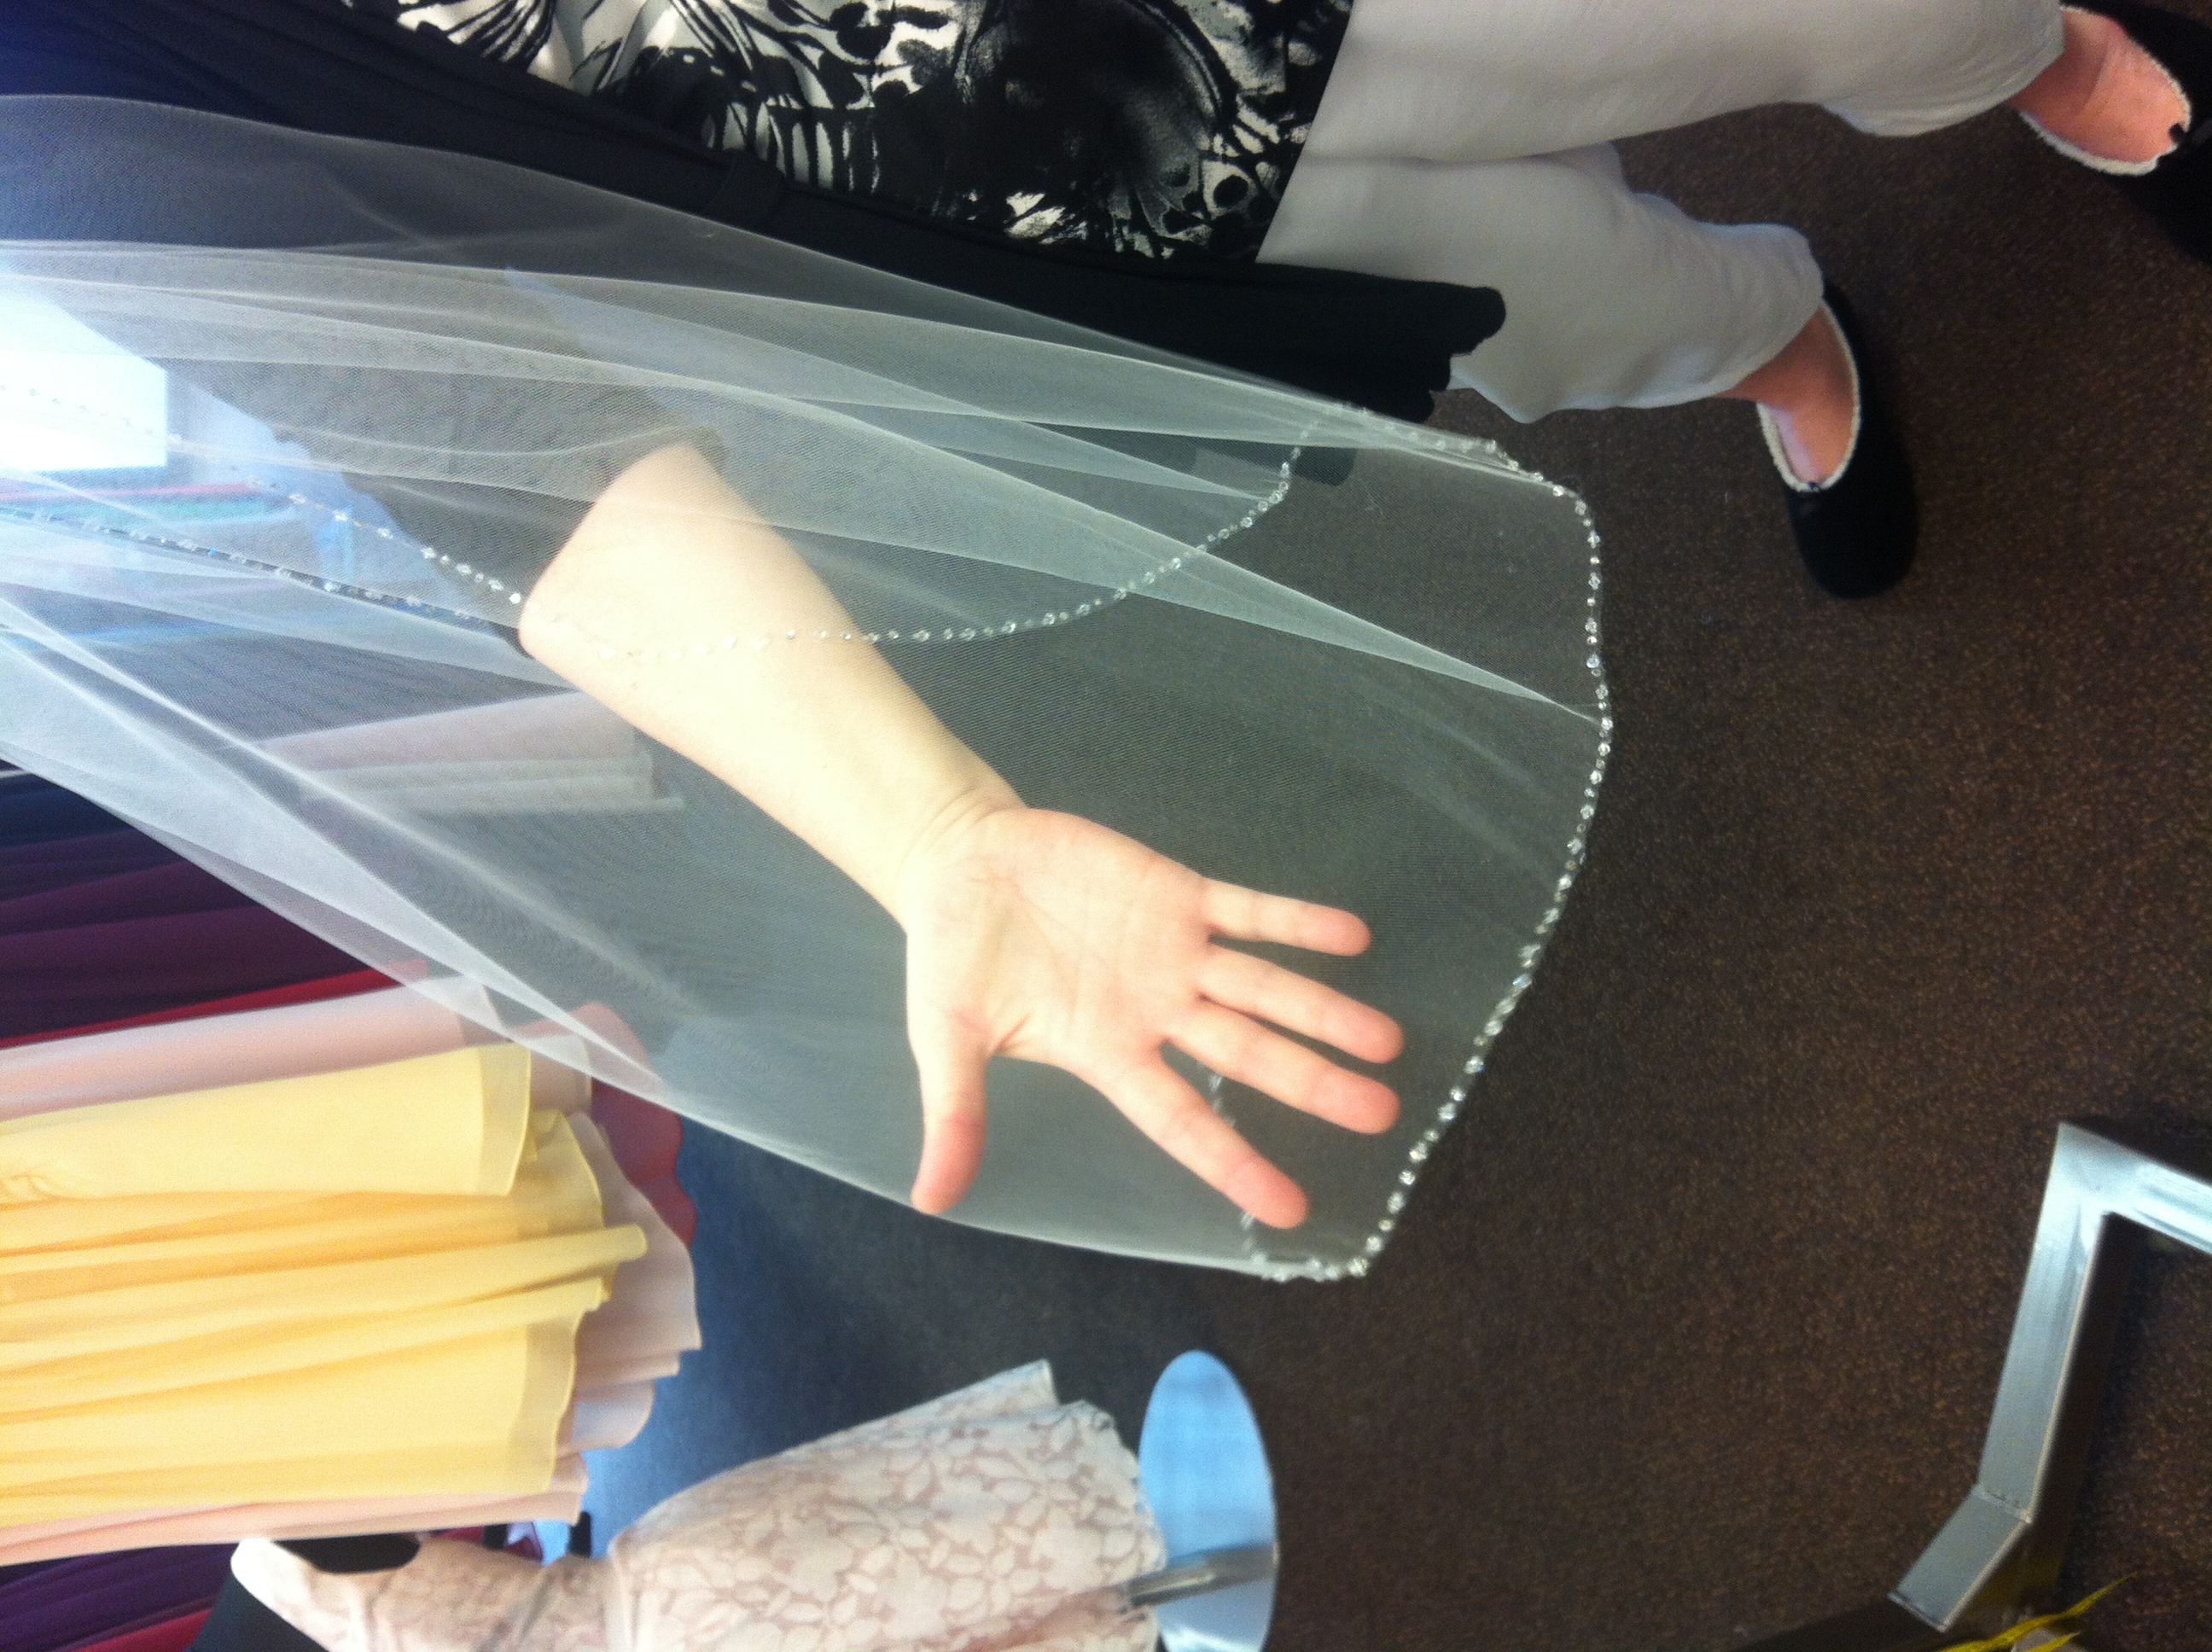
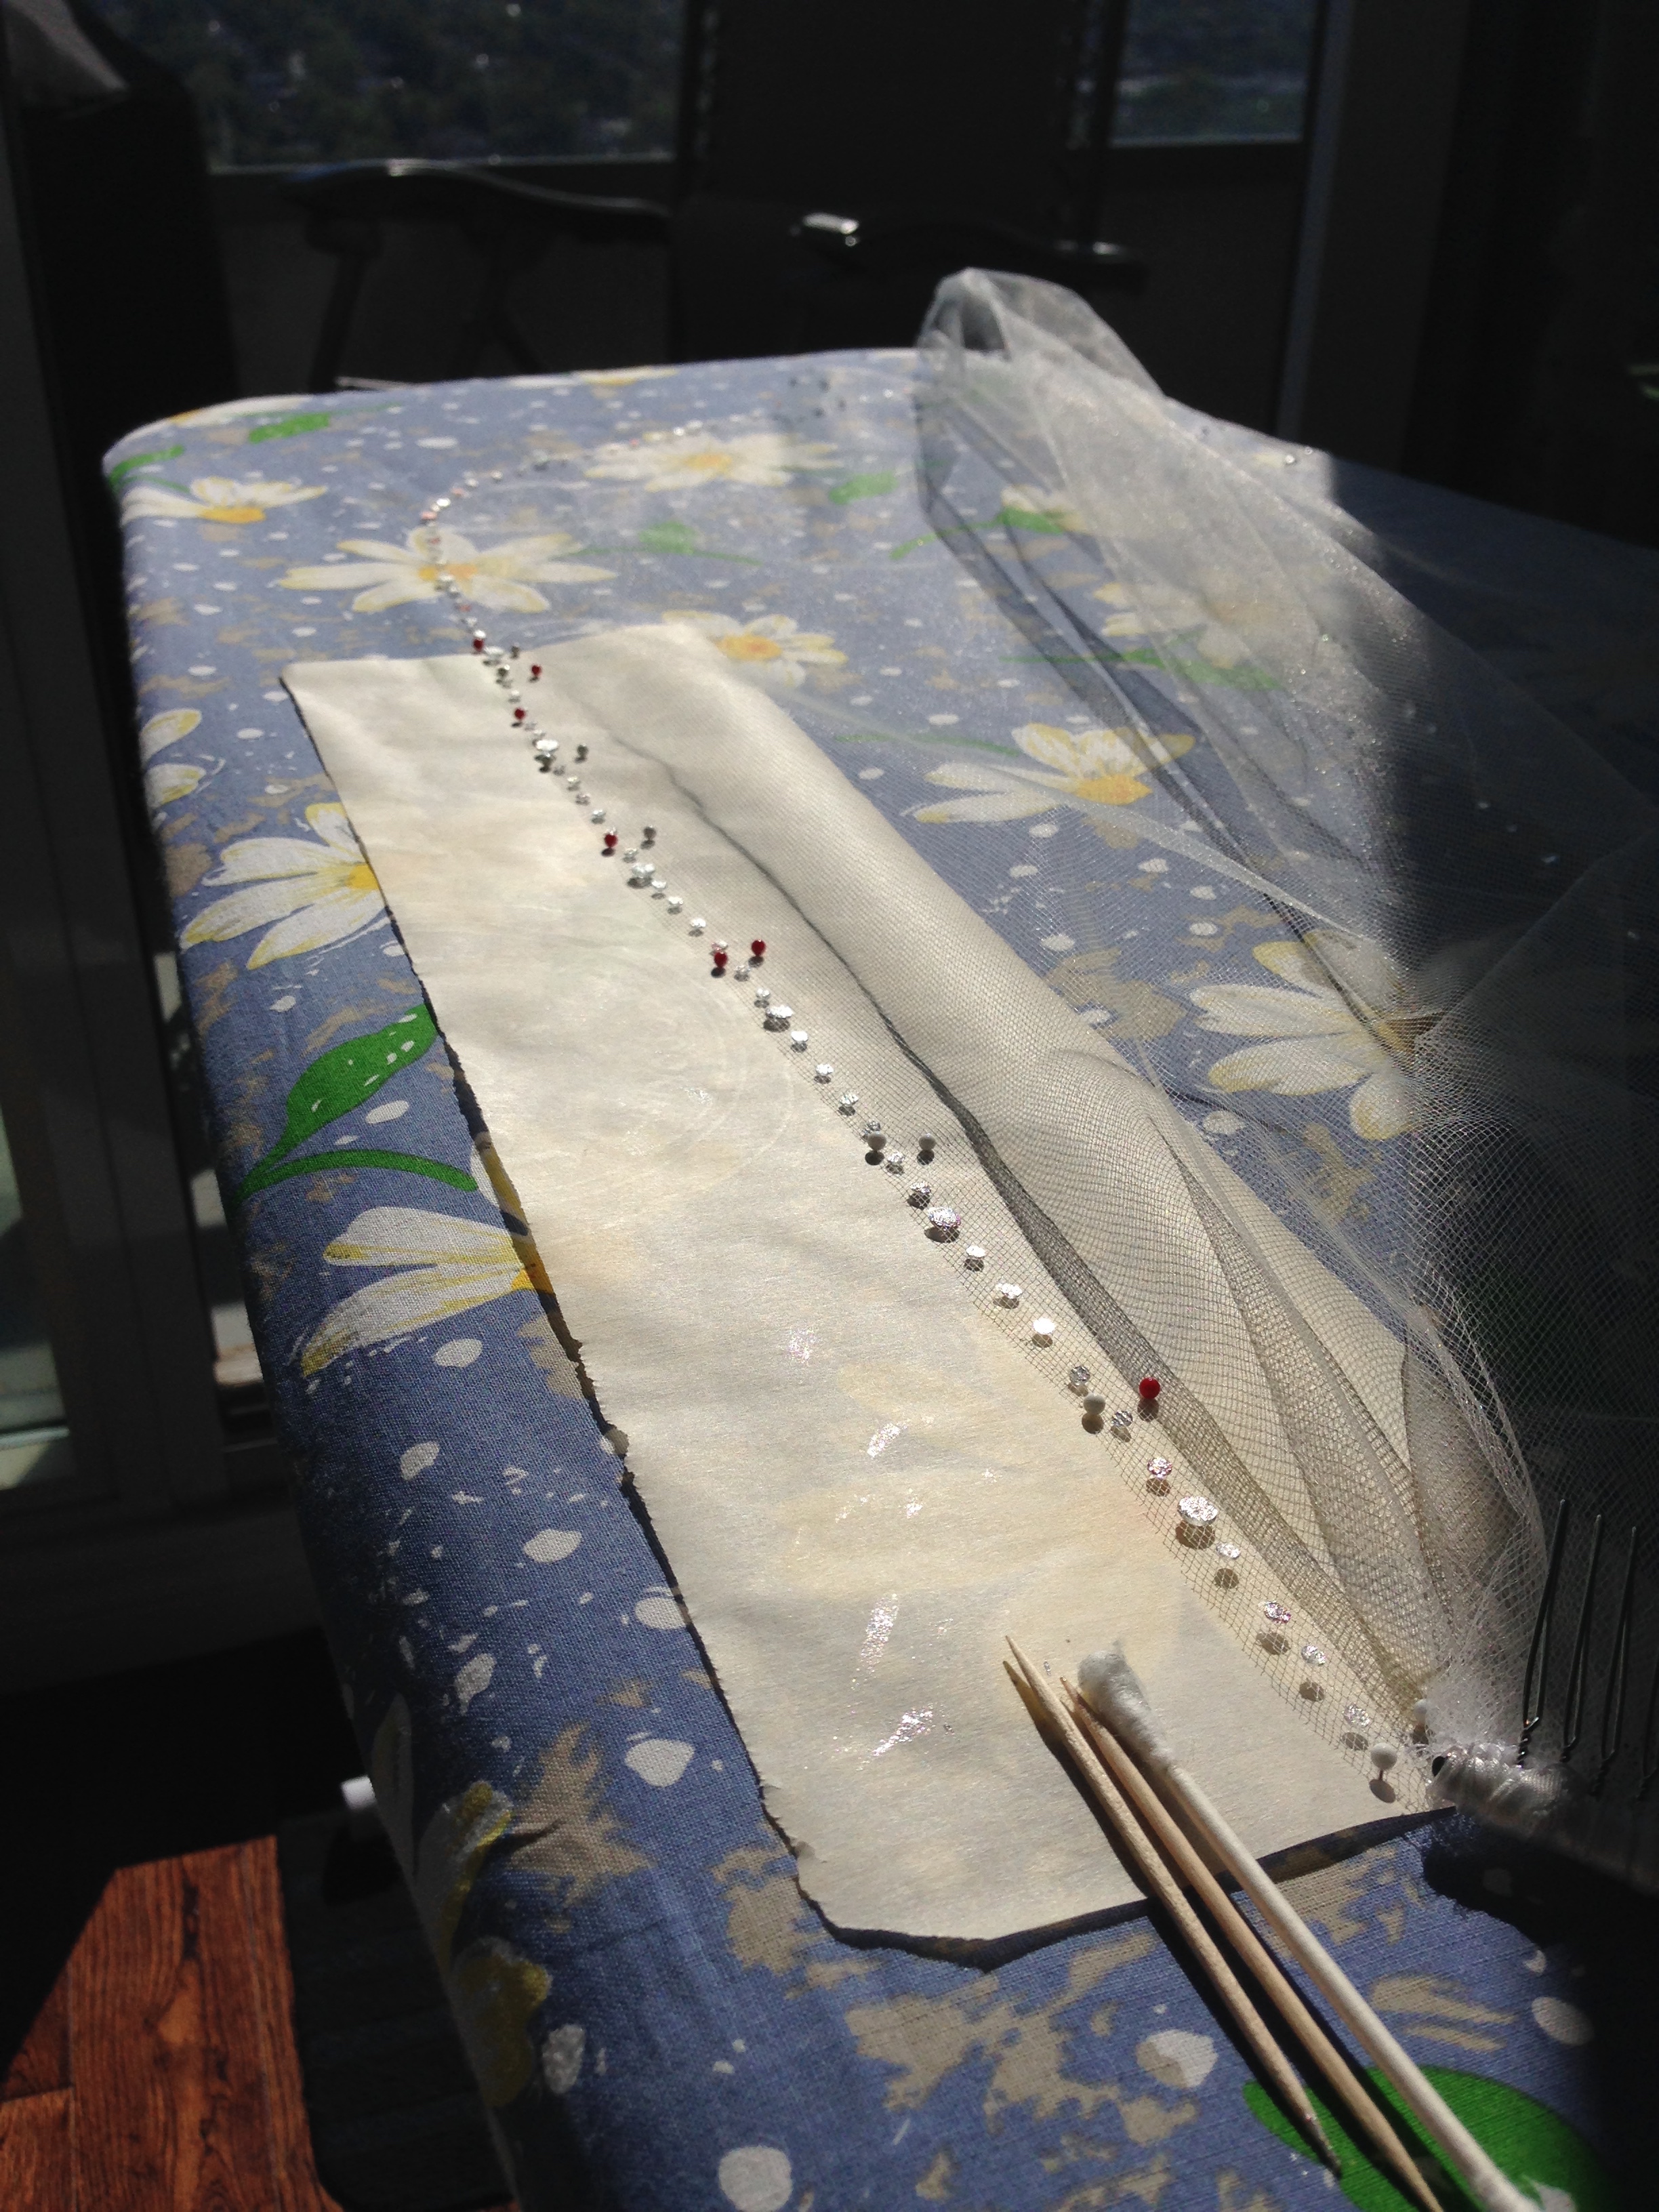
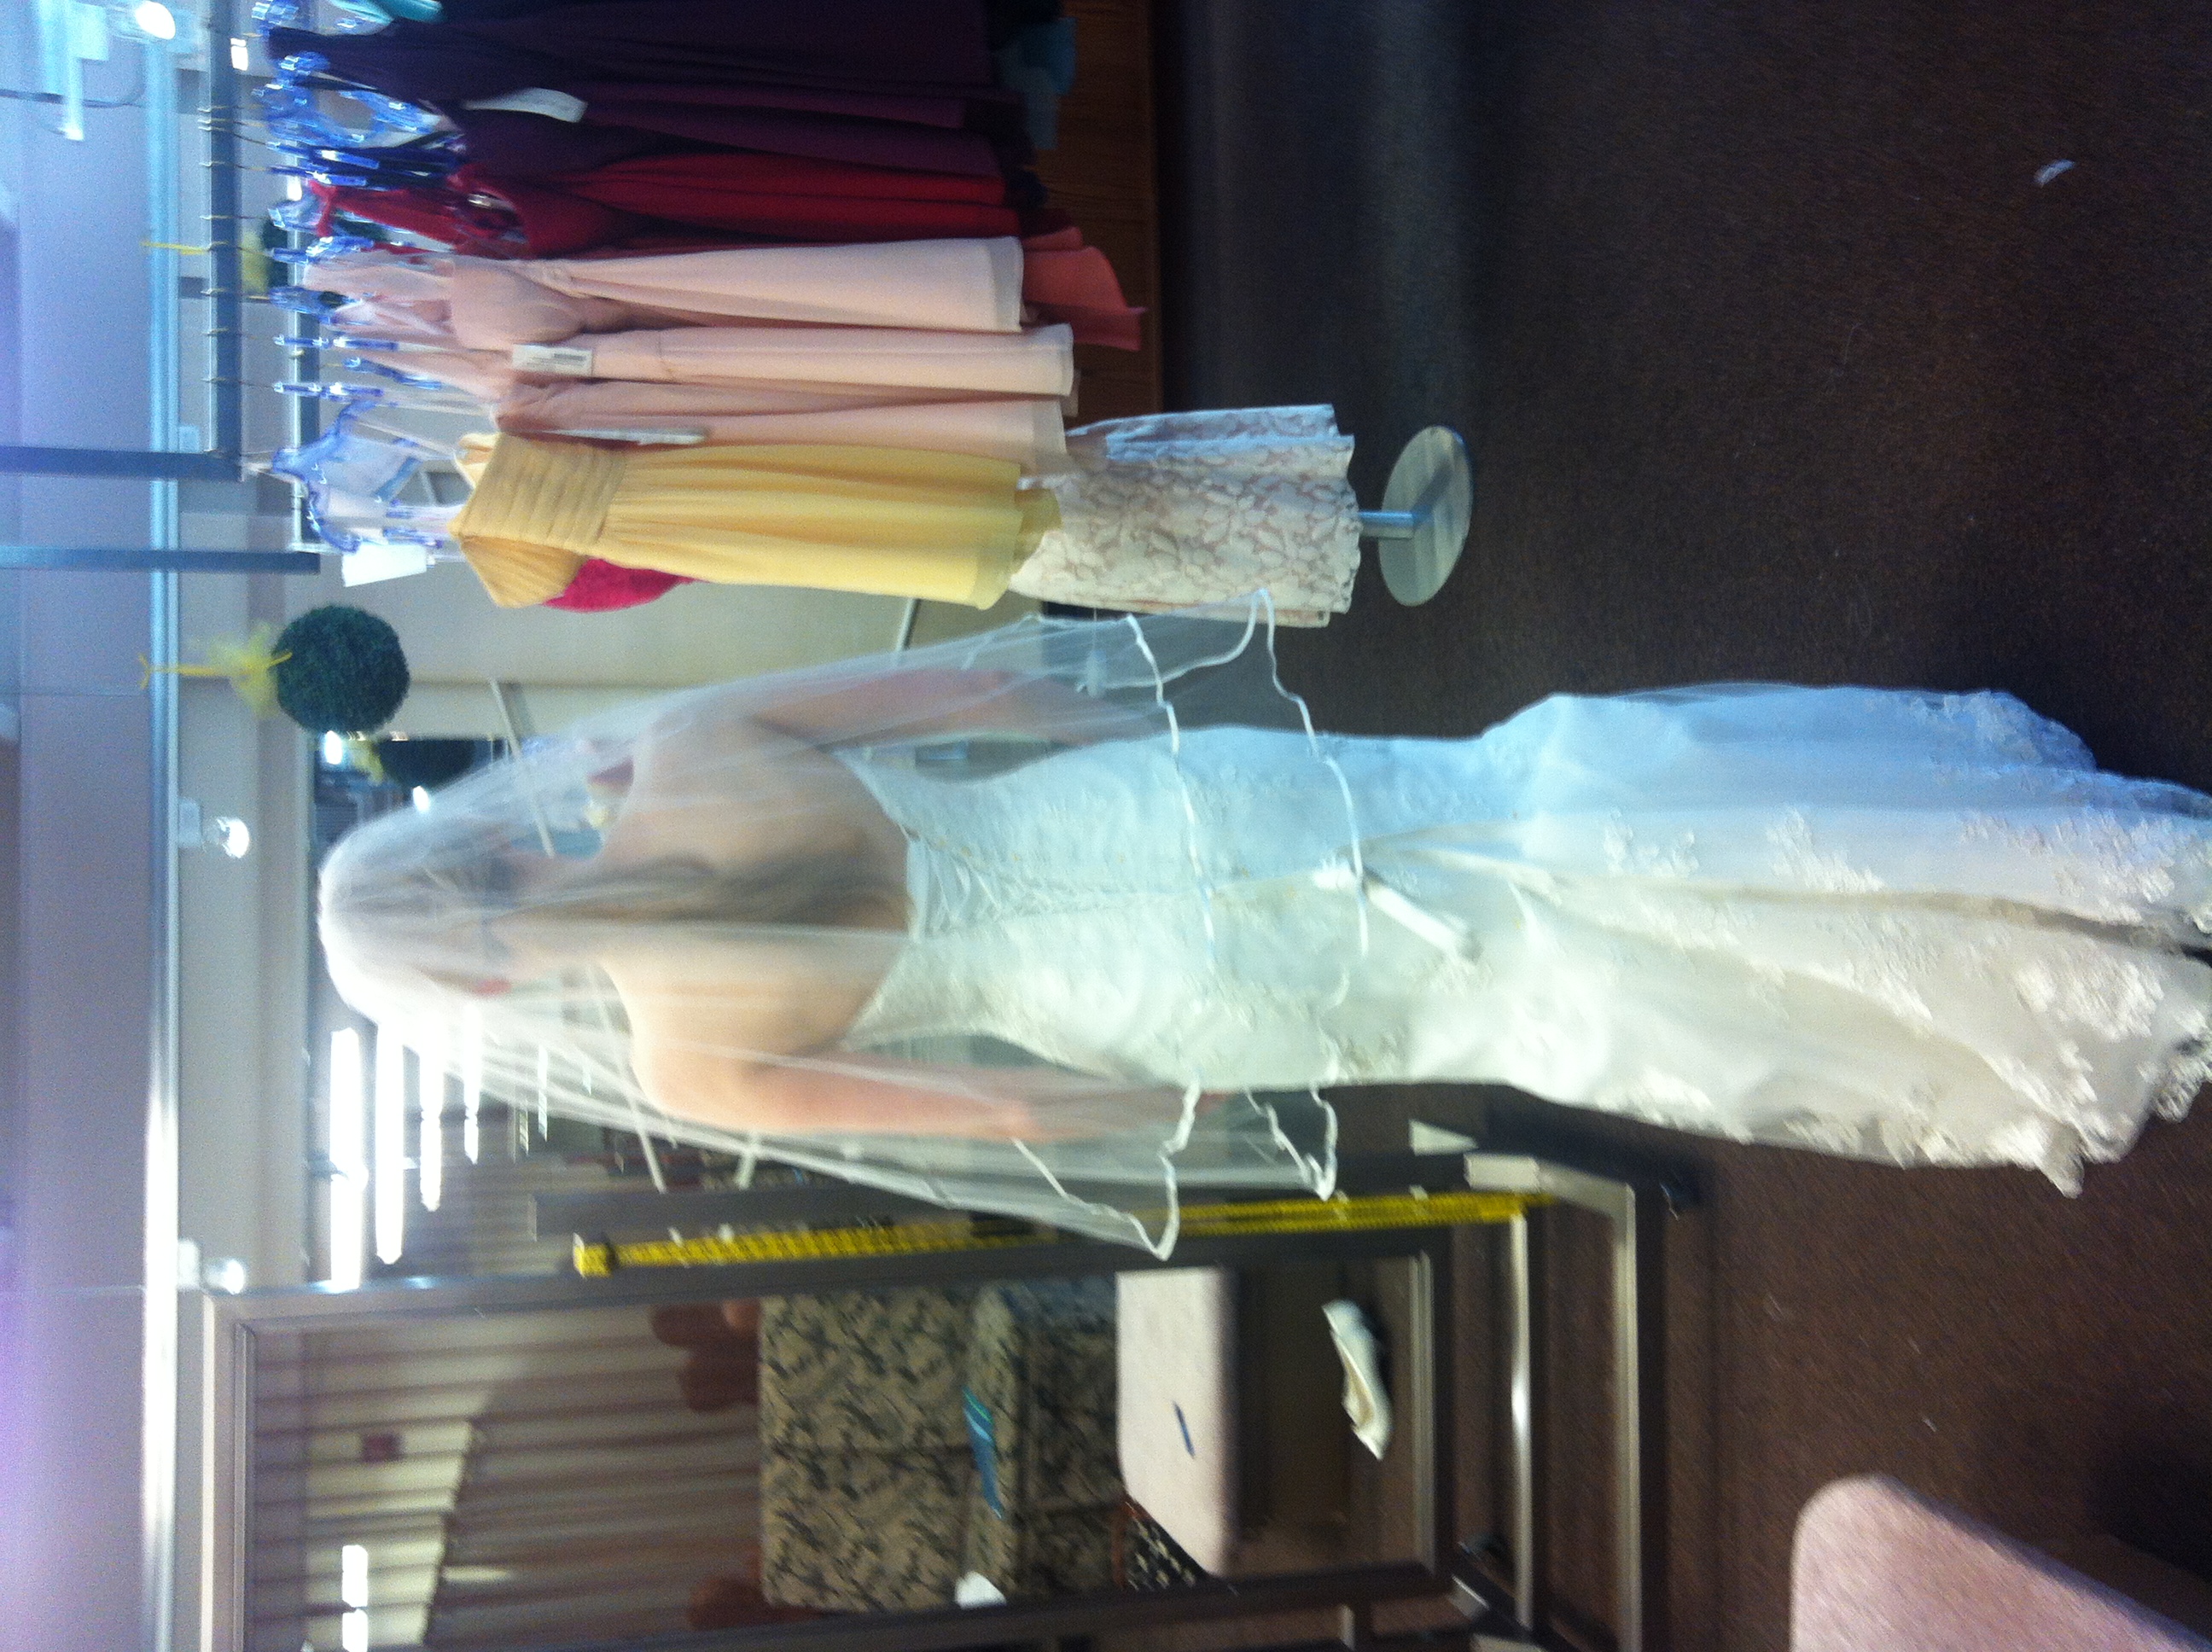
Instead of a two tiered veil, the new veil would be a single veil, with bling! Super easy pattern to make: Similar tear drop form as the previous veil but with less width. The tip to gathering edge is the length from the nap of the neck to the top of the butt. About 2/3rds of the way down the centre line is where the veils width is the widest, to create the loopies that whoosh into the tip. (This is All technical jargon. My apologies. -winky face-) 

Since the hairstyle was also solidified now I knew the comb piece would be visible. I wrapped it up in the ribbon I had left over from the first veil. Waste not, want not. 

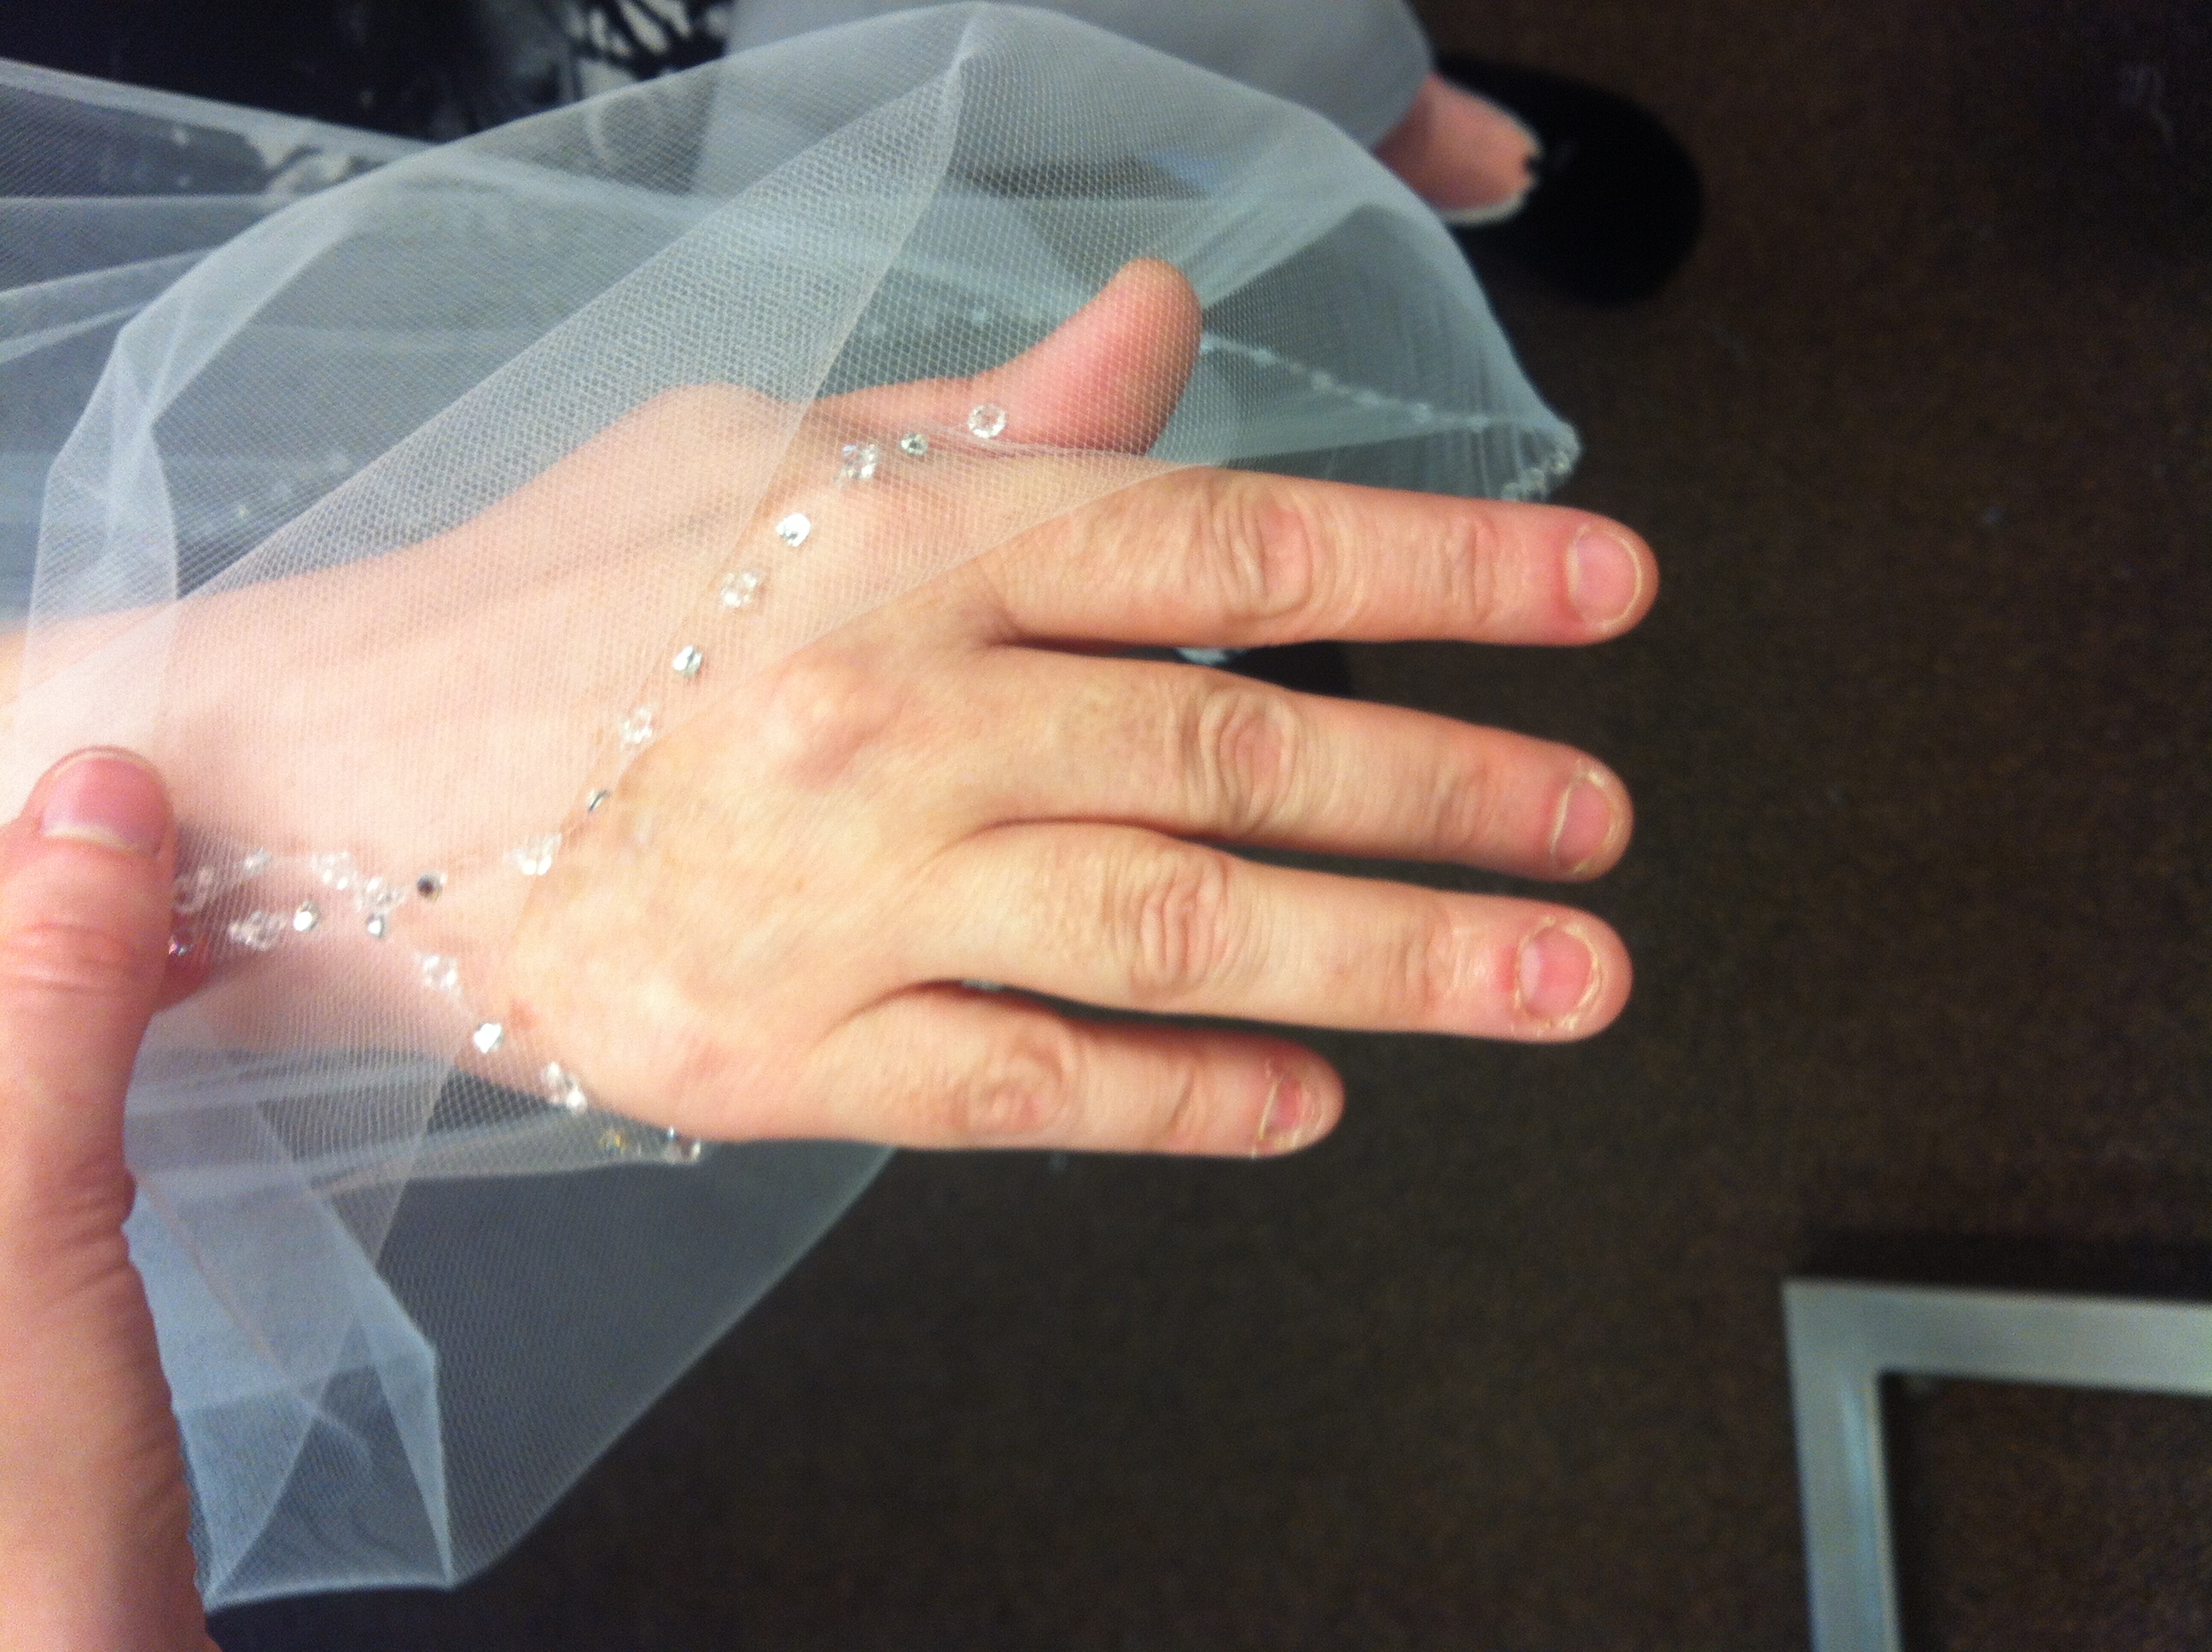
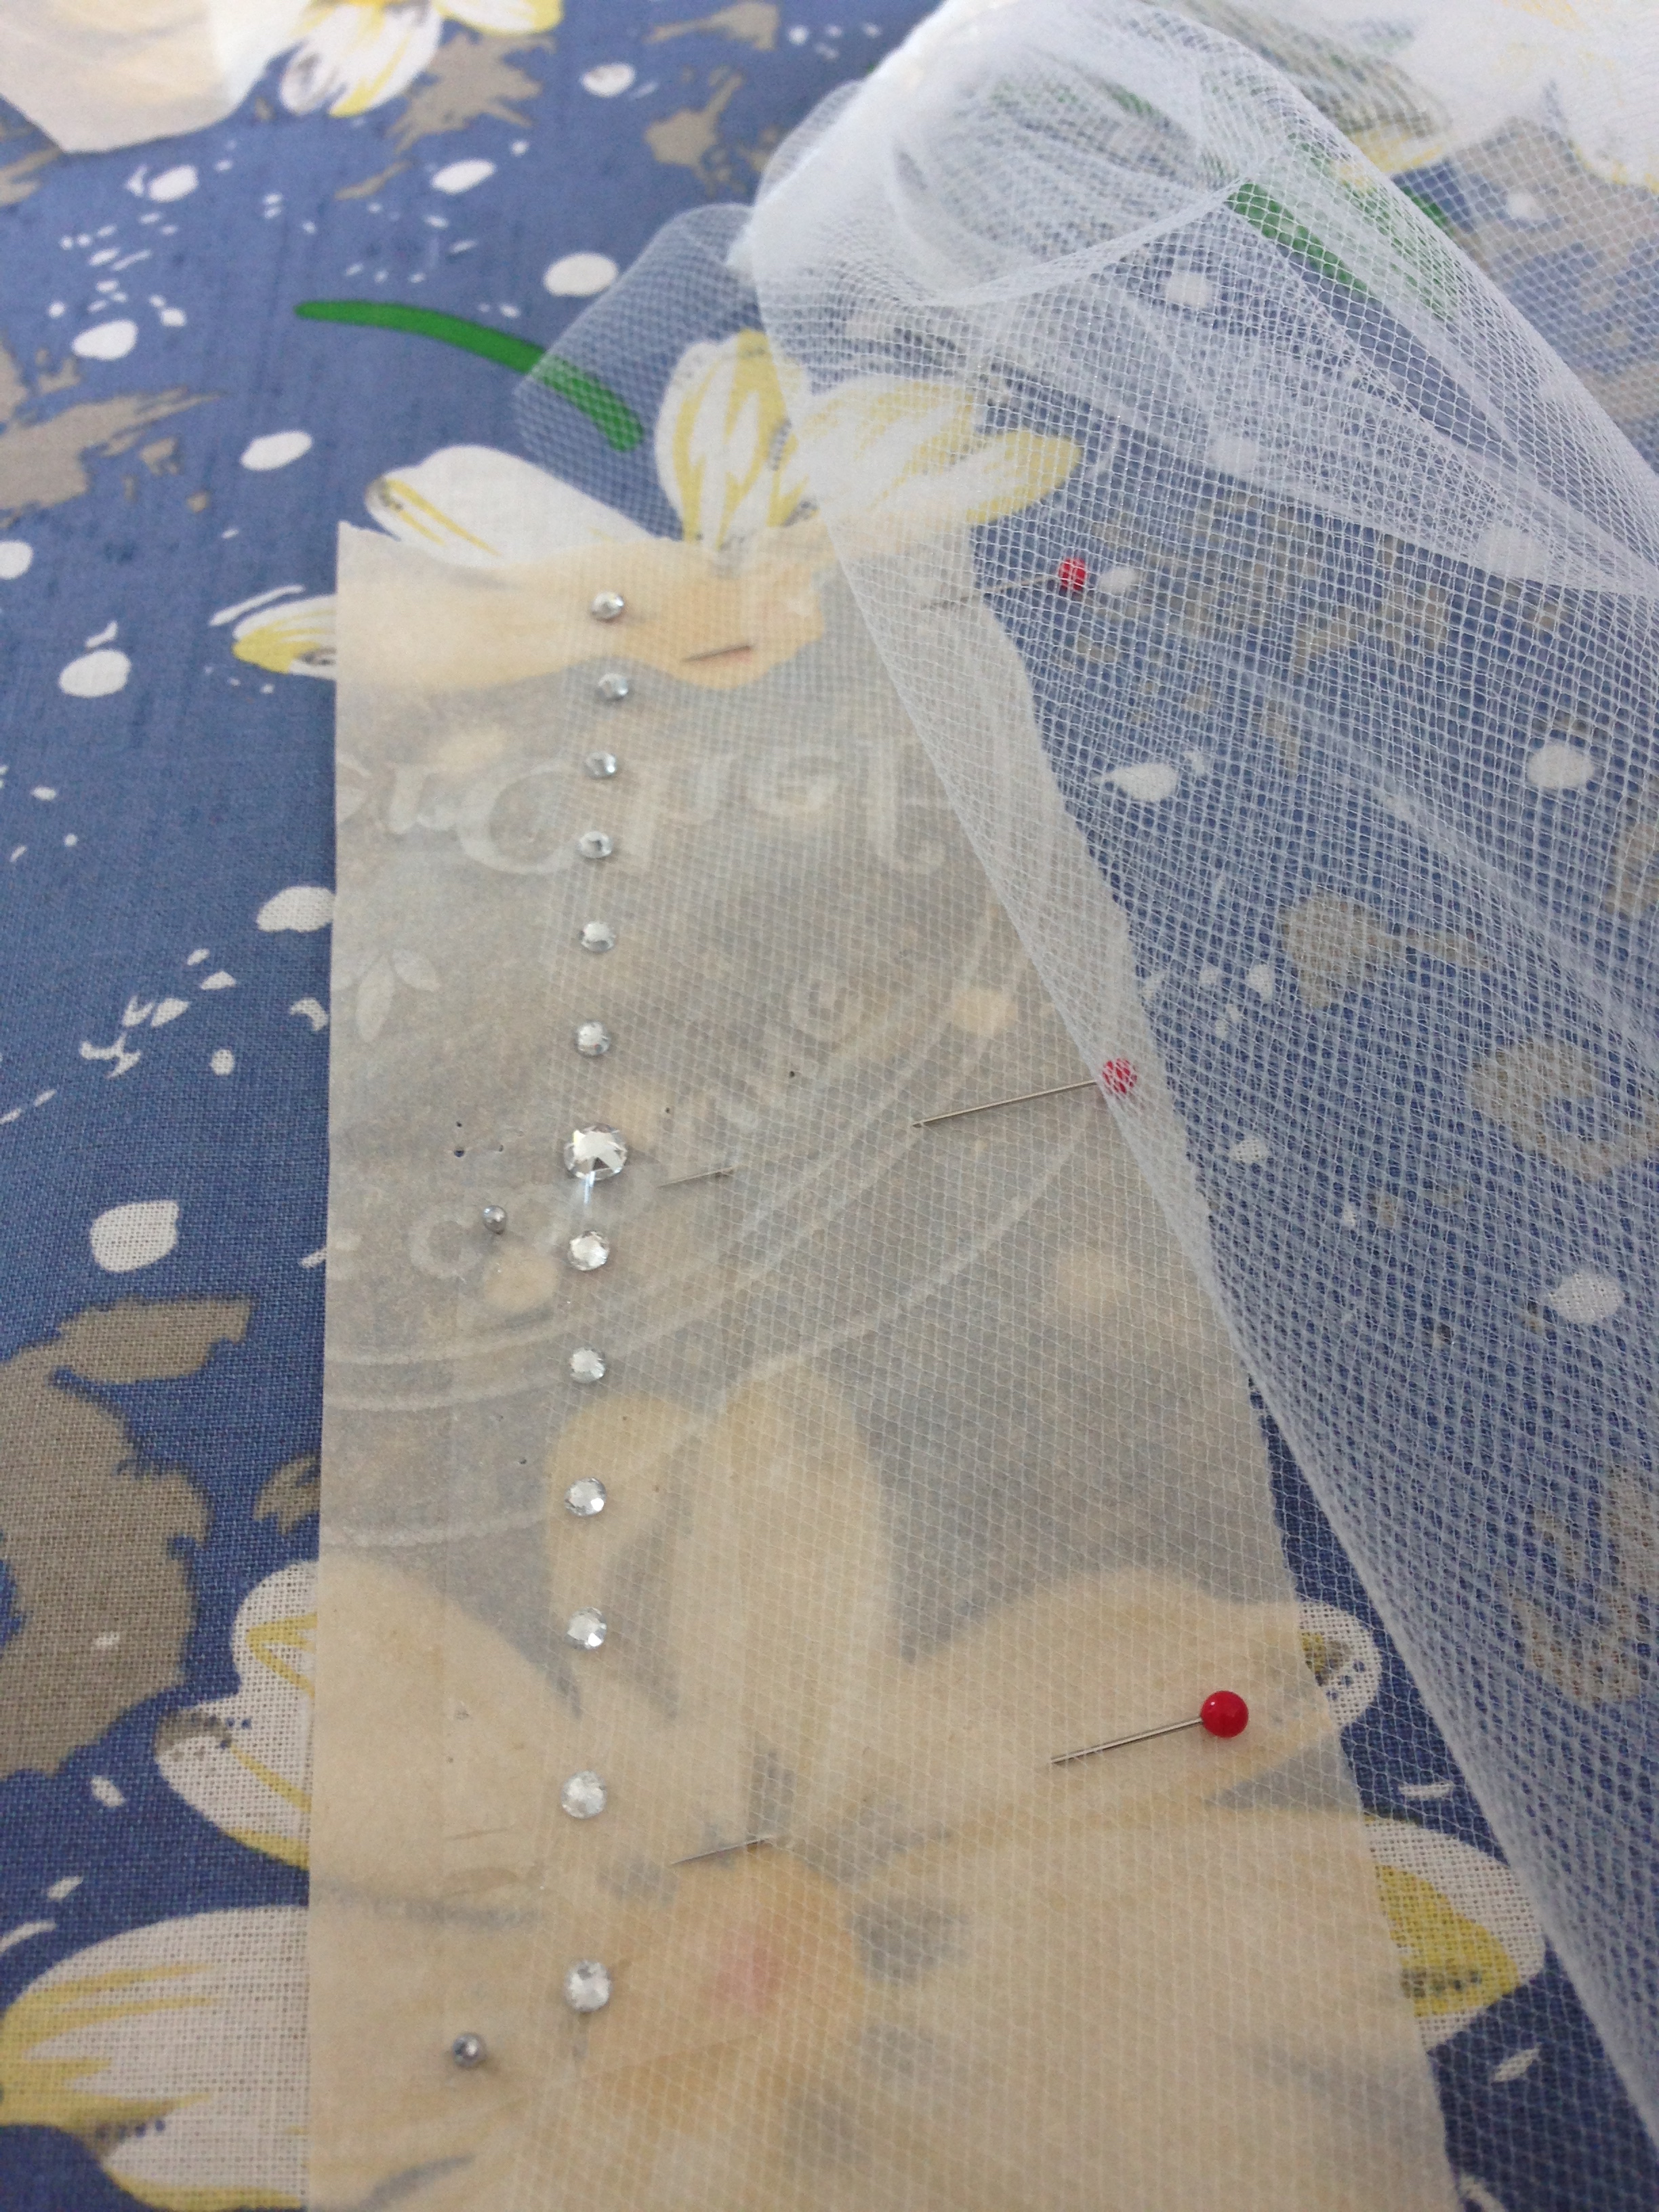
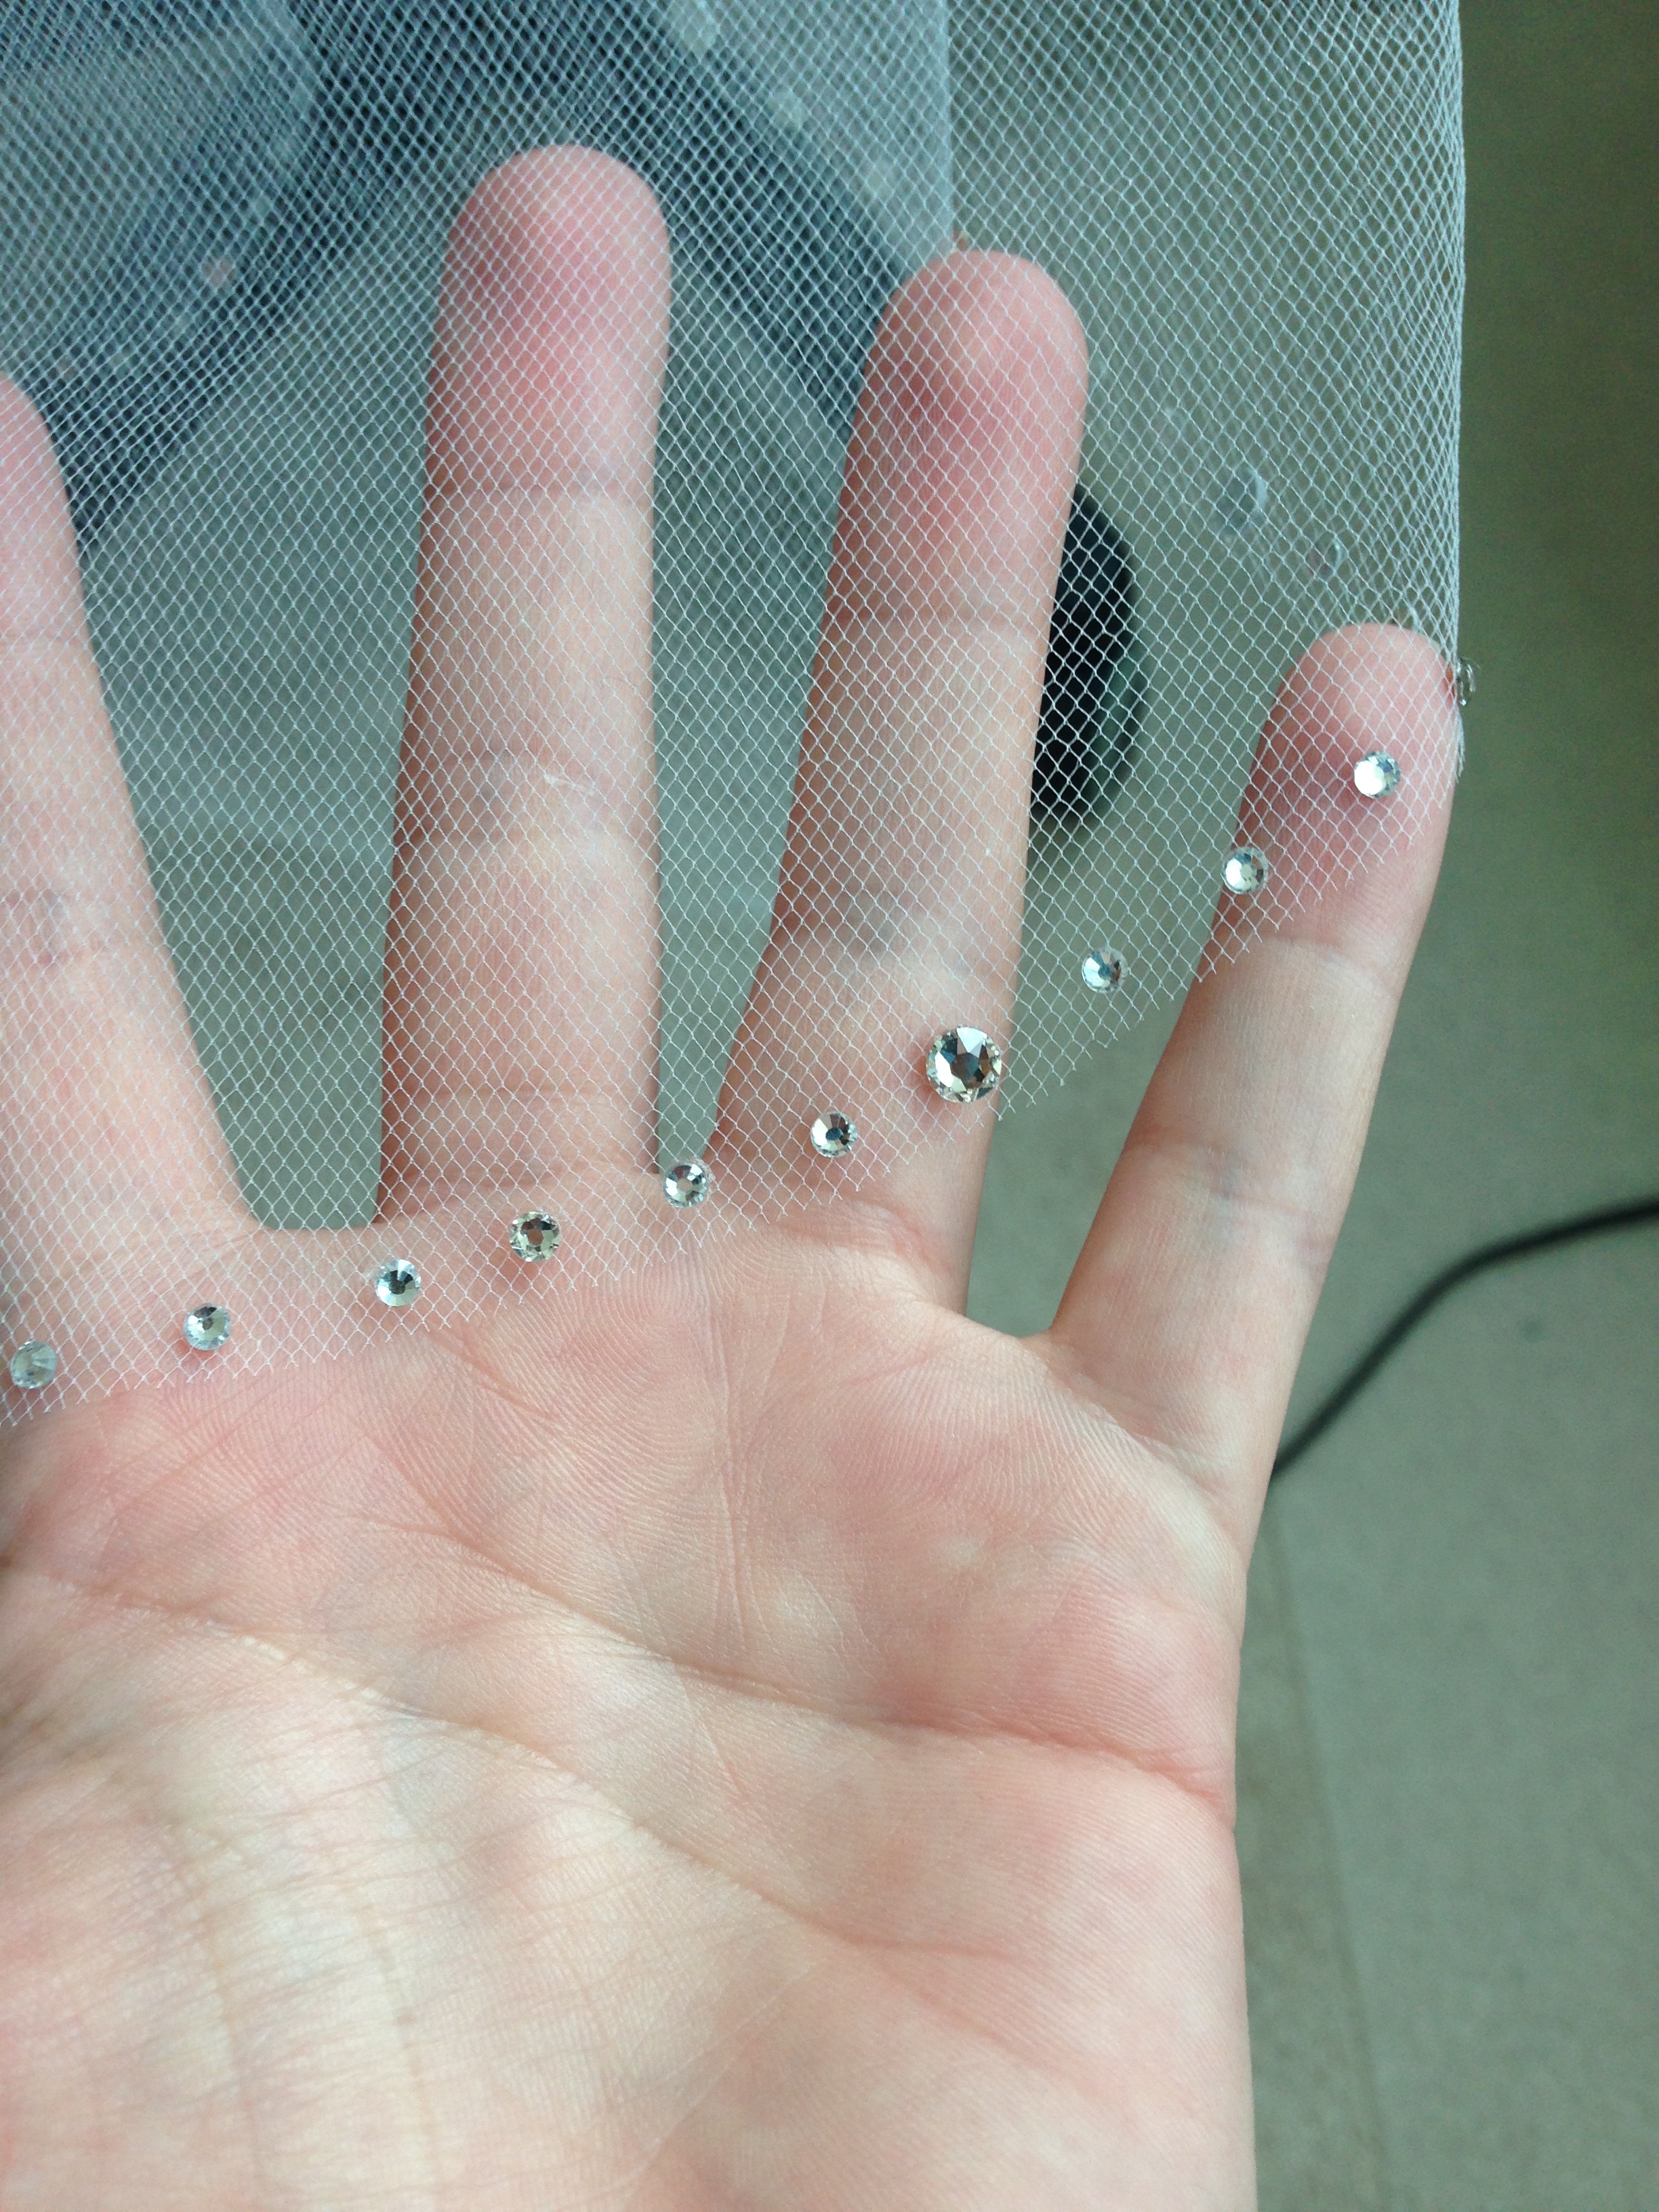
Now for the part I'd never done before: gem stones on mesh. I went to The Place I'm Not Allowed To Go (AKA Michaels) to see what they had in iron on gems. Turns out they have a lovely selection! So I bought some 'made in china' crystals and some Swarovski crystals too. It Is going to be a fancy wedding after all. (For the record, Swarovski crystals are made in china too.) 

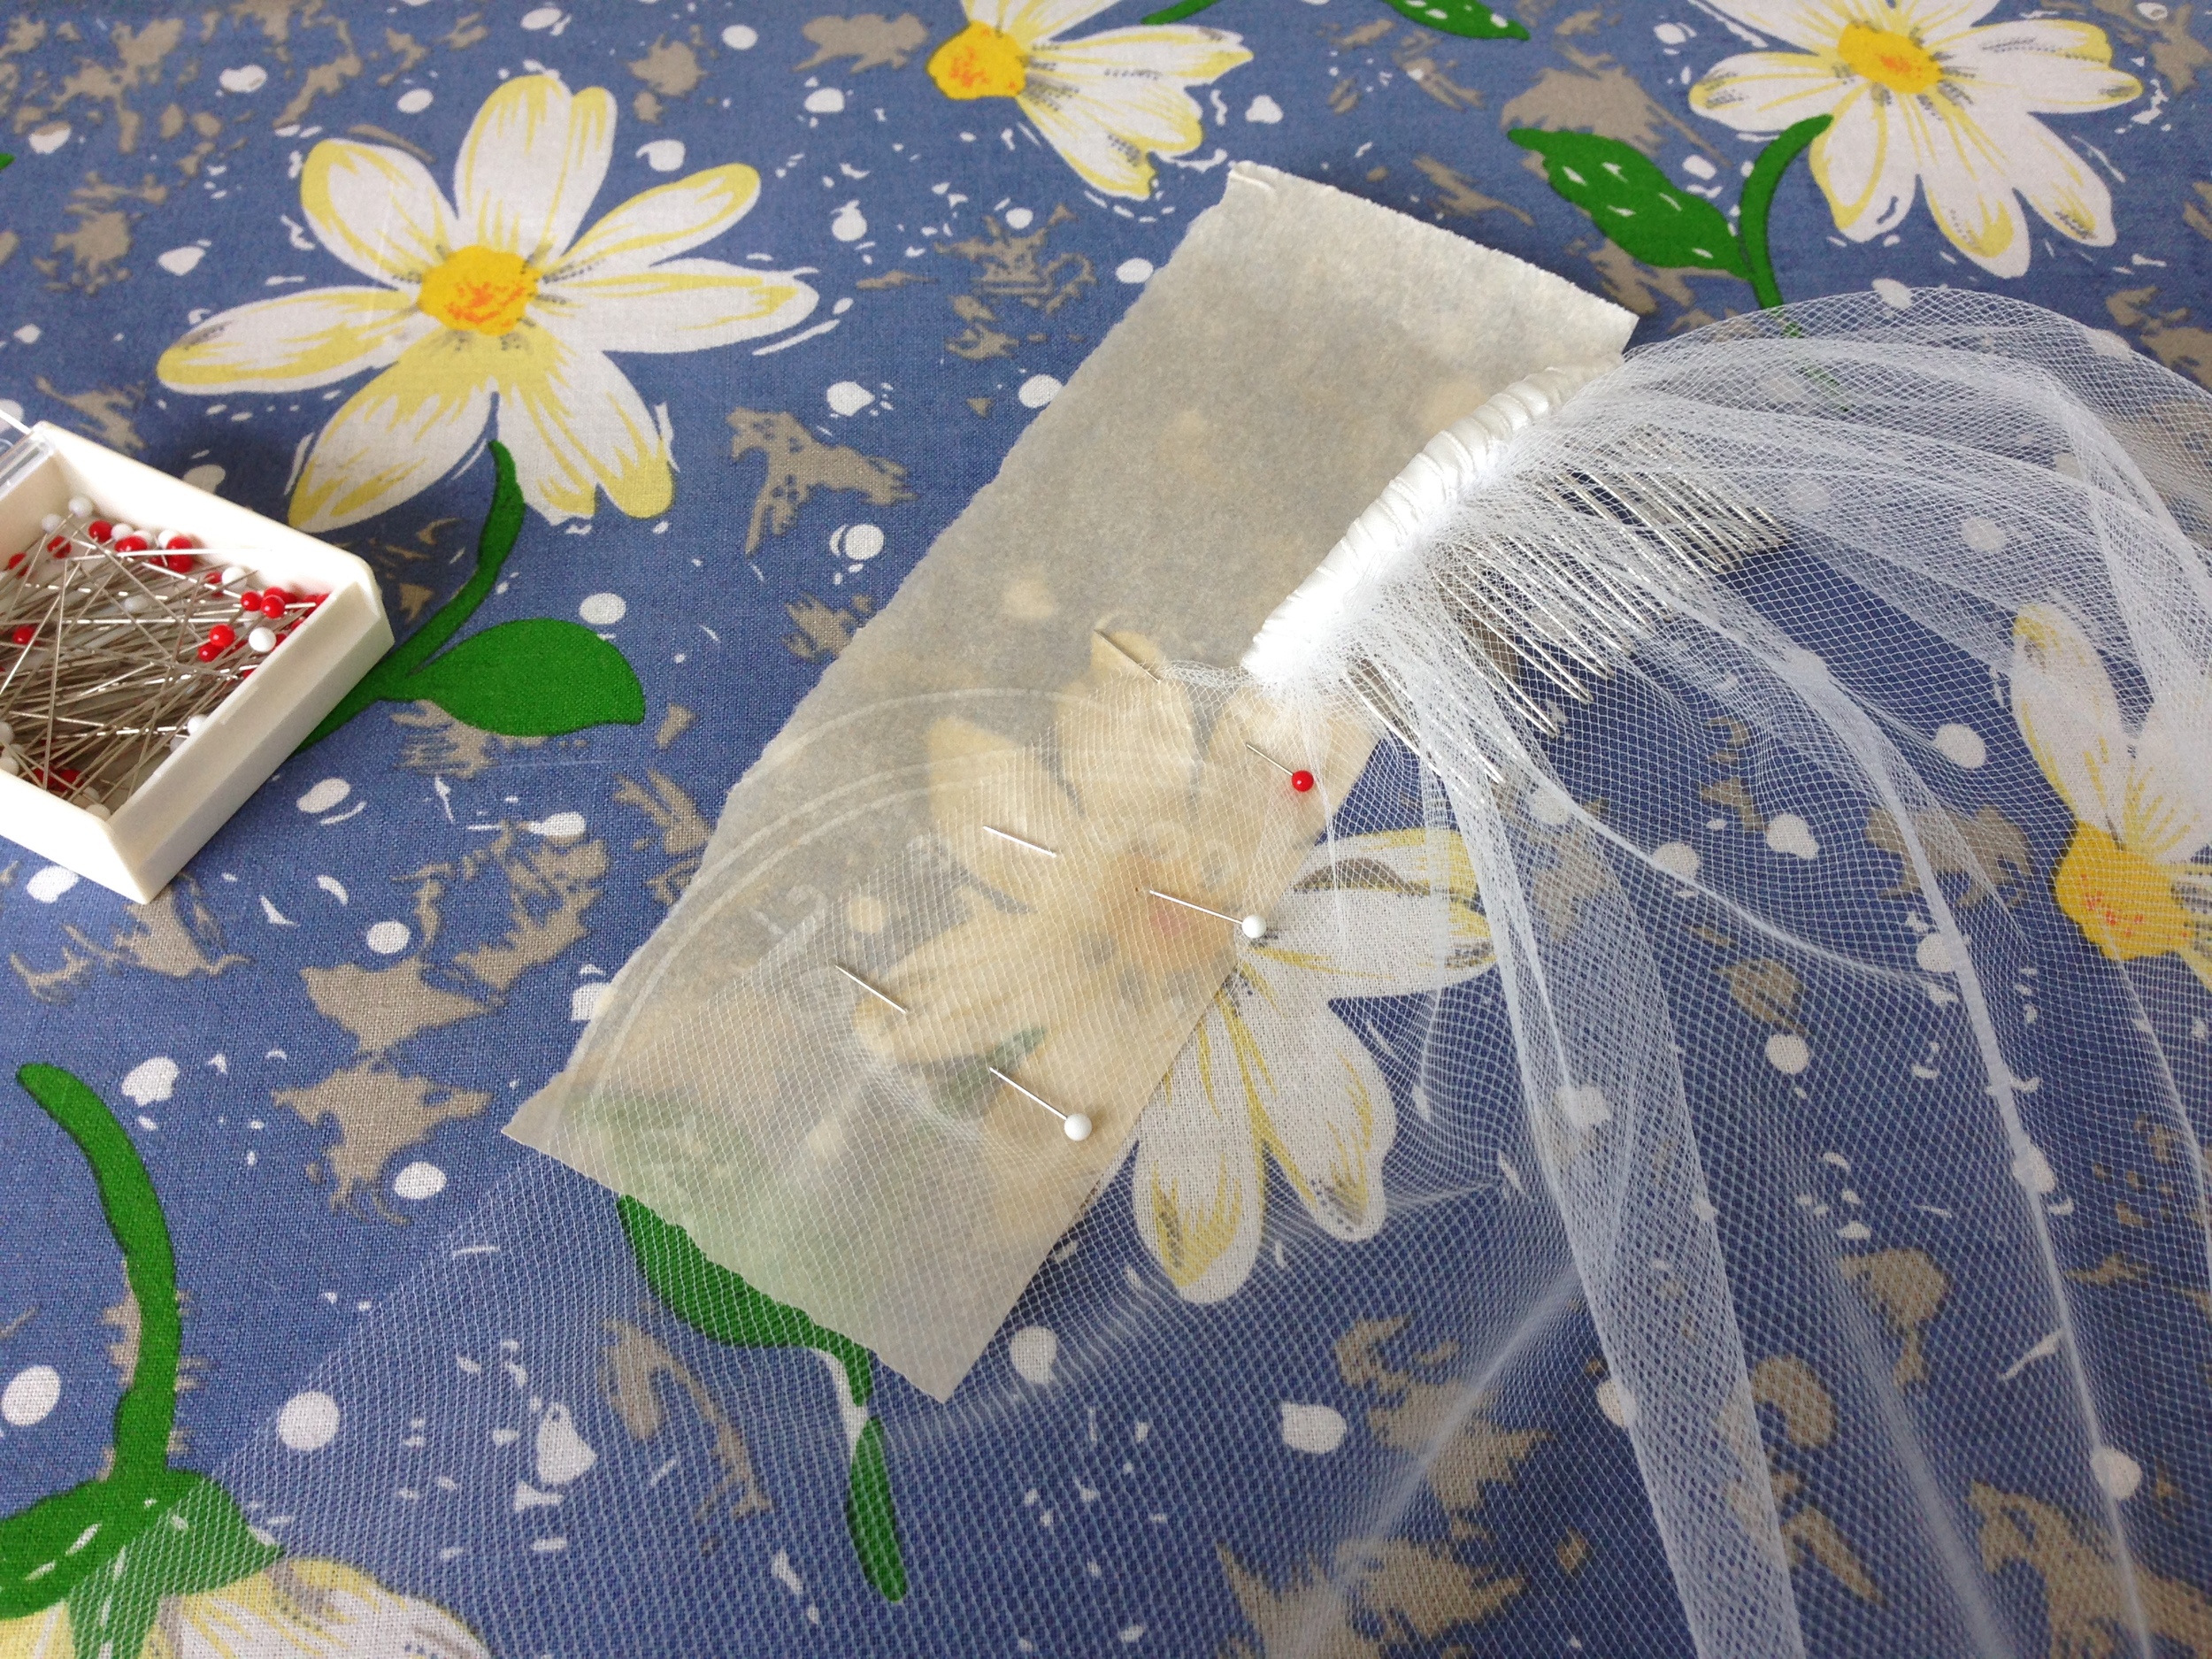
I even researched how to bedazzle. (Haha.) Hilariously enough, there are Many Many youtube videos that have different ways of doing this. I found the best way for me was to use a plastic adhesive sheet to stick and move my laid out pattern of gems onto the pinned down veil edge, where I could iron on the gems. This worked rather well after I got the temperature right, and figured out that if I put parchment under the veil the gems would stop adhering to my ironing board.... Pictures of my process are above!

Also, because of sheer paranoia, I went over the backs of each gem with a glue and silver leaf mixture. That's right. I'm official a crazy veil making lady now.

But it did turn out beautiful.

It was an exciting adventure and I'm so glad I got to do it. <3 Love you Jess! 

-Andrea

The Half-Assed Hobbyist

Plantlings to Ploddlers to Tiny Tomatoes

The gardening season is coming to a close. Within the next couple weeks my tomato babies will be grandparents, nearing the end of their time living on my balcony.

(I was warned that it was a bad idea to personify my plants... It's just So Sad.)

As fall approaches and canning season is in full fervour,  I find my little plant babies grumbling about the cold and fussing about too much rain. It reminds me of the beginning though. Time has just Flown by. 

Overall, Mission: Urban Garden on the Balcony has been a success! My petunias Exploded. My basil and mint grew too big for their containers so I had to cut them back. And my tomatoes bounced back from having blight earlier in June and I got a delightful crop of tomatoes (which I have to admit to eating most of myself....). And lastly, my poor clamatis, which I thought was deadened from an early summer planter flood, bloomed! I'm super pleased with the results. 

Of course this just means that next year there will be even grander plans that I'll attempt to half-ass. It just worked out so well this time round! Maybe next year it'll work out even better. 

To Optimism. To Gardening. To next year not eating all my tomatoes and making garlic tomato and roasted red pepper jam!

-Andrea

The Half-Assed Hobbyist


Zoo-chi-nee

So I suck at spelling. I'm one of ~those~ people that just really never got the hang of word-ing. Definitely influenced by a family dyslexia disorder that no one really talks about, but wibbly switching words aside, I always check my spelling by saying the words out loud (....in my head....alright, you got me, I'm the crazy girl saying words out loud to herself). Some words are funner to check than others. Like saying 'piece' in an english accent to remember to check that the 'i' and 'e' are in the right place, because in Canadian (hah) it's said 'pee-ce', which is really confusing. Or another favourite word to say: Zoo-chi-nee, also known as zucchini. 

-SMOOTH TRANSITION-

As I had a bunch of market zucchini in my fridge, below is a recipe for:

Zucchini Muffins with Chia Seeds

2 cups flour
1 cup sugar
1/4 tsp salt
2 tsp baking soda
1 tsp cinnamon

2 eggs
1/3 cup oil
1/3 cup margarine 

2 medium zucchini, grated

Chia seeds

  1. Pre-heat oven to 375'. Oil a muffin pan. Set aside. 
  2. Combine all the dry ingredients in one bowl. Stir to combine.
  3. Combine eggs, oil and margarine in another bowl. Stir to combine. 
  4. Add 'liquid' ingredients to the dry ingredients. Mix thoroughly. 
  5. Add shredded zucchini to batter. Mix together. 
  6. Using a 1/4 cup measure, scoop batter into prepare muffin pan. 
  7. Sprinkle chia seeds over top of muffins. 
  8. Bake muffins for ~25 minutes or until golden brown and a toothpick inserted into centre of a muffin comes out clean.
  9. Serve warm with margarine and clover honey. 

Haha. Anyways. Word-ing. Check. 

Enjoy!

-Andrea

The Half-Assed Hobbyist

ย 

Get Jammin'

My glee cannot be contained. It's my second favourite time of year! (My favourite time being reserved for when gorging on pumpkin pie after all meals is 'socially acceptable'.) Canning Season has begun! Yay!!!!

Now, as I am land locked and car-less, driving out to find u-picks (which are apparently not that big a thing in the GTA) has been an issue. However! My lovely lady friend Lesley came to visit me after she went backpacking around the Maritimes, and brought a special treat: wild strawberries from St Hubert. Obviously we had to work to do. These berries weren't going to eat themselves! So we made a tart and, with the leftovers, some wild strawberry jam. 

This isn't my first time round the jamming bend. In 2013, the BF and I picked a ridiculous amount of fruit and I made a ridiculous amount of jam. Nom. I used the same process this time round as I did before:

  1. Sterilize All The Things. Thoroughly wash all jars and screwbands and lids and utensils (jar tongs; wooden spoon; ladle; jar funnel; plastic knife or spoon) in hot soapy water. Rinse clean of all soap residue. Fill the waterbath canner with jars and water (and ~2 TBSP vinegar) and bring the canner to boil. Place all your jars evenly spaced in the canner and boil the jars for at least 10 minutes. (This will sterilize the jars.) Dry all screwbands and utensils and lay them out so they're easily accessible. Also, set a sauce pan filled with water over medium-low heat on the stove (don't boil the water though!). Put in the snap lids. This will soften the wax ring on the lids helping the jars seal completely.
  2. Prep All the Ingredients. Read the recipe through and assemble all the ingredients you'll need. Make sure you find a reputable recipe to follow. I use Bernardin as my mainstay. Mash and then measure the fruit, measure out the sugar, get the pectin pack ready (I used a sugar-reduced pectin for the strawberries. No particular reason other than I wanted to try it). Once everything is prepped you can Start. ALSO. Make sure your canner is boiling hot! You won't have time to bring it back to a boil after you've started your jam. I also usually have a kettle of boiling water going as well in case I need to top up the canner during the process. 
  3. Start Jamming. Now for the fast hot mess that is jam making. Add fruit, juice, pectin and margarine to a large pot, making sure that there's lots of room in the pot as the jam will expand to almost double when it's boiling. Stir well so all the pectin powder is dissolved. Now add heat! Bring the jam to a rolling boil over high heat. You'll know a 'rolling boil' when you see it. It's bubbling sugar paste that doesn't stir down. Think molten sugar lava. Add your sugar and stir well and fast to combine. Continue stirring until the mixture comes back to a rolling boil. Boil and stir for as long as the recipe says (for me it was 3 minutes). After the time is up, take the pot off the heat and prepare to fill your jars! (Sometimes a 'skin' or 'foam' may form on the top of your jam. Use a slotted spoon to scoop it off. It can be discarded in the sink for now.)
  4. Start Canning. Now that your jam has been sufficiently lava-ed, using the jar tongs, remove a sterilized jar from the boiling canner and empty the water in it back into the canner. Place the jar on your clean counter next to the jam pot. Place the jar funnel on the jar and ladle the jam smoothly up to the recommended head space marker (my recipe called for a 1/4 inch headspace). Remove the funnel, wipe the rim with a damp paper towel or clean damp cloth. Place a warmed lid on top. Place a screwband on the jar, then grasp the jar with the jar tongs. Tighten the screwband to ONLY fingertip tight. This literally means using your finger tips only, tighten the screwband until there is enough resistance that it stops. Then, keeping the jar level, lift it up and place it back into the canner. Repeat!
  5. Finish Canning. Now that all your jam has been put in jars in your canner, top up the boil water with more boiling water from the kettle, if need be (I usually like about 2 inches of water above my cans, if I can get it). Depending on your altitude, you'll need to adjust the time you process the jars. But it's a standard 10 minutes across the board, no matter what. For Alberta, I had to add an extra 5 minutes, but good ol' Toronto is set at the standard 10. With the canner lid on, process the jam in the boiling waterbath for the required time. After the time is done, remove the jars with the tongs, lifting them straight out of the canner (NO tipping to get water off the top!). Set them down to cool in an out of the way space. From this point on, till they're completely cooled, No Touching! Resist the urge to poke them! As they cool, you'll hear the popping sounds of the snap lids sealing. Even after this has happened, No Touchy! It's a waiting game now. If you did it right, you'll have delicious shelf-stable jam to look forwards. 
  6. Enjoy! Let the jars cool completely. This will take up to 8 hours. I usually leave mine sit for 12 to 24 hours. After they've cooled, check that all the jars have sealed. The snap lids should be divoted inwards and you should be unable to pry them off with your fingers.** Ta Da!!! The jam is now shelf stable! Label the jam with the date and the contents and bask in the glory that is homemade jam. 

Also eat the jam. By the spoonful. Obviously. 

But yah! I look forward to more canning to come! I want to try pickles this year. And maybe peaches...? Definitely marmalade. All the Things! (As Always.)

-Andrea

The Half-Assed Hobbyist  


** If the lid did not seal do not fret! The jam is still good to eat! It just needs to live in the fridge and be eaten first. I don't recommend attempting to re-can the jars. Instead, bake something with jam! Oooo. That's a good idea actually. Hmmmm. Haha.

Tart the Second

Previously, I never understood the real desire to make a tart when you could easily make it be a pie instead. Pie > Tart; Or so I thought. 

The first tart I ever made was a raspberry tart with a crumble topping for my bestie Jess' 25th birthday. It was splendiferous, made from fresh raspberries that I'd picked late that summer. So when my buddy Lesley came and stayed with me, bringing a bag of fresh wild strawberries she'd picked, the call for tart echoed softly in my brain. (-taaaart taaaaart taaaaart-)

Wild Strawberry Chocolate Tart

Chocolate Press-in Pastry:

1 1/4 cups flour
1/4 cups cocoa powder
2 TBSP sugar
1/4 tsp salt
1/4 cup butter (cold)
1/4 cup margarine (cold)
1 egg yolk
1 tsp vinegar

  1. Oil and flour a ~9 inch tart pan. Set aside.
  2. Combine flour through salt in a bowl. Stir together.
  3. Add cold butter and margarine. Using a pastry blender or fork, cut butter and margarine into dry ingredients until smaller that pea sized lumps remain. 
  4. In a cup, add egg yolk and vinegar. Using a fork, whisk egg and vinegar together. Pour liquid over tart mixture and stir to combine. 
  5. Form pastry into a disc. Wrap in plastic wrap and refrigerate for 30 minutes. 
  6. On a floured surface, roll out pastry to ~1 cm thick. The pastry is Very Soft. It will tear when you go to move it to the tart pan. That's ok. Just pat the pieces together. (Also, start pre-heating the oven to 375'.)
  7. Pat the pastry evenly into the tart shell. (If you kept the separated egg white around from the egg that was used, brush it onto the surface of the pastry.)

Strawberry Filling:

2 cups wild strawberries, headed and sliced
1/2 cup sugar
1 tsp cinnamon
1 tsp vanilla
1 TBSP flour

  1. Combine all filling ingredients together in a bowl. Stir together.
  2. Pour filling into prepared tart shell.
  3. Bake at 375' for about 40 minutes.

While I think I will always have a preference for pie, tarts will now have their place seated at the what-to-do-with-fresh-berries table in the Conference Hall A of my brain. 

-Andrea

The Half-Assed Hobbyist

ย 

ย